Honey Lavender London Fog Latte Refreshing Delight
Craving a drink that’s both refreshing and comforting? Meet the Honey Lavender London Fog Latte! This delightful blend of floral notes and sweet honey will awaken your senses. With a few simple ingredients and easy steps, you can craft this latte at home. I’ll guide you through brewing the perfect cup, frothing milk, and adding unique twists to make it your own. Let’s get started on this tasty journey!
Ingredients
Essential Ingredients for Honey Lavender London Fog Latte
– 1 cup water
– 2 tablespoons dried lavender flowers
– 1 tablespoon honey
– 1 cup milk (dairy or plant-based)
– 1 bag of Earl Grey tea
– 1 teaspoon vanilla extract
– A pinch of sea salt
To make a great Honey Lavender London Fog Latte, you need simple ingredients. Each one adds a unique flavor. The dried lavender gives a lovely floral note. Honey adds sweetness, while Earl Grey tea brings a rich taste. Milk creates a creamy texture, and vanilla adds warmth. A pinch of sea salt balances all the flavors.
Optional Garnishes
– Additional honey drizzle
– Sprigs of fresh lavender
– Edible flowers
Garnishes can make your latte look even more special. Drizzling extra honey on top adds a sweet touch. Fresh lavender sprigs not only look pretty but also smell great. Edible flowers can add color and fun to your drink. Use these to impress your friends and family.Enjoy creating your perfect latte!
Step-by-Step Instructions
How to Brew the Lavender Tea
To start, pour 1 cup of water into a small pot. Bring the water to a boil over medium heat. Once it is boiling, remove the pot from heat. Add 2 tablespoons of dried lavender flowers to the hot water. Cover the pot with a lid and let it steep for 5 to 7 minutes. This time helps the lavender flavor to mix well. After steeping, strain the lavender water through a fine mesh sieve into a cup. Discard the leftover lavender flowers.
Preparing the Latte Mixture
Now, return the lavender-infused water to the pot. Add 1 bag of Earl Grey tea to the lavender water. Steep the tea for 3 to 5 minutes. The longer you steep, the stronger the tea flavor will be. While the tea steeps, grab 1 tablespoon of honey and set it aside. You can adjust the honey to your taste. Then, add 1 teaspoon of vanilla extract and a pinch of sea salt to the tea mixture. Stir well until everything is mixed.
Frothing the Milk
Next, pour 1 cup of your choice of milk into a separate pan. Heat the milk over medium heat until it is warm but not boiling. If you want a frothy texture, use a whisk or a milk frother. Whisk it gently until it gets nice bubbles. For the best froth, aim for milk that is fresh and cold to start with.
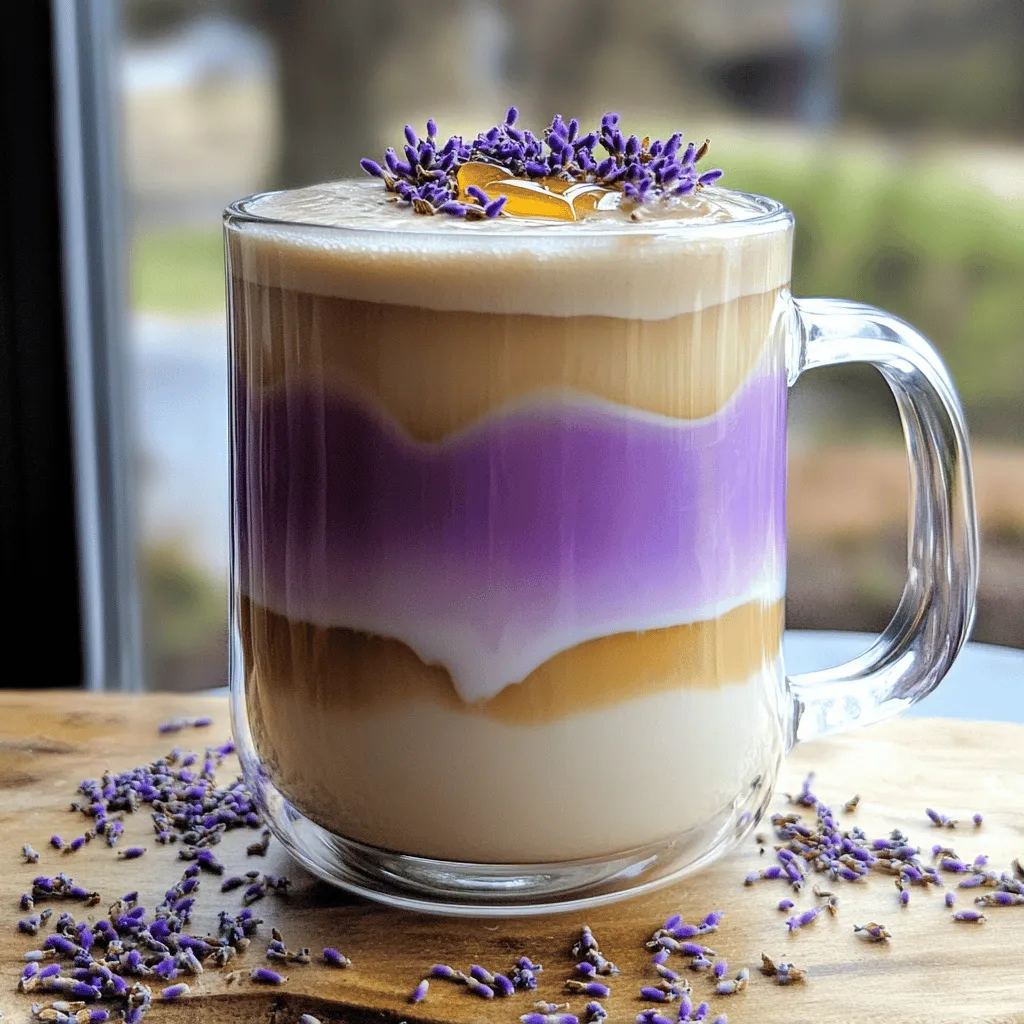
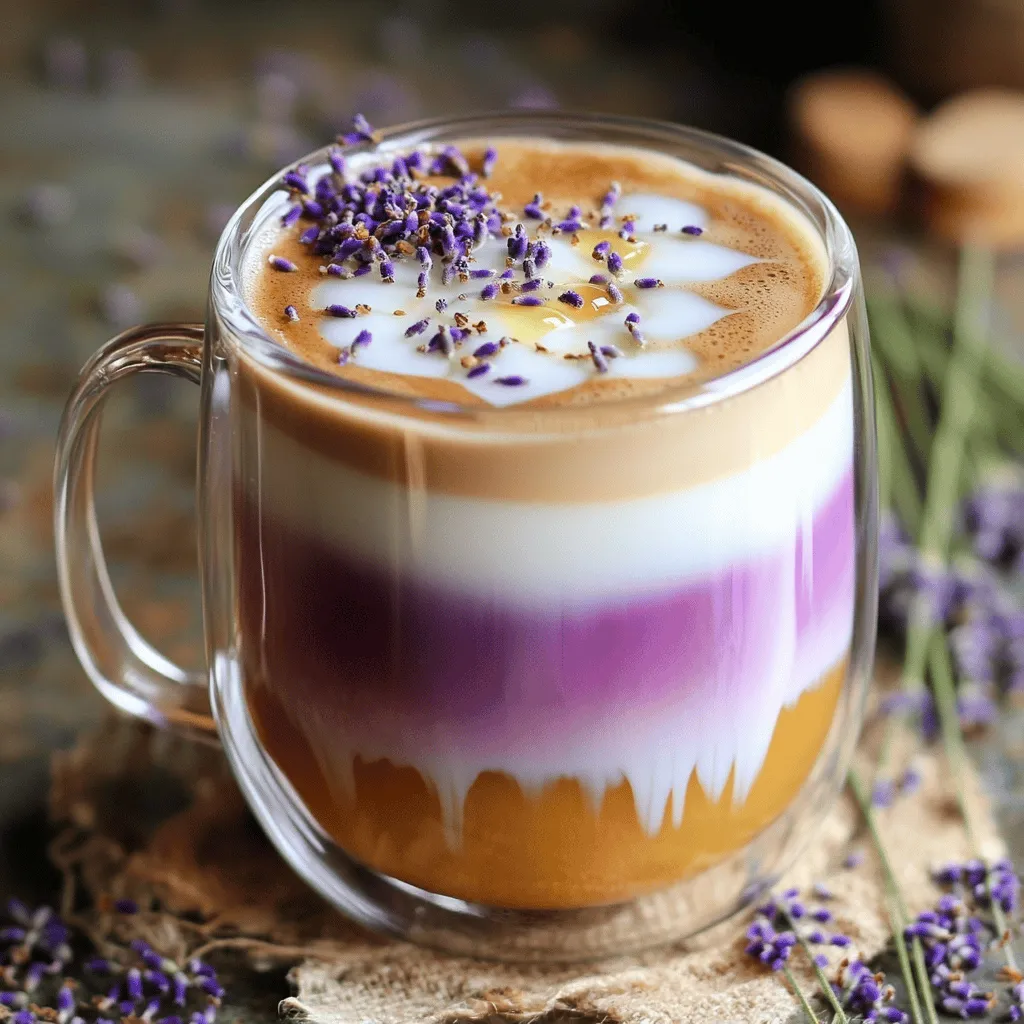
Now you’re ready to combine everything. Pour the lavender tea mixture into your favorite mug until it is about halfway full. Slowly pour the warm milk on top for a lovely layered look. You can drizzle a little more honey on top for added sweetness and sprinkle dried lavender for a beautiful touch. Enjoy your Honey Lavender London Fog Latte!
Tips & Tricks
Adjusting the Flavor
To make your Honey Lavender London Fog Latte just right, you can tweak the sweetness. If you want less sweetness, use less honey. Start with 1 teaspoon and add more if you need it. Honey adds a nice touch, but you control how much goes in.
The milk type also plays a big role. You can use any milk you like. Almond milk gives a nutty taste. Oat milk is creamy and smooth. Dairy milk is rich and classic. Pick what you enjoy most!
Presentation Tips
For a stunning latte, serve it in a clear glass mug. This shows off the lovely layers of lavender tea and milk. You can also add a sprig of fresh lavender on top. It makes your drink look fancy and invites everyone to sip.
Garnishes can enhance your drink. Drizzle a bit of honey on top for shine. You can also sprinkle extra dried lavender flowers for a pretty touch. Make it look as good as it tastes!
Common Mistakes to Avoid
One mistake to watch out for is oversteeping the tea. If you steep the Earl Grey bag too long, it can taste bitter. Stick to 3 to 5 minutes for the best flavor.
Another issue is scalding the milk. Heat it gently until warm, but don’t let it boil. Scalded milk can ruin the creamy texture. Keep an eye on it while it heats!
Variations
Finding new ways to enjoy your Honey Lavender London Fog Latte is part of the fun. Here are some ideas to make your drink even better.
Alternative Sweeteners for Healthier Options
If you’re looking for different ways to sweeten your latte, try these options:
– Maple syrup: This adds a warm, rich flavor.
– Agave: A mild option that dissolves easily.
– Sugar-free substitutes: Great for those watching sugar intake.
These alternatives can change the taste, so feel free to try each one.
Different Floral Infusions
You can switch up the flavors by using different flowers. Consider these options:
– Chamomile: It adds a gentle, calming taste.
– Mint: This gives a refreshing twist to your drink.
Experiment with these flowers to find your favorite mix. They can brighten up the drink in unique ways.
Adding More Flavor
Want to spice things up? Consider adding some extra flavors:
– Cinnamon: A pinch brings warmth and depth.
– Flavored syrups: Try vanilla or caramel for a sweet touch.
These additions can make your latte feel special. Mixing flavors can lead to exciting new tastes that you will love.Enjoy making your Honey Lavender London Fog Latte!
Storage Info
How to Store Leftover Lavender Tea
To store leftover lavender tea, place it in a clean jar. Make sure to cool it first. Seal the jar tightly to keep out air and light. Refrigerate the jar right away. This helps keep the flavors fresh. You can enjoy the tea within three days. After that, it may lose its taste.
Tips for Storing Dry Ingredients
To store dried lavender, keep it in an airtight container. This helps prevent moisture and keeps it fragrant. Place the container in a cool, dark place. Avoid direct sunlight and heat. For tea bags, store them in a dry spot, too. You can use a zip-top bag or a sealed box. This keeps them fresh and flavorful for longer.
FAQs
What does a Honey Lavender London Fog Latte taste like?
A Honey Lavender London Fog Latte offers a sweet and floral experience. The lavender brings a light, calming flavor. The honey adds warmth and sweetness. Earl Grey tea gives it a bold, citrusy note. When you sip it, you’ll notice the creamy milk blends all the flavors well. It’s both soothing and refreshing.
Can I make this latte vegan?
Yes, you can easily make this latte vegan. To do this, swap regular milk for a plant-based option. Almond, oat, or soy milk works great. For honey, you can use maple syrup or agave. Both options give you the sweetness you want without using animal products.
Where can I buy a Honey Lavender London Fog Latte?
You can find a Honey Lavender London Fog Latte in many coffee shops. Look for cafes that focus on specialty drinks. Some chains or local shops offer this drink on their menu.It’s quick and easy!
This blog post showed you how to make a Honey Lavender London Fog Latte. We covered the key ingredients, step-by-step instructions, and tips to make it perfect. You learned about variations and how to store your ingredients well. This drink offers a lovely mix of sweet and floral flavors. I hope you explore these ideas and create your own version at home. Enjoy your latte-making journey!


![To make a rich and tasty pumpkin spice syrup, gather these key ingredients: - 1 cup water - 1 cup granulated sugar - 1/2 cup pure pumpkin puree These ingredients form the base of your syrup. The water helps dissolve the sugar, while the pumpkin puree adds that classic pumpkin flavor. Spices are what truly make this syrup special. You’ll need: - 1 teaspoon ground cinnamon - 1/2 teaspoon ground nutmeg - 1/4 teaspoon ground ginger - 1/4 teaspoon ground cloves These spices bring warmth and depth to your syrup. Each spice adds its own unique note, creating a perfect fall blend. To round out the flavor, don't forget this important ingredient: - 1 teaspoon vanilla extract Vanilla extract adds a sweet aroma and enhances the other flavors. This small addition makes a big difference in taste. This recipe combines all these ingredients to create a syrup that brightens up any dish or drink. For the complete preparation steps, check out the Full Recipe. To start, you need to dissolve the sugar in water. Pour 1 cup of water into a medium saucepan. Add 1 cup of granulated sugar. Set the heat to medium. Stir the mixture until the sugar fully dissolves. You want the liquid to be clear and smooth. Next, add the pumpkin puree. Use 1/2 cup of pure pumpkin puree. Gently whisk it into the sugar-water mix. Make sure there are no lumps. It should blend nicely into a creamy base. Now, it’s time to add the spices. Measure out 1 teaspoon of ground cinnamon, 1/2 teaspoon of ground nutmeg, 1/4 teaspoon of ground ginger, and 1/4 teaspoon of ground cloves. Whisk these spices into the syrup base. This step gives your syrup that cozy fall flavor. Make sure to whisk thoroughly. You want all the spices to mix evenly. This will ensure every drop of syrup bursts with flavor. Next, bring your syrup to a gentle simmer. Slightly increase the heat until you see small bubbles. Once it starts simmering, reduce the heat to low. Allow the syrup to cook for 10-15 minutes. Stir occasionally to prevent sticking. This simmering step will help the flavors meld together. After the time is up, remove the saucepan from the heat. Stir in 1 teaspoon of vanilla extract for a lovely aroma. Allow the syrup to cool for a few minutes. Then strain it through a fine-mesh sieve or cheesecloth. This will remove any pumpkin pulp and keep the texture smooth. Once it cools completely, store it in a clean glass jar. Your homemade pumpkin spice syrup is ready to enjoy! For the full recipe, refer to the earlier section. To get the best texture for your syrup, start by straining it. After simmering, pour the syrup through a fine-mesh sieve or cheesecloth. This step removes any pumpkin pulp, giving you a smooth finish. If you skip this, you might end up with a chunky syrup that doesn’t mix well in drinks. You can customize your syrup to match your taste. If you love more spice, add an extra pinch of cinnamon or nutmeg. For a sweeter syrup, consider using brown sugar or honey instead of granulated sugar. Remember, the balance of flavors can make or break your syrup. Adjust it until it feels just right for you. This syrup shines in so many ways. Drizzle it over pancakes or waffles for a tasty breakfast treat. You can also add it to your coffee or hot chocolate for a cozy drink. Feeling adventurous? Mix it into cocktails for a fall twist. Your friends will love the rich flavors! You can find the full recipe here for more details. {{image_4}} You can switch up the main ingredients in your syrup. If you want to skip the pumpkin puree, you can use butternut squash puree instead. It gives a similar flavor and texture. Just make sure it is smooth for the best results. Another option is to use maple syrup instead of granulated sugar. This change adds a rich, warm flavor that pairs well with the spices. You can mix it with water to make the syrup thinner. This way, you still enjoy the sweet taste without all the white sugar. Why stick to just pumpkin spice? You can create themed syrups for other seasons too. In winter, try adding peppermint or gingerbread flavors. For spring, consider using fresh fruits like strawberries or lemons. Each season brings a chance to change the flavors. You can also infuse other flavors into your syrup. Adding vanilla gives it a creamy taste. If you love chocolate, mix in some cocoa powder. This creates a unique twist that makes your drinks even more special. If you follow a vegan diet, it’s easy to adapt this recipe. Just use maple syrup or agave nectar instead of sugar. This choice keeps it sweet and plant-based. For low-sugar options, you can use stevia or monk fruit sweetener. These alternatives provide sweetness without the extra calories. Adjust the amount based on your taste. If you need a gluten-free syrup, you’re in luck! All the ingredients are naturally gluten-free. So, enjoy this syrup in your favorite recipes without worry. For a complete guide on making this syrup, check out the Full Recipe. Store your homemade pumpkin spice syrup in a glass jar. Glass helps keep the syrup fresh longer. Make sure to seal the jar tightly after each use. Refrigerate the syrup to maintain its flavor and quality. Cold storage slows down spoilage. Your syrup will stay fresh for about two weeks in the fridge. Check it for any off-smells or mold. If the syrup looks cloudy or has an unusual texture, toss it out. Always trust your senses when it comes to freshness. Once you finish the syrup, don’t throw away the jar! You can use it for other sauces or spices. Clean the jar with hot soapy water. To sterilize it, you can boil the jar in water for a few minutes. This way, you keep your kitchen eco-friendly and tidy. For the full recipe and tips on making your own delicious pumpkin spice syrup, check out the [Full Recipe]. Homemade pumpkin spice syrup lasts about two weeks in the fridge. You want to store it in a clean glass jar. Always check for any off smells or mold before using. If it looks or smells strange, it’s best to toss it out. Yes, you can use this syrup in both hot and cold drinks. It adds a cozy flavor to your morning coffee or lattes. You can also mix it into iced tea or smoothies for a fall twist. The syrup blends well in any drink you choose. The best way to use pumpkin spice syrup is in your favorite beverages. You can drizzle it over pancakes or waffles for a sweet touch. It also tastes great in yogurt or oatmeal. Try mixing it into cocktails for a festive flavor. For the full recipe, check out the entire guide! In this blog post, we explored how to make homemade pumpkin spice syrup. We covered key ingredients like pumpkin puree, sugar, and essential spices. I shared step-by-step instructions to help you create this tasty syrup. Remember, you can adjust flavors and even try different ingredients for fun twists. Store your syrup properly for long-lasting freshness. Enjoy adding this syrup to drinks or breakfast dishes. Making your own syrup is easy and delicious—give it a try!](https://fastmealmate.com/wp-content/uploads/2025/07/fc2a1fa2-a46c-4404-8cf7-6e2e63d61871-768x768.webp)
. {{image_4}} You can boost the protein in your cheesy zucchini casserole easily. Try adding cooked ground turkey, chicken, or beef. For a meatless option, chickpeas or lentils work great. Just mix your chosen protein into the ricotta mixture before layering. This addition makes the dish heartier and fills you up more. This casserole is a fantastic vegetarian dish. To make it gluten-free, just swap regular breadcrumbs for gluten-free ones. You can also use crushed nuts for a crunchy topping. Using a mix of veggies, like bell peppers or spinach, instead of just zucchini can add flavor and color. This makes the dish even more fun and healthy. Herbs and spices can take this casserole to the next level. You can add fresh herbs like thyme or parsley for a garden taste. A pinch of red pepper flakes gives a nice kick if you like heat. Don’t forget to adjust the garlic powder to your taste. These small changes create a unique flavor each time you make it. For the full recipe, you can refer to the detailed instructions provided above. After enjoying your cheesy zucchini casserole, let it cool. Then, cover it tightly with plastic wrap or foil. You can also transfer it to an airtight container. This keeps it fresh and tasty. Store it in the fridge for up to three days. Keeping it sealed helps prevent any unwanted odors from other foods. When you're ready to enjoy the leftovers, preheat your oven to 350°F (175°C). Remove the casserole from the fridge and let it sit for about 10 minutes. This helps it warm evenly. Cover it with foil to keep it moist as it heats. Bake for about 20 minutes or until it’s hot throughout. You can also microwave individual portions for about 1-2 minutes, but the oven gives a better texture. If you want to save your casserole for a later date, freezing is a great option. Before freezing, let the casserole cool completely. Cut it into portions for easier thawing. Wrap each piece tightly in plastic wrap, then place it in a freezer bag. Be sure to label the bags with the date. Your casserole can last up to three months in the freezer. When you’re ready to eat, thaw it overnight in the fridge and follow the reheating steps. This way, you can enjoy a tasty meal anytime! For the full recipe, check out the details above. Yes, you can use other veggies. Carrots, bell peppers, and spinach work well. Just chop them small. This adds color and nutrients. Mix and match to suit your taste. The casserole lasts about 3 to 5 days in the fridge. Make sure to cover it well. This keeps it fresh and tasty. If it smells off, throw it out. Cottage cheese is a great substitute for ricotta. You can also blend soft tofu for a dairy-free option. Just mix it smoothly to mimic ricotta’s texture. This keeps your dish creamy and delicious. For the full recipe, check the earlier section. This blog post covered everything you need for a delicious zucchini casserole. We explored the essential ingredients, tips for selecting fresh produce, and the best cheeses. I provided clear steps to prep and bake the dish. We also discussed ways to avoid a watery casserole and how to store leftovers properly. In closing, whether you're adding protein or trying a veggie twist, this recipe is versatile. Enjoy the process, get creative, and savor each bite. Your homemade zucchini casserole will impress everyone!](https://fastmealmate.com/wp-content/uploads/2025/07/5ddfaaa2-5596-48f1-a1cf-d08d639fc95a-768x768.webp)