Instant Pot Beef Stew Flavorful and Easy Meal
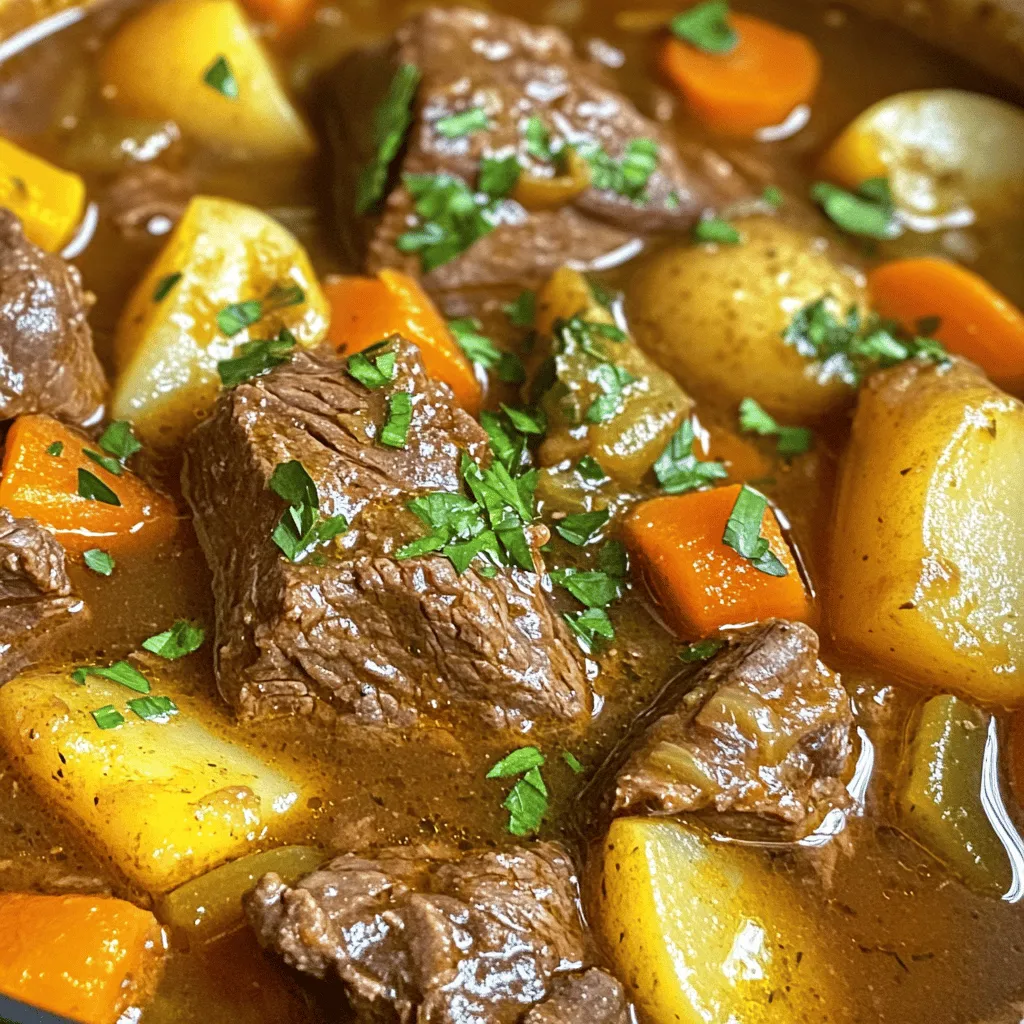
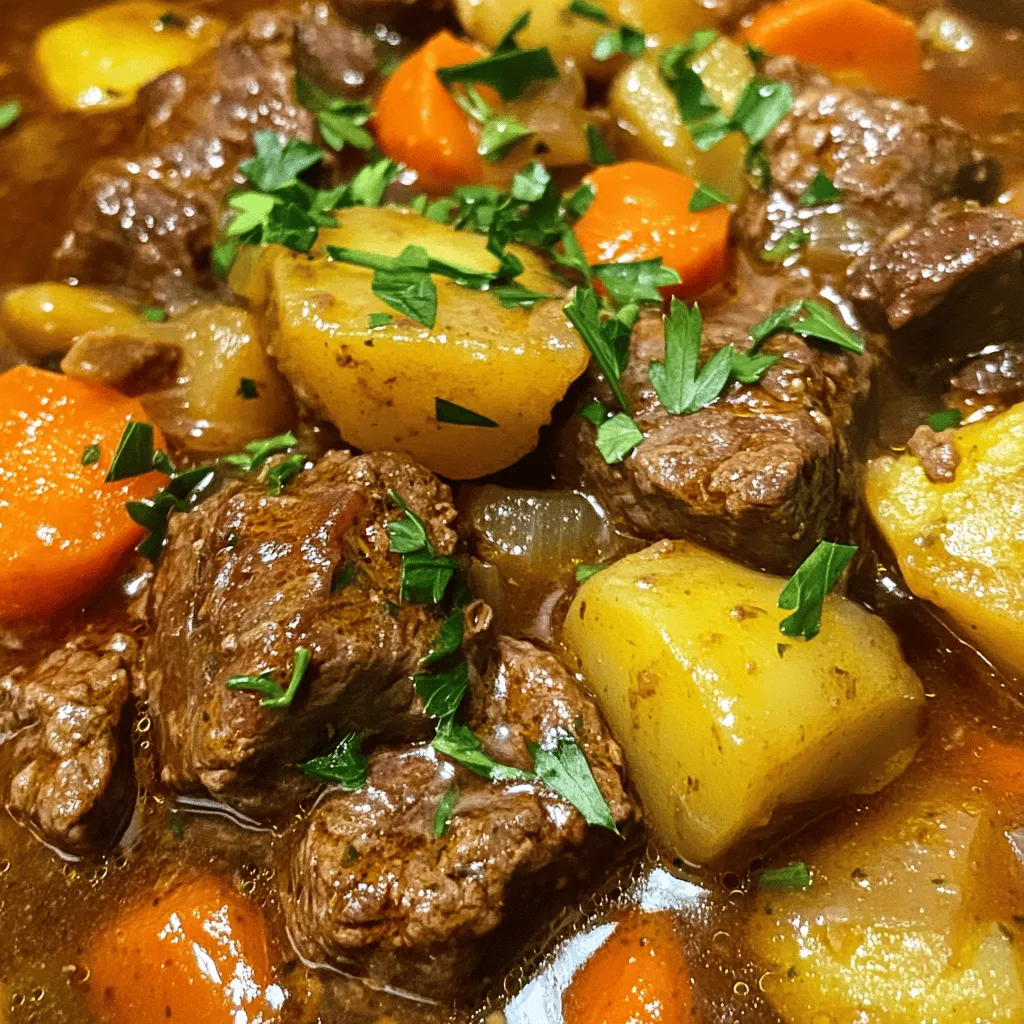
Are you ready to savor a hearty meal without the hassle? This Instant Pot Beef Stew is your answer! With tender beef, fresh veggies, and rich broth, it’s a warm hug in a bowl. I’ll guide you through each step, ensuring a flavorful dish you can whip up quickly. So grab your Instant Pot and let’s create a meal that will impress your family and friends!
Ingredients
Main Ingredients
To make a tasty Instant Pot Beef Stew, you need the following items:
– 2 lbs beef chuck, cut into 1-inch cubes
– 3 tablespoons olive oil
– 1 large onion, finely chopped
– 3 cloves garlic, minced
– 4 cups beef broth
– 3 carrots, sliced into rounds
– 3 medium potatoes, diced
– 2 stalks celery, chopped
– 1 cup peas (fresh or frozen)
– 2 tablespoons tomato paste
– 1 tablespoon Worcestershire sauce
– 2 teaspoons dried thyme
– 2 teaspoons dried rosemary
– Salt and pepper to taste
– 2 tablespoons cornstarch (optional, for thickening)
– Fresh parsley, chopped (for garnish)
Each ingredient plays a key role. The beef chuck gives a rich taste. Olive oil helps to brown the meat. Onions and garlic add depth and aroma. Broth forms the base for flavor. Carrots and potatoes provide texture and sweetness. Peas add a touch of color and freshness.
I recommend using fresh herbs when possible. They boost flavor and make the stew even better. For a twist, try adding your favorite spices. This recipe is flexible, so feel free to make it your own.
Step-by-Step Instructions
Preparing the Beef
Start by setting your Instant Pot to sauté mode. Add 3 tablespoons of olive oil and let it heat up until it shimmers. Next, add 2 lbs of beef chuck cut into 1-inch cubes. Brown the beef for about 5 minutes. This creates a rich flavor and a nice crust. After browning, remove the beef and set it on a plate. This step is key for a deep taste in your stew.
Cooking the Aromatics
In the same pot, toss in 1 large onion, finely chopped, and 3 cloves of minced garlic. Sauté these for about 3 to 4 minutes. You want the onions to turn translucent and smell sweet. This process builds flavor. Then, pour in 1 cup of beef broth to deglaze the pot. Use a wooden spoon to scrape the tasty bits stuck to the bottom. This adds even more flavor to your stew.
Combining and Cooking Ingredients
Now, return the browned beef to the pot. Add the rest of the beef broth, which is 3 cups. Mix in 3 sliced carrots, 3 diced potatoes, 2 chopped stalks of celery, 2 tablespoons of tomato paste, and 1 tablespoon of Worcestershire sauce. Don’t forget to add 2 teaspoons each of dried thyme and dried rosemary, plus salt and pepper to taste. Stir everything well.
Close the lid of your Instant Pot. Make sure the valve is set to sealing. Select manual cooking mode and set the timer for 35 minutes. This pressure cooking time allows all flavors to blend together. After cooking, let the pressure release naturally for 10 minutes. Then, do a quick release to get rid of any remaining pressure.
If you want a thicker stew, mix 2 tablespoons of cornstarch with water to create a slurry. Select the sauté function again, stir in this mixture, and cook for 2 to 3 minutes. This will give your stew the perfect consistency. Finally, stir in 1 cup of peas and let them heat for 2 minutes. This adds color and freshness. Serve your hearty stew with a sprinkle of fresh parsley on top for a lovely finish.
Tips & Tricks
Perfecting Flavor
To boost the flavor of your beef stew, start with aromatics. Aromatics enhance taste and make your dish smell great. Always sauté your onions and garlic until they are soft and fragrant. This step adds depth and richness to your stew.
Best practices for deglazing: After browning your beef, use beef broth to deglaze the pot. Pour in a cup of broth and scrape the bottom with a wooden spoon. This process lifts the tasty browned bits stuck to the pot. These bits pack a lot of flavor that will make your stew shine.
Achieving the Right Consistency
For the perfect stew thickness, consider using cornstarch. Mix two tablespoons of cornstarch with some water to make a slurry. Add this to your stew during the last cooking phase. Stir it in, and let it simmer until thickened.
Adjusting seasoning: Always taste your stew after cooking. If it needs more flavor, simply add salt, pepper, or herbs. A little adjustment can elevate your dish to the next level.
Serving Suggestions
How you serve your beef stew matters. Use rustic bowls for a cozy feel. Ladle the stew in and top it with fresh parsley for color.
Pairing recommendations: Serve your stew with crusty bread. The bread is great for dipping and makes the meal feel complete. You can also enjoy it with a simple green salad for some crunch.
Variations
Different Meat Options
You can easily swap beef for chicken or pork. Both meats cook well in the Instant Pot. Chicken gives a lighter taste, while pork adds a sweet flavor. For a vegan option, use plant-based proteins like mushrooms or lentils. These ingredients absorb flavors and create a hearty dish. You can also use tofu for a protein boost without meat.
Ingredient Swaps
Feel free to change up the vegetables in your stew. If you can’t find carrots, use parsnips or turnips. You can also add sweet potatoes for a unique twist. Changing spices can create exciting new flavors. Try adding smoked paprika for a smoky taste or cumin for warmth. Fresh herbs, like basil or cilantro, can make your stew fresh and vibrant.
Regional Versions
Explore regional variations like Irish or Italian beef stew. Irish beef stew often includes Guinness for a deep flavor. Italian versions might add tomatoes and bell peppers for brightness. You can also add regional ingredients, like olives or capers, for a unique touch. Each variation tells a story and brings new tastes to your table.
Storage Info
Proper Storage Techniques
To keep your beef stew fresh, store it in airtight containers. Let it cool completely before sealing. This step prevents moisture build-up, which can cause spoilage. For freezing, use freezer-safe bags or containers. Squeeze out excess air to reduce freezer burn. Label your containers with the date for easy tracking.
Reheating Tips
When reheating, do it gently. Use the stovetop or microwave. Stir often to heat evenly. If your stew seems thick after refrigeration, add a splash of broth or water. This helps restore the original consistency.
Shelf Life
In the fridge, your beef stew lasts about 3 to 4 days. In the freezer, it stays good for up to 3 months. Look for signs of spoilage like off smells or mold. If you see any, it’s best to discard the stew. Enjoy your savory beef stew again with these storage tips!
FAQs
Common Questions
How long can I cook beef stew in an Instant Pot?
You can cook beef stew in an Instant Pot for about 35 minutes. This allows the beef to become tender and soak up the flavors. Make sure to let the pressure release naturally for about 10 minutes after cooking.
Can I use frozen beef for this recipe?
Yes, you can use frozen beef. Just add a few extra minutes to the cooking time. The Instant Pot will handle the extra time well, making your stew just as tasty.
What should I do if my stew is too salty?
If your stew tastes too salty, add a peeled potato. The potato will absorb some salt. Cook it in the stew until soft, then remove it before serving.
Ingredient Substitutions
Can I use water instead of broth?
You can use water, but broth adds more flavor. If you use water, consider adding extra herbs or spices to boost the taste.
What can I replace Worcestershire sauce with?
You can use soy sauce or balsamic vinegar as a substitute. Both add a nice depth of flavor, similar to Worcestershire sauce.
Cooking Times
How do pressure cooking times vary with different meats?
Different meats need different times. Beef usually needs about 35 minutes. Chicken takes around 10-15 minutes, while pork needs about 20-25 minutes to cook well in the Instant Pot.
What is the best way to thicken stew quickly?
The best way to thicken stew is to make a cornstarch slurry. Mix 2 tablespoons of cornstarch with a bit of water. Stir it into your stew and cook for 2-3 minutes until thickened.
This blog post covered how to make a tasty beef stew. We discussed essential ingredients, step-by-step cooking, and tips for flavor. You learned about variations like vegan options and ingredient swaps. Proper storage methods and reheating tips ensure your stew stays delicious.
In conclusion, making beef stew can be fun and rewarding. Don’t hesitate to experiment with flavors and ingredients. Happy cooking!


![- Pasta Types: I recommend using rotini or fusilli pasta. These shapes hold the dressing well. If you prefer, you can swap them for penne or farfalle. Just make sure the pasta cooks until it’s al dente. - Fresh Vegetables: For a great taste and texture, use cherry tomatoes, cucumbers, and bell peppers. These add color and crunch. Red onion gives a nice bite. Fresh corn, either cooked or frozen, adds sweetness. Lastly, diced avocado brings creaminess to the salad. - Dressing Components: The dressing is what makes this salad shine. Use the juice of two fresh limes for tangy flavor. Extra virgin olive oil adds richness. Garlic powder gives depth. Don’t forget salt and freshly ground pepper to taste. These ingredients create that fresh cilantro lime flavor that everyone loves. You can find the complete preparation method in the [Full Recipe]. To start, bring a large pot of salted water to a boil. This step is key for flavor. Add 8 oz of rotini or fusilli pasta. Cook it until it's al dente, which means it should have a slight bite. This usually takes about 8 to 10 minutes. Once cooked, drain the pasta. Rinsing it under cold water stops the cooking. It also helps cool it down quickly. You’ll need a large pot for boiling and a colander for draining. While the pasta cools, get your veggies ready. Chop the cherry tomatoes, cucumber, bell pepper, and red onion. Aim for even pieces to ensure a nice bite. Use a sharp knife for clean cuts. For the avocado, slice it carefully. Cut it in half, remove the pit, and scoop out the flesh with a spoon. Then dice it into small pieces. Handle it gently to avoid mashing. Next, it’s time for the dressing. In a small bowl, combine the juice of 2 limes, 3 tablespoons of olive oil, and 1 teaspoon of garlic powder. Whisk these ingredients together until they blend well. Always taste it! Adjust the seasoning with salt and pepper to suit your preference. Now, let’s mix everything together. In a large bowl, combine the cooled pasta, chopped veggies, and diced avocado. Drizzle the dressing over the top. Toss gently to coat everything. Be careful not to mash the avocado. Finally, fold in ½ cup of chopped cilantro. This adds a fresh flavor. Mix gently, ensuring the avocado stays intact. For the best taste, cover the salad and chill it in the fridge for at least 30 minutes. This allows all the flavors to blend beautifully. For the full recipe, check the instructions at the beginning. Enjoy your bright and zesty Cilantro Lime Pasta Salad! To boost the citrus flavor in your cilantro lime pasta salad, try adding lime zest. This adds a bright, fresh taste. You can also mix in a little orange juice for a sweet twist. For herbs and spices, consider adding fresh parsley or mint. Both pair well with cilantro. A pinch of cumin or chili powder can also give your salad a nice kick. You want your salad to look as good as it tastes. Serve it in a clear bowl to show off the colorful veggies. You can layer the ingredients for a fun effect. For garnishes, fresh cilantro leaves work wonders. Add lime wedges on the side for a pop of color and extra zing. Slices of radish or a sprinkle of feta cheese can also elevate the dish. Chill your salad for at least 30 minutes before serving. This lets the flavors mix well. If you have time, chilling it longer is even better. To enjoy leftovers, keep them in a sealed container. Add a splash of lime juice before eating. This helps keep everything fresh and tasty. {{image_4}} You can change this salad to match your taste. Here are some great protein options: - Chicken - Shrimp - Beans Adding these gives you more protein and flavor. If you want a vegetarian dish, beans are a good choice. They add nutrients and make the salad filling. Need to change the recipe for special diets? No problem! You can use gluten-free pasta instead of regular pasta. There are many kinds available, like rice or chickpea pasta. For a vegan version, simply swap out the dressing. Use a mix of lime juice and avocado oil, or find a vegan dressing at the store. The best ingredients change with the seasons. In summer, use fresh corn and ripe tomatoes. They add sweetness and crunch. In winter, try roasted vegetables like squash or broccoli. They give warmth and heartiness to the dish. Always look for local produce. It tastes better and supports your community! Check your farmer's market for fresh options. For the full recipe, check out the entire section above! To keep your cilantro lime pasta salad fresh, store it in the fridge. Place it in an airtight container; this helps lock in flavors. Use a glass or plastic container with a tight lid. Avoid large bowls, as they can let air in and make the salad dry out. You can freeze pasta salad, but it may change the texture. If you choose to freeze it, use a freezer-safe container. When you want to eat it, move it to the fridge overnight. Let it thaw slowly for best results. Serve it cold once it’s thawed. Leftovers will last up to three days in the fridge. Check for signs of spoilage before eating. If you see any mold or if it smells off, throw it away. Always trust your senses. Keeping track of freshness helps you enjoy your salad at its best! For the full recipe, check the section above. To keep avocado fresh, use lime juice. The acid slows the browning. You can also cover the avocado tightly with plastic wrap. This limits air exposure. If you mix the avocado in last, it stays bright green longer. Yes, you can prepare this pasta salad a few hours in advance. Just store it in the fridge. For the best taste, mix in the avocado right before serving. This helps keep it fresh. If you dislike cilantro, try parsley or basil instead. Both herbs add a fresh taste. You can also use mint for a unique twist. Mix in different herbs to find your favorite flavor. To make this pasta salad gluten-free, use gluten-free pasta. Many brands offer great options like rice or quinoa pasta. Check the box for cooking times. The rest of the ingredients are naturally gluten-free. Serve the pasta salad in a large, colorful bowl. Add lime wedges and extra cilantro on top for decoration. This makes it more inviting. For a buffet, set it out with serving spoons. This allows guests to help themselves easily. This blog post covered key ingredients, cooking steps, and helpful tips for making a delicious pasta salad. Remember to choose the right pasta and fresh vegetables for a tasty mix. The dressing adds incredible flavor, so don't skip it. Storing leftovers properly keeps your salad fresh for later. Try different variations to suit your taste. My final thought? Pasta salad is versatile and fun. Enjoy making it your own, and share it with others!](https://fastmealmate.com/wp-content/uploads/2025/07/1fb0967e-6542-4160-ae3e-9e2a11b1d0c7-768x768.webp)