
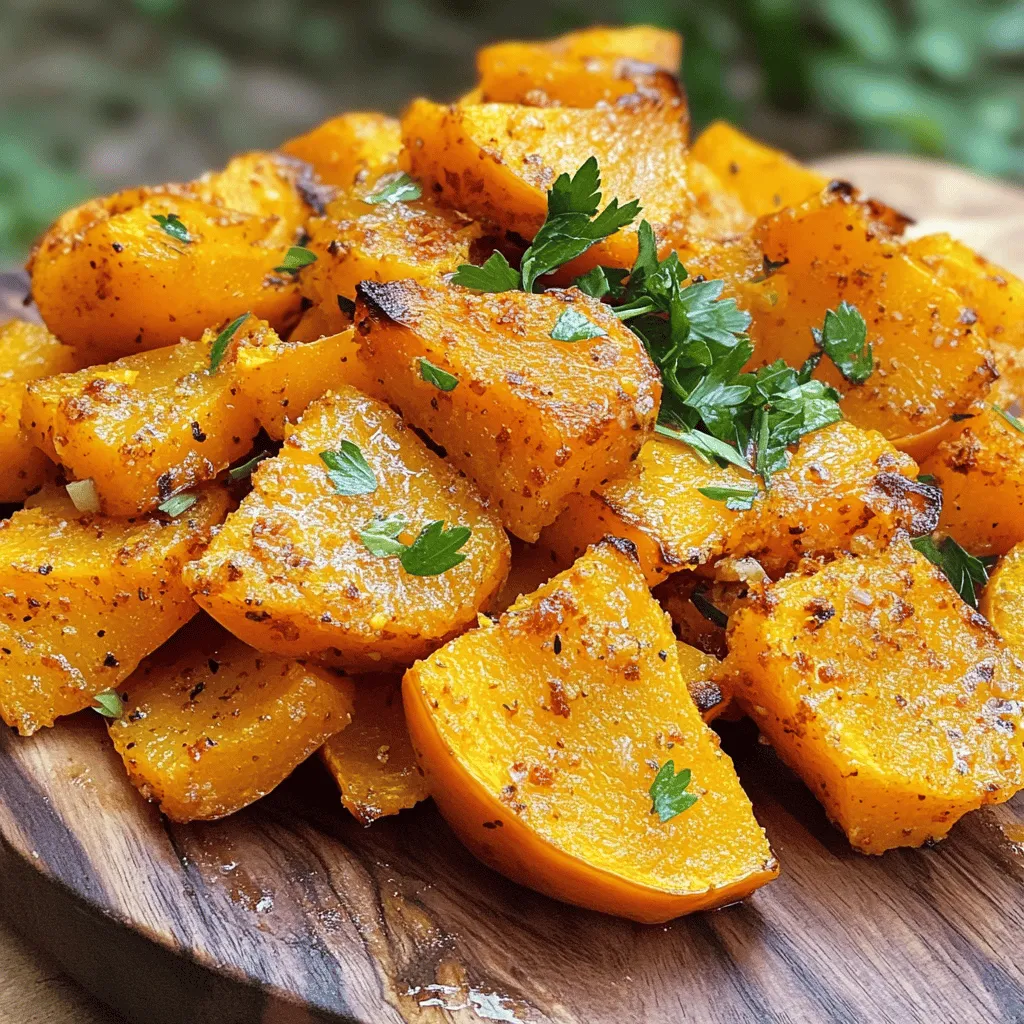
Crispy Roasted Squash Tasty and Simple Side Dish

If you crave a delicious, easy side dish, crispy roasted squash is the answer! I’ll show you how to create sweet, crunchy goodness using just a few simple ingredients. Butternut squash shines when roasted, bringing out its natural flavors. Plus, you’ll love how customizable it is! Ready to impress your taste buds? Let’s dive into the world of crispy roasted squash that anyone can master!
Ingredients
Main Ingredients Needed
– Butternut squash
– Olive oil
– Spices and seasonings
The main star of this dish is the butternut squash. It offers a sweet flavor and smooth texture. I use about one medium squash, peeled and diced into one-inch cubes. This size helps the squash roast evenly and become perfectly crispy. You will also need two tablespoons of olive oil to help the squash brown nicely. I love using extra virgin olive oil for its rich taste.
Next, we need spices to boost the flavor. I use:
– One teaspoon of smoked paprika for a warm, smoky taste.
– One teaspoon of garlic powder for that savory note.
– Half a teaspoon of ground cumin for an earthy touch.
– Sea salt and freshly cracked pepper to taste.
Feel free to add a pinch of cayenne pepper if you like some heat!
Optional Ingredients for Added Flavor
– Additional spices
– Garnishes
You can get creative with your spices! Consider adding dried herbs like thyme or rosemary for a fragrant lift. You can also swap in chili powder for a different kick. For a pop of color and freshness, I often sprinkle some finely chopped parsley on top before serving. This adds a lovely contrast against the golden squash.
Recommended Squash Varieties
– Best types for roasting
– Texture and flavor profiles
While I love butternut squash, you can try other types too! Delicata squash has a sweet flavor and is easy to slice. Acorn squash offers a mild taste and a fun shape. Each type has its unique texture and flavor, so feel free to experiment. Just remember, the key is to choose squash that will roast well. It should be firm and free of blemishes for the best results.
Step-by-Step Instructions
Preparation Steps
To start, you need to prep the squash. Take 1 medium butternut squash. Peel it and cut it into 1-inch cubes. This size helps it cook evenly.
Next, mix your seasoning. In a large bowl, add the squash cubes. Pour in 2 tablespoons of extra virgin olive oil. Then, add 1 teaspoon smoked paprika, 1 teaspoon garlic powder, and 1/2 teaspoon ground cumin. Season with sea salt and freshly cracked pepper to taste. If you like heat, add 1/4 teaspoon cayenne pepper. Toss everything until the squash is well coated.
Roasting Process
Now, preheat your oven to 425°F (220°C). A hot oven helps the squash get crispy. Line a baking sheet with parchment paper. This makes cleanup easy.
Spread the seasoned squash on the sheet in a single layer. Make sure the pieces are not touching. This spacing is key for crispiness.
Checking for Doneness
Roast the squash for about 25-30 minutes. Halfway through, flip the pieces with a spatula. This ensures even browning.
Look for visual cues. The squash should be golden brown and crispy on the edges. When it meets these signs, it is ready!
Tips & Tricks
How to Achieve Maximum Crispiness
– Spacing and layering: Make sure to spread squash evenly on the baking sheet. Leave space between each piece. This allows hot air to circulate and gives you a nice crunch. If the squash pieces touch, they will steam instead of roast.
– Importance of moisture: Dry squash roasts better. Pat the pieces dry with a paper towel before seasoning. This step helps them crisp up nicely in the oven.
Seasoning Tips
– Flavor combinations: The spices you choose can change the taste. I love using smoked paprika and garlic powder together. They bring a warm, smoky flavor to the squash.
– Using fresh herbs versus dried: Fresh herbs add brightness. Try using fresh parsley or thyme right before serving. Dried herbs work well too, but add them during cooking for best results.
Serving Suggestions
– Best pairings with other dishes: Crispy roasted squash goes great with roasted chicken or fish. It adds a sweet touch to savory mains.
– Creative serving ideas: Serve the squash on a bed of greens. Drizzle with balsamic glaze for a sweet and tangy contrast. This way, it looks beautiful and tastes even better.
Variations
Alternative Squash Options
You can try many types of squash for this dish. Acorn squash adds a sweet taste. Delicata squash has a creamy texture, making it perfect. You can also use spaghetti squash for a fun twist. When using different squash, adjust the cooking time. Some squash may need more time to roast. Others may cook faster.
Flavor Alterations
You can change the flavor to fit your mood. For sweet squash, add maple syrup or brown sugar. This makes a wonderful caramelized finish. If you like heat, add chili powder or fresh jalapeños. Spices like cinnamon or nutmeg can also give a warm flavor. Experiment with your favorite spices to find your perfect mix.
Dietary Adjustments
This recipe is easy to modify for different diets. It is naturally gluten-free, so you don’t need to worry. To make it vegan, simply use oil instead of butter. You can also add nuts or seeds for extra crunch and protein. These simple swaps help everyone enjoy crispy roasted squash.
Storage Info
Proper Storage Techniques
To keep your crispy roasted squash fresh, store it in the fridge. Use an airtight container. This helps lock in moisture and flavor.
– Refrigeration Recommendations: Store in the fridge for up to three days.
– Freezing Advice: If you want to freeze it, let it cool first. Place in a freezer-safe bag. It can last up to three months in the freezer.
Shelf Life Expectations
Crispy roasted squash is best when fresh. But with proper care, it can last a bit longer.
– How long will it last? In the fridge, it lasts about three days. If frozen, it stays good for three months.
– Signs of spoilage: Look for soft spots or a change in color. If it smells sour, it is best to toss it out.
Reheating Instructions
Reheating your squash correctly is key to keeping it crispy.
– Best methods for reheating: Use an oven or a toaster oven for best results. Set it to 350°F (175°C) and heat for about 10 minutes.
– Maintaining crispiness: Avoid using a microwave, as it can make the squash soggy. If you must use one, heat for a very short time.
FAQs
How can I make my roasted squash crispier?
To make your squash crispier, follow these tips:
– Use high heat: Roasting at 425°F (220°C) works best.
– Cut evenly: Dice the squash into 1-inch cubes for even cooking.
– Don’t overcrowd: Spread the squash in a single layer on the baking sheet.
– Flip halfway: Turn the squash pieces halfway through cooking for even crispness.
Crispiness comes from good air circulation. If pieces touch, they steam instead of roast.
Can I make this recipe in advance?
Yes, you can prep the squash ahead of time. Here’s how:
– Cut and season: Dice the squash and mix with oil and spices.
– Store: Place in an airtight container in the fridge for up to 24 hours.
– Roast when ready: Just pop it in the oven when you’re set to eat.
This saves time on busy days and keeps flavors fresh.
What can I serve with crispy roasted squash?
Crispy roasted squash pairs well with many dishes:
– Grilled meats: Chicken, pork, or steak complement the sweetness.
– Salads: Toss with greens for a fresh crunch.
– Grains: Serve over rice, quinoa, or couscous for a hearty meal.
– Dips: Pair with yogurt or tahini sauce for extra flavor.
These combinations create a balanced plate.
How do I know if the squash is fully cooked?
Look for these signs of doneness:
– Color: The squash should be golden brown.
– Texture: When pierced with a fork, it should feel tender.
– Crisp edges: The edges should be crisp and slightly caramelized.
For the best results, keep an eye on it as it roasts.
Roasting butternut squash is simple and rewarding. You learned the key ingredients and steps to prepare tasty, crispy squash. I shared tips for flavor, texture, and serving ideas. Exploring variations allows you to customize your dish. Remember to store leftovers properly for best results. Now, you can enjoy this healthy dish anytime. Embrace your new skills and get creative in your kitchen!

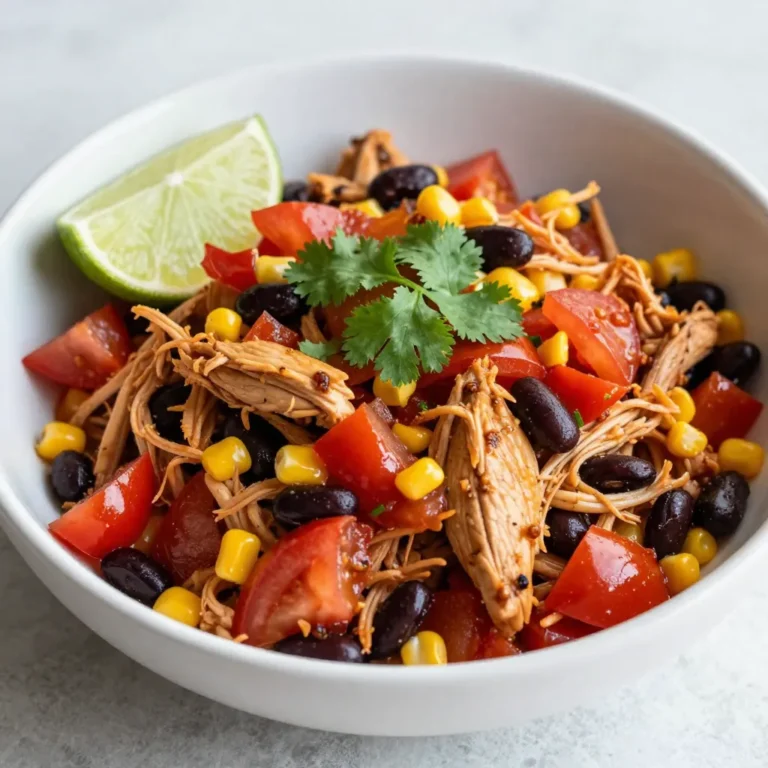
![For a delicious S'mores Brownie Skillet Dip, gather the following ingredients: - 1 cup all-purpose flour - 1 cup granulated sugar - 1/2 cup unsweetened cocoa powder - 1/2 teaspoon baking powder - 1/4 teaspoon salt - 1/2 cup unsalted butter, melted - 2 large eggs - 1 teaspoon vanilla extract - 1 cup semi-sweet or dark chocolate chips - 1 cup mini marshmallows - 1/2 cup graham cracker crumbs - Extra graham crackers for serving These ingredients blend together to create a rich, chocolatey dip. The all-purpose flour and cocoa give it a brownie base. The sugar adds sweetness, while the baking powder helps it rise slightly. The melted butter keeps it rich and moist. The eggs and vanilla extract add flavor and structure. Chocolate chips provide bursts of chocolatey goodness. Mini marshmallows, when baked, become soft and gooey, adding that classic S'mores taste. Finally, the graham cracker crumbs create a crunchy topping, perfect for dipping. Use this list to prepare your dip. Following these steps ensures you get the best flavor and texture. For full details, check out the Full Recipe. - Preheat oven to 350°F (175°C). This helps the dip cook evenly. - In a large bowl, mix the dry ingredients: flour, sugar, cocoa powder, baking powder, and salt. Stir well to combine. - In another bowl, combine the wet ingredients: melted butter, eggs, and vanilla extract. Mix gently until they blend together. - Pour the wet mix into the dry mix. Stir until just combined. Do not overmix; a few lumps are okay. - Now, fold in the chocolate chips. This adds rich flavor and texture to the dip. - Grease a 10-inch cast-iron skillet or oven-safe dish. Pour the brownie batter into the skillet. Spread it evenly. - Top the batter with mini marshmallows and graham cracker crumbs. This gives the dip that classic s'mores taste. - Place the skillet in the preheated oven. Bake for 20-25 minutes. The edges should be set, and the center should be soft. The marshmallows will puff up and turn golden. - Once baked, take the skillet out of the oven. Let it cool for a few minutes. This makes it safe to eat. Enjoy this warm dip with extra graham crackers for a fun treat! To avoid overmixing the batter, mix just until the wet and dry ingredients blend. You want some lumps for that fudgy texture. Too much mixing makes the brownies tough. For the perfect marshmallow topping, add them during the last few minutes of baking. This lets them brown nicely without burning. Keep an eye on them. You want golden, not charred! The best snacks for dipping are graham crackers, of course! You can also use fruit like strawberries or bananas. They add a nice, fresh taste to the rich dip. For a great presentation, drizzle melted chocolate on top before serving. Add some colorful fruit on the side. It makes the dish look fun and inviting. {{image_4}} You can make this dessert fit your needs with some easy swaps. If you want a gluten-free option, use gluten-free flour. It works well and keeps the taste great. You can also switch the chocolate. Dark chocolate gives a rich taste, while milk chocolate is sweeter. Choose what you like best! Add more fun to your dip with flavor extras. Chopped nuts add crunch and taste. Walnuts or pecans work best. If you love sweetness, drizzle some caramel over the top. It makes the dip even more special. You can also try different extracts. Almond extract gives a nice twist. Coconut extract can add a tropical touch. Just use a little bit to taste and enjoy! To keep your S'mores Brownie Skillet Dip fresh, store it in the fridge. First, let it cool completely. Then, cover the skillet tightly with plastic wrap or transfer it to an airtight container. When stored this way, it can last for about 3 days. If you have more than you can eat, freezing is an option. Scoop the dip into a freezer-safe container. Leave a little space at the top, as it may expand. It can last up to 2 months in the freezer. Just remember to label the container with the date for easy tracking. When it's time to enjoy your leftovers, reheating is simple. You can warm it up in the oven. Preheat the oven to 350°F (175°C). Place the skillet in the oven for about 10-15 minutes. This helps keep the dip gooey and warm. You can also reheat in the microwave if you're short on time. Use a microwave-safe bowl and heat in short bursts. Stir between each burst to ensure even warming. This way, the marshmallows remain soft and fluffy, just like when it was first made. Can I make this dish ahead of time? Yes, you can prepare the batter ahead. Just store it in the fridge. Bake it right before serving for best results. What can I use if I don’t have a cast-iron skillet? You can use any oven-safe dish. A glass or ceramic baking dish works well too. Just make sure to grease it well. How can I make it less sweet? To cut back on sweetness, use less sugar or dark chocolate. You can also add a pinch of salt to balance the flavors. What is the best way to serve this dip? Serve it warm with extra graham crackers. You can also add fresh fruit like strawberries or bananas for dipping. - Check out the [Full Recipe] for detailed instructions. This blog post covers a fun and tasty s'mores brownie skillet dip. You learned how to mix the right ingredients and bake this treat perfectly. I shared tips to make it even better and suggestions for serving. With storage info, you can save leftovers too. Enjoy making this sweet dip for your next gathering! It’s easy, fun, and sure to impress. Remember that you can personalize it with your favorite flavors. Happy baking!](https://fastmealmate.com/wp-content/uploads/2025/07/00705dfa-6977-4536-b8b9-b3715ee69892-768x768.webp)