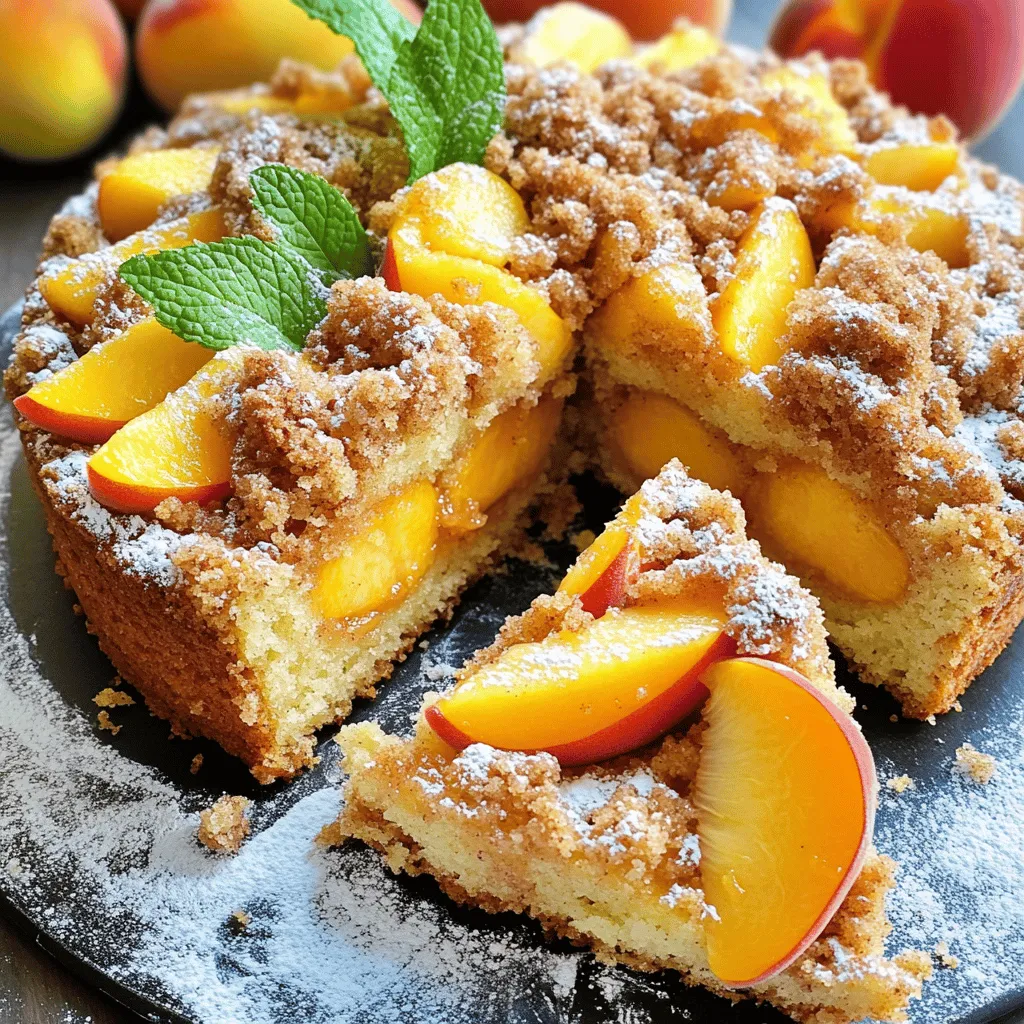
Southern Peach Crumb Cake Irresistible and Simple Recipe

Are you ready to bake a treat that screams summer? This Southern Peach Crumb Cake combines juicy peaches with a rich crumb topping for a simple yet irresistible dessert. Using fresh ingredients, this recipe is perfect for family gatherings or cozy evenings at home. Whether you’re a baking pro or a novice in the kitchen, my step-by-step guide will make this cake a go-to favorite. Let’s get started!
Ingredients
Main Ingredients for Southern Peach Crumb Cake
– 2 cups fresh peaches, peeled and diced
– 1/2 cup granulated sugar
– 1/2 teaspoon ground cinnamon
– 1/4 teaspoon ground nutmeg
– 1/4 teaspoon salt
– 1 1/2 cups all-purpose flour
– 1 teaspoon baking powder
– 1/2 teaspoon baking soda
– 1/2 cup unsalted butter, at room temperature
– 2 large eggs
– 1 teaspoon vanilla extract
– 1/2 cup buttermilk
The main star of this cake is the fresh peaches. Use ripe, sweet peaches for the best flavor. The granulated sugar enhances the sweetness of the peaches. Ground cinnamon and nutmeg add warmth and depth. Flour and baking powder give the cake its structure. Eggs and buttermilk keep it moist. Unsalted butter provides richness to the batter.
Crumb Topping Ingredients
– 1 cup light brown sugar
– 1/2 cup all-purpose flour
– 1/3 cup unsalted butter, melted
– 1 teaspoon ground cinnamon
– 1/2 cup chopped pecans (optional)
For the crumb topping, light brown sugar creates a rich, caramel flavor. The flour binds everything together. Melted unsalted butter adds moisture and helps form crumbs. Ground cinnamon ties in with the cake’s spices. Chopped pecans add crunch, but they are optional.
Kitchen Tools Needed
– 9-inch round cake pan
– Mixing bowls
– Spatula
– Whisk and measuring cups
You will need a 9-inch round cake pan to bake the cake evenly. Use mixing bowls for combining your ingredients. A spatula helps to fold in the peaches gently. Whisk and measuring cups are key for accurate measurements. Having these tools ready makes the process smooth and fun.
Step-by-Step Instructions
Preparing the Peaches
First, take your fresh peaches and peel them. Dice them into small chunks. In a bowl, toss the diced peaches with 1/2 cup of granulated sugar, 1/2 teaspoon of ground cinnamon, 1/4 teaspoon of ground nutmeg, and a pinch of salt. This mixture will create a sweet syrup. Set it aside for about 10 minutes. This helps the peaches release their juices, making them extra tasty in the cake.
Making the Cake Batter
In a large bowl, start by creaming together 1/2 cup of unsalted butter and 1/2 cup of brown sugar. Mix until it becomes light and fluffy. Add in 2 large eggs, one at a time. Mix well after each addition. Next, stir in 1 teaspoon of vanilla extract. In another bowl, combine 1 1/2 cups of all-purpose flour, 1 teaspoon of baking powder, and 1/2 teaspoon of baking soda. Gradually mix the dry ingredients into the butter mixture. Alternate this with 1/2 cup of buttermilk. Start and end with the flour mixture. Mix until just combined to keep the cake light.
Assembling the Cake
Now, gently fold the peach mixture into the batter. Be careful not to overmix. You want those lovely peach chunks to stay intact. Next, pour the batter into a greased 9-inch round cake pan. Smooth the top with a spatula. For the crumb topping, mix together 1 cup of light brown sugar, 1/2 cup of flour, 1/3 cup of melted butter, 1 teaspoon of ground cinnamon, and optional 1/2 cup of chopped pecans. Combine until it forms a crumbly texture. Evenly sprinkle this topping over the batter.
Baking the Cake
Preheat your oven to 350°F (175°C). Place your cake pan in the oven and bake for 40-45 minutes. To check if your cake is done, insert a toothpick into the center. It should come out clean. Once baked, let the cake cool in the pan for about 10 minutes. After that, transfer it to a wire rack to cool completely. Enjoy your Southern Peach Crumb Cake!
Tips & Tricks
Achieving the Perfect Crumb Cake
Using ripe peaches is key. They offer the best flavor and sweetness. Choose peaches that give slightly when pressed. This means they are ready to eat. If they are too hard, the cake will lack flavor.
Avoid overmixing the batter. This keeps the cake light and fluffy. Mix just until you see no dry flour. You want to fold in the peaches gently. This keeps their shape and adds juicy bites.
For a good crumb topping texture, mix until it’s crumbly. Use melted butter, light brown sugar, and flour. The mixture should feel sandy between your fingers. If it is too wet, add a bit more flour. This topping adds a sweet crunch to your cake.
Serving Suggestions
Presentation is important. Slice the cake into wedges and place them on a nice plate. Dust the top with powdered sugar for a pretty look. You can also drizzle a glaze made from powdered sugar and milk.
Pair your cake with ice cream or whipped cream. Vanilla ice cream is a classic choice. The cold creaminess balances the warm cake. Whipped cream adds lightness, making each bite heavenly.
Troubleshooting Common Issues
If your cake turns out dry, try adding more buttermilk next time. Also, check your oven temperature. An oven thermometer can help ensure it bakes evenly.
For even baking, rotate the cake halfway through. This helps it bake evenly and prevents burning. If the top browns too fast, cover it with foil. This keeps the cake moist and ensures it cooks through.
Variations
Alternative Fruit Options
You can swap peaches for other fruits in this cake. Apricots work well, bringing a sweet-tart flavor. Blueberries add a burst of juice and color. Use about the same amount of fruit as the recipe calls for. Feel free to mix and match fruits for a fun twist.
Different Topping Ideas
The crumb topping is key to this cake. You can use streusel, which adds a crunchy texture. For a nutty flavor, try a topping with chopped pecans or walnuts. You can also boost the flavor by adding cinnamon or lemon zest. A pinch of nutmeg can enhance the cake’s warmth.
Gluten-Free and Vegan Adaptations
To make this cake gluten-free, replace all-purpose flour with a gluten-free blend. Make sure it has xanthan gum for the best texture. For a vegan version, substitute eggs with flax eggs or applesauce. Use plant-based milk instead of buttermilk. Coconut oil or vegan butter can replace the regular butter. These changes keep the cake moist and tasty.
Storage Info
Storing Leftovers
To keep your Southern Peach Crumb Cake fresh, refrigerate it. Place the cake in an airtight container. This helps keep the moisture in and prevents it from drying out. If you don’t have a container, wrap the cake tightly with plastic wrap. This method also works well.
Freezing the Cake
You can freeze this cake if you have leftovers. First, let the cake cool completely. Next, slice it into pieces. Wrap each slice in plastic wrap. Then, place the wrapped slices in a freezer bag. This keeps the flavor and texture. When you want to eat it, take a slice out and thaw it in the fridge overnight.
Shelf Life Information
Your refrigerated cake will stay fresh for about three to five days. If you freeze it, it can last for up to three months. After thawing, the cake may be slightly less moist, but it still tastes great. Storing it well helps keep that delicious peach flavor alive.
FAQs
What can I substitute for buttermilk?
You can use regular milk as a substitute for buttermilk. To make it work, add a tablespoon of lemon juice or vinegar. Let it sit for about five minutes. This will create a tangy flavor similar to buttermilk. You can also use yogurt or sour cream mixed with water. Both options give the cake a moist texture.
Can I make this cake in advance?
Yes, you can make this cake in advance. Bake it a day before your event. Once cooled, wrap it tightly in plastic wrap. This keeps it fresh for the next day. You can also freeze the cake for up to three months. Just make sure to wrap it well. Thaw it overnight in the fridge when you’re ready to serve.
How can I tell when the cake is done?
To check if your cake is done, look for a golden-brown top. You can also use a toothpick. Insert it into the center of the cake. If it comes out clean, the cake is ready. If it’s wet, give it a few more minutes in the oven. Keep an eye on it to avoid overbaking.
Is it necessary to peel the peaches?
Peeling the peaches is not necessary. The skin adds a bit of texture, but it can be tough. If you like a smoother cake, peel the peaches before using them. If you enjoy the extra bite, leave the skin on. Either way, the flavor will still be delicious.
In this article, we covered the essential ingredients for Southern Peach Crumb Cake, including fresh peaches and spices. We explored step-by-step instructions, from preparing the peaches to baking the cake. I shared tips for achieving the perfect crumb and offered variations for different tastes. Remember, using ripe peaches makes a big difference in flavor. Enjoy experimenting with this recipe, and don’t hesitate to make it your own! Whether you serve it warm or with ice cream, this cake is sure to impress.

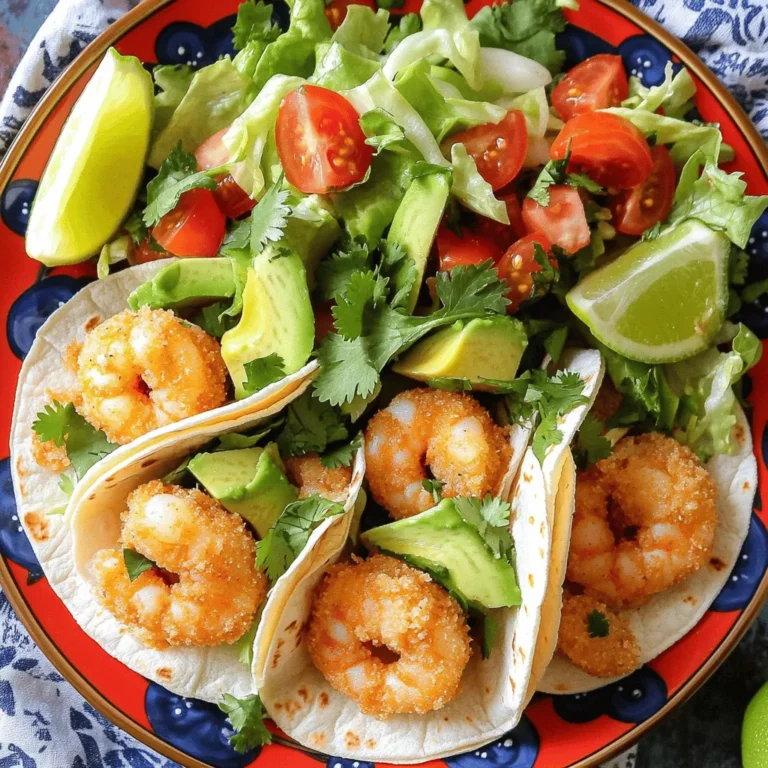

![- Fettuccine or Linguine: I love using fettuccine or linguine for this dish. These pastas hold the creamy sauce well. Their flat shape allows for a perfect bite every time. - Fresh Seafood: When choosing shrimp, look for firm, pink, and shiny ones. For scallops, they should be plump and slightly translucent. Fresh seafood makes all the difference in flavor. - Aromatics and Seasoning: Garlic and onion add depth to the dish. Use three cloves of garlic for a bold flavor. A small onion gives a nice sweetness. Fresh lemon juice and zest brighten the entire meal. - Fresh Basil Leaves: Adding fresh basil leaves boosts flavor and looks great. Tear them by hand for a rustic touch. Scatter them on top just before serving. - Grated Parmesan Cheese: Choose a good-quality Parmesan cheese for the best taste. Grate it fresh for a rich, nutty finish. It melts nicely into the pasta and adds creaminess. For the full recipe, visit the details above and enjoy the process! Start by boiling a large pot of salted water. Add the fettuccine or linguine. Cook it until it's al dente. This means it should be firm but cooked through. This step is key because overcooked pasta becomes mushy. After cooking, drain the pasta but save about ½ cup of the pasta water. This water can help thicken your sauce later. Next, heat 2 tablespoons of olive oil in a large skillet over medium heat. Wait until the oil shimmers before adding minced garlic and chopped onion. Sauté for about 3-4 minutes. You want the onion to become clear and fragrant. This step builds a great flavor base for your dish. Now it’s time to add the seafood. Place the shrimp and scallops in the skillet. Cook for about 4-5 minutes, stirring gently. The shrimp will turn pink, and the scallops will look opaque when done. Avoid overcooking them, or they will become rubbery. After the seafood is cooked, pour in a cup of heavy cream. Stir well to mix all the ingredients. Then, add the lemon zest, lemon juice, and red pepper flakes if you want some heat. Season with salt and black pepper. Let this sauce simmer for about 2-3 minutes. This time lets all the flavors blend together nicely. Finally, add the cooked pasta to the skillet. Toss everything gently to coat the noodles in the creamy sauce. If the sauce is too thick, add the reserved pasta water a little at a time. This helps reach the perfect consistency. Let it rest for a minute before serving to deepen the flavors. For the complete recipe, check the [Full Recipe]. To make the best seafood pasta, pay attention to the seafood. Always use fresh shrimp and scallops. Look for firm shrimp and plump scallops. Avoid overcooking seafood; it should be cooked just until it turns opaque. A common mistake is cooking seafood too long. This can make it tough and chewy. Spices and herbs bring your dish to life. Use fresh herbs like basil or parsley. Lemon zest adds brightness. A pinch of red pepper flakes adds heat. Try adding a dash of white wine for depth. These flavors work well with the creamy sauce and seafood. Plating is key to a great meal. Use large, shallow bowls for serving. Twirl the pasta for an elegant look. Garnish with fresh basil leaves and a sprinkle of Parmesan cheese. Drizzle a little extra olive oil on top for shine. This makes your dish appealing and appetizing. For a fun touch, consider adding a lemon wedge on the side. It gives a pop of color and flavor. These small details can impress your guests. For the complete recipe, check out the [Full Recipe]. {{image_4}} If you want to change up the seafood in this dish, there are great options. You can substitute shrimp and scallops with: - Crab meat - Lobster - Mussels - Clams These options can add unique flavors to your pasta. For example, crab meat gives a sweet taste, while mussels add a briny touch. Just make sure to adjust the cooking time, as some seafood cooks faster than others. You can switch up the pasta type for different health goals. Consider using: - Whole wheat pasta - Gluten-free pasta Whole wheat pasta has more fiber and nutrients than standard pasta. Gluten-free pasta is great for those with wheat allergies. Both options work well with the sauce and seafood. Just cook them according to package directions for the best texture. Want to try something new? You can play with the sauce for your dish. Here are some ideas: - Use marinara sauce for a classic Italian touch. - Try a basil pesto for a fresh and herbal flavor. Marinara sauce adds a rich tomato taste. Pesto brings in bright flavors and a creamy texture. Feel free to mix and match these sauces with your seafood for fun twists. You can find the full recipe to guide you through all these ideas. After enjoying your seafood pasta, store leftovers right away. Let the dish cool for about 30 minutes. Then, place it in an airtight container. This keeps it fresh for up to three days. Make sure to check for any signs of spoilage before eating. When reheating seafood pasta, keep the texture and flavor in mind. Use a skillet over low heat. Add a splash of water or broth to help with moisture. Stir gently to avoid breaking the seafood. Heat until it’s warm, about 5-7 minutes. You can also use the microwave. Just cover the dish loosely with a lid or wrap to keep it moist. To freeze your seafood pasta, let it cool completely first. Place it in a freezer-safe container. It can last up to two months in the freezer. To defrost, move the container to the fridge overnight. Reheat gently in a skillet or microwave, adding a splash of cream or broth to restore creaminess. Enjoy your delicious seafood pasta anytime! For the full recipe, check out the earlier section. You can tell shrimp and scallops are cooked when they change color. Shrimp should turn pink, and scallops should become opaque. For shrimp, look for a tight curl. For scallops, they should have a firm texture. If you cut into them, they should be white inside with no translucent areas. This means they are safe to eat. Yes, you can prepare this recipe ahead of time. Cook the pasta and seafood separately. Store them in airtight containers in the fridge. When you are ready to eat, simply reheat the seafood and mix it with the pasta and sauce. This makes it easy for busy weeknights or special occasions. A crisp white wine works best with seafood pasta. Look for a Sauvignon Blanc or Pinot Grigio. These wines have bright flavors that complement the seafood. If you prefer red, a light Pinot Noir can also be a good choice. The key is to avoid heavy wines that might overpower the dish. Yes, frozen seafood is a great option. Thaw your shrimp and scallops in the fridge overnight or under cold water. Avoid using hot water, as it can start to cook the seafood. Once thawed, pat them dry with a paper towel before cooking. This helps achieve a nice sear and prevents excess moisture in your dish. For the best flavor, try to use high-quality frozen seafood. You can find the full recipe [here](#). You've learned key ingredients for seafood pasta and how to cook it perfectly. Fettuccine or linguine, fresh seafood, and the right spices are essential. Remember to cook your pasta al dente and reserve some water. Proper techniques for sautéing and combining everything create a delicious cream sauce. Try different seafood, pasta types, and sauces for variety. Store and reheat your leftovers properly to keep the flavor. Now, you have what you need to make amazing seafood pasta at home. Enjoy your cooking adventure!](https://fastmealmate.com/wp-content/uploads/2025/06/7c1ca401-a8ff-43d0-aae3-34555c9d3a34-768x768.webp)