
Heavenly Vanilla Mousse Dessert Delightfully Simple Recipe
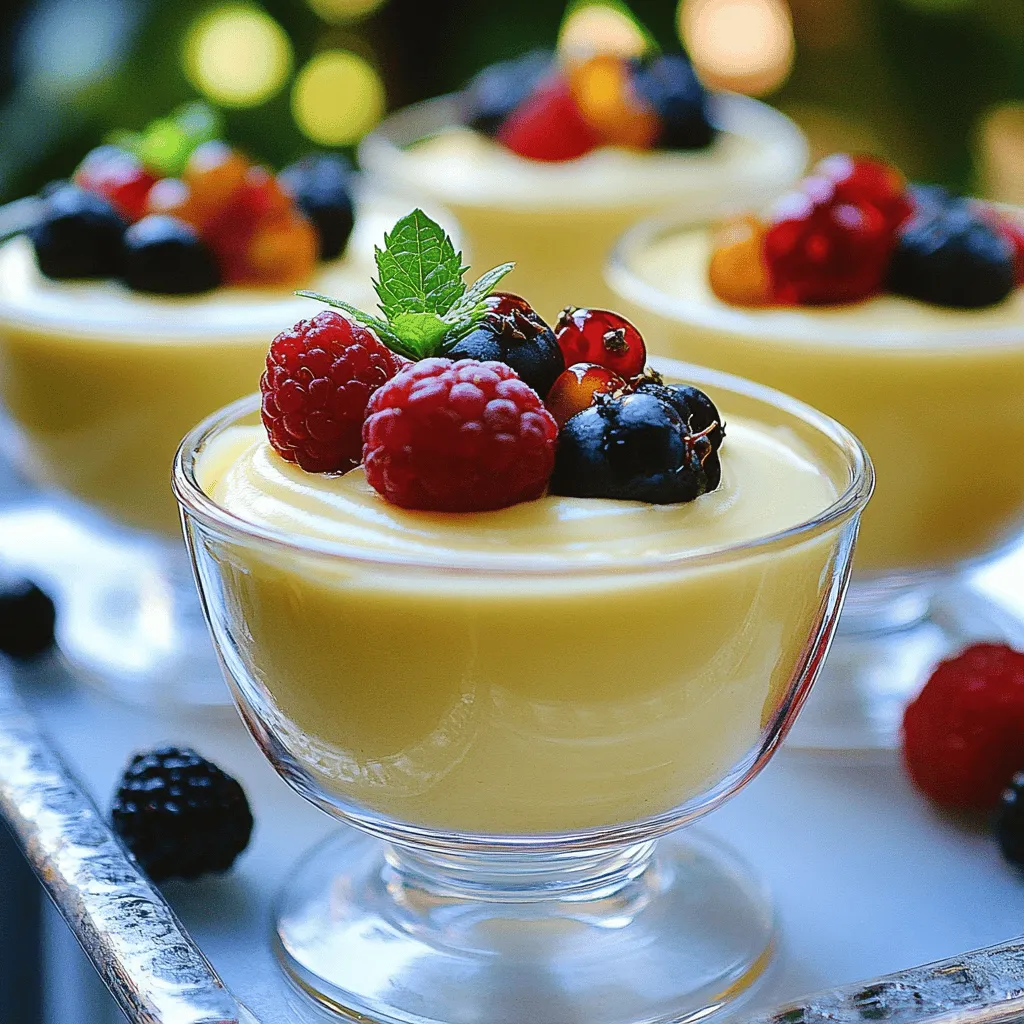
Are you ready to indulge your sweet tooth with a simple yet luxurious treat? This Heavenly Vanilla Mousse Dessert is not just easy to make; it’s a crowd-pleaser. I’ll guide you through every step, from choosing the right ingredients to mastering the perfect texture. With options for flavors and garnishes, you can customize it to delight any palate. Let’s dive into the delightful world of vanilla mousse!
Ingredients
Essential Ingredients for Heavenly Vanilla Mousse Dessert
To make Heavenly Vanilla Mousse, you need these key ingredients:
– 2 cups heavy whipping cream
– 1 cup sweetened condensed milk
– 2 teaspoons pure vanilla extract
– 1 teaspoon unflavored gelatin powder
– 3 tablespoons cold water
– 1/4 cup powdered sugar
– A pinch of salt
These ingredients create a rich and creamy dessert. Each one plays a role. The heavy cream gives the mousse its lightness. The sweetened condensed milk adds sweetness and creaminess. Vanilla extract gives a warm flavor. Gelatin helps the mousse set properly.
Optional Garnishes and Extras
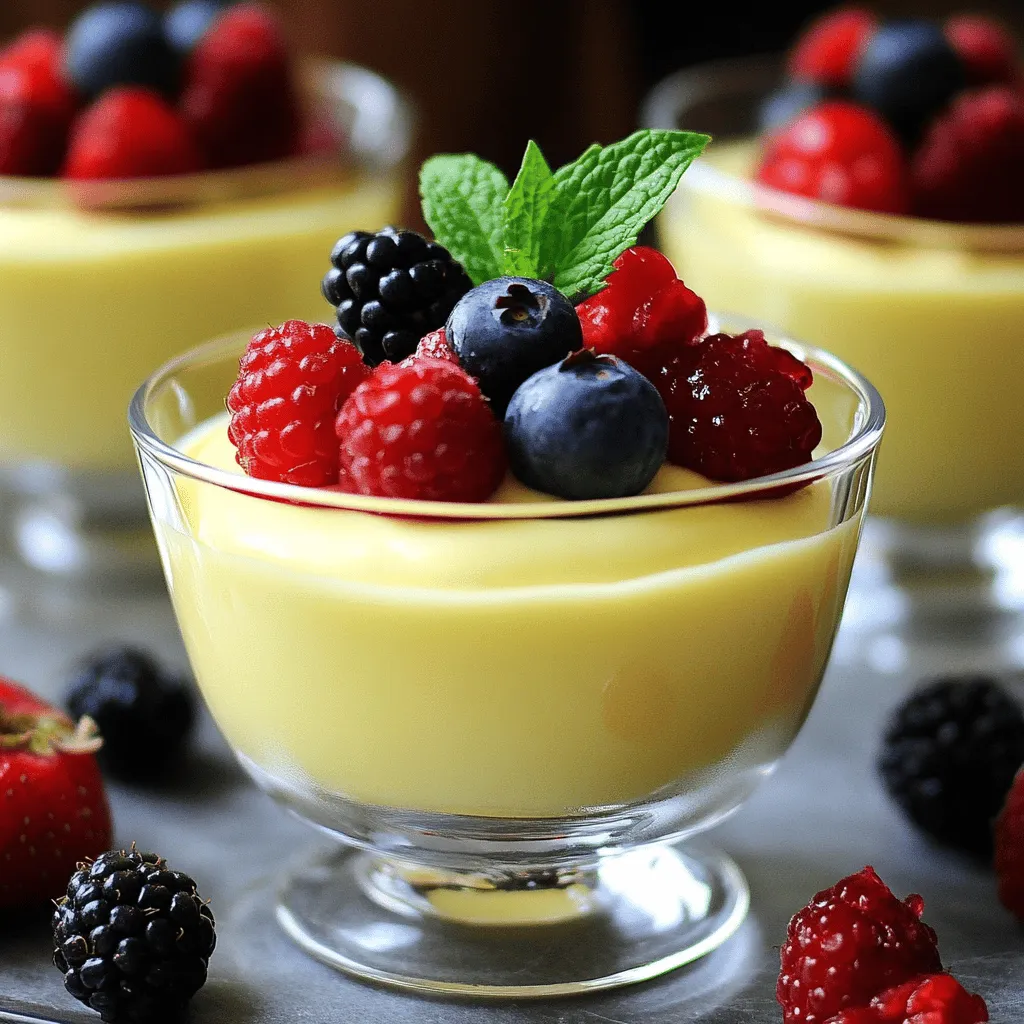
You can make your mousse even more special with these garnishes:
– Fresh berries (like strawberries, blueberries, or raspberries)
– Fresh mint leaves
These garnishes add color and freshness to the dessert. They also enhance the overall taste, making the mousse more appealing.
Ingredient Substitutions
If you need to make changes, here are some ideas:
– Use coconut cream instead of heavy cream for a dairy-free option.
– Replace sweetened condensed milk with coconut milk for a lighter taste.
– If you want a different flavor, try almond or hazelnut extract instead of vanilla.
These substitutions allow you to customize the mousse to fit your needs and preferences. You can still enjoy a delicious dessert even if you don’t have all the original ingredients.
Step-by-Step Instructions
How to Bloom the Gelatin
To bloom the gelatin, start by measuring one teaspoon of unflavored gelatin powder. Place it in a small bowl. Next, add three tablespoons of cold water to the bowl. Let it sit for about five minutes. During this time, the gelatin will absorb the water and swell. After five minutes, gently heat the bowl in a small saucepan over low heat. Stir it occasionally until the gelatin completely dissolves. Be careful not to boil it. Once dissolved, remove it from the heat and let it cool slightly.
Whipping the Cream: Achieving the Perfect Consistency
Next, take two cups of heavy whipping cream and pour it into a large mixing bowl. Add a quarter cup of powdered sugar to the cream. Using an electric mixer, beat the mixture on medium speed. Keep mixing until soft peaks form. This means the cream should hold a shape but still be soft. Make sure not to overbeat, or it will turn grainy and lose its fluffy texture. The key is to stop when it looks light and airy.
Combining Ingredients for the Mousse
Now, it’s time to combine everything. Gently fold in one cup of sweetened condensed milk and two teaspoons of pure vanilla extract into the whipped cream. Use a spatula and be careful not to deflate the cream. Next, take the cooled gelatin and slowly fold it into the creamy mixture. Mix gently to keep the mousse airy. Once everything is well combined, spoon or pour the mixture into individual serving cups. Cover them with plastic wrap or lids. Place them in the fridge for at least two hours to set. When ready to serve, top each mousse with fresh berries and mint leaves for a lovely touch.
Tips & Tricks
Best Practices for Whipping Cream
To whip cream well, start with cold cream. Cold cream whips better and faster. Use a mixing bowl that is also cold. You can chill it in the fridge or freezer for a bit. This helps keep the cream cold while whipping.
– Use an electric mixer for faster results.
– Beat the cream on medium speed.
– Stop when you see soft peaks. Soft peaks mean the cream is fluffy, not too stiff.
How to Achieve the Lightest Texture
To get the lightest texture in your mousse, fold gently. Folding means mixing without beating. When you add the sweetened condensed milk and vanilla, use a spatula.
– Add the dissolved gelatin last to keep air in the mix.
– Mix slowly and carefully to avoid losing air. If you mix too hard, the mousse can become heavy.
Common Mistakes to Avoid
One mistake is overbeating the cream. If you beat it too long, it can turn into butter. Another mistake is not letting the gelatin cool enough. Hot gelatin can melt the cream.
– Always bloom your gelatin first, then dissolve it.
– Don’t skip chilling the mousse after mixing. It helps it set and taste better.
– Use fresh berries for garnish, but don’t add them too early. They can make the mousse soggy if they sit too long.
Using these tips, your Heavenly Vanilla Mousse Dessert will be light, fluffy, and a joy to eat.
Variations
Flavor Twist Ideas
You can change the taste of your vanilla mousse easily. To make a chocolate mousse, just add melted chocolate to the whipped cream. Use about 4 ounces of dark chocolate to start. For coffee mousse, mix in 2 tablespoons of instant coffee with the gelatin. This gives a rich, bold flavor. You can explore other flavors like almond or citrus zest too. Just use pure extracts for the best results.
Alternative Toppings and Mix-Ins
Toppings can really change your dessert. Instead of berries, try crushed cookies or nuts. Shaved chocolate adds a nice touch too. You can also drizzle caramel or chocolate sauce over the mousse. If you want a tropical twist, sprinkle some coconut flakes on top. Fresh fruit like mango or kiwi adds color and flavor. Mix-ins like chocolate chips or toffee bits can surprise your guests.
Serving Suggestions for Different Occasions
Think about where you’ll serve your mousse. For a fancy dinner, use elegant glass cups. They show off the creamy layers well. If it’s a picnic, small jars work great. You can easily transport them. For kids’ parties, add fun toppings like colorful sprinkles. This makes the dessert more appealing. No matter the occasion, the mousse will impress everyone.
Storage Info
How to Properly Store Leftover Mousse
Store your leftover mousse in the fridge. Use airtight containers to keep it fresh. Cover the mousse with plastic wrap or a lid. This prevents any odors from other foods getting into your mousse.
Shelf Life of Vanilla Mousse
Vanilla mousse can last up to 3 days in the fridge. After that, it may lose its airy texture. I recommend enjoying it within this time for the best taste.
Freezing Mousse: What You Need to Know
You can freeze mousse, but it may change in texture. To freeze, place it in a freezer-safe container. Leave some space at the top for expansion. When ready to eat, thaw it in the fridge overnight. Whip it again before serving to restore some fluffiness.
FAQs
What is the best type of cream to use for mousse?
The best cream for mousse is heavy whipping cream. It whips up well and creates a light texture. Look for cream with at least 36% fat. This high fat content helps the mousse hold its shape. Using lighter cream may lead to a runny dessert. Make sure the cream is cold for the best results.
Can I make Heavenly Vanilla Mousse Dessert ahead of time?
Yes, you can make this mousse ahead of time! It stays fresh in the fridge for up to three days. Just cover the cups with plastic wrap. This makes it a great choice for parties or busy days. Prepare it the day before and let it set. Your guests will love it when you serve it.
How can I make this dessert dairy-free?
To make this dessert dairy-free, use coconut cream instead of heavy whipping cream. Chill a can of full-fat coconut milk overnight. Scoop out the solid cream and whip it like regular cream. Use a dairy-free sweetened condensed milk alternative for the other ingredients. This swap keeps the creamy texture and taste. Enjoy a delightful dessert that fits your needs!
Creating a perfect Heavenly Vanilla Mousse Dessert is simple. You need the right ingredients, proper techniques, and a few tips. Remember, choosing the best cream makes a big difference. Avoid common mistakes to get that light texture. You can also try different flavors and toppings to keep it fun.
In the end, this dessert brings joy to any occasion. Enjoy sharing your delicious mousse with friends and family!

![When making zucchini brownies, you need simple and quality ingredients. Here’s what you will need: - 1 cup shredded zucchini - 1/2 cup unsweetened applesauce - 1/3 cup pure maple syrup or agave nectar - 1/4 cup vegetable oil or melted coconut oil - 1 teaspoon pure vanilla extract - 1/2 cup all-purpose flour or gluten-free flour - 1/4 cup unsweetened cocoa powder - 1/2 teaspoon baking soda - 1/2 teaspoon baking powder - 1/4 teaspoon fine sea salt - 1/2 cup chocolate chips These ingredients come together to create a rich and moist brownie. The zucchini adds moisture without a strong taste. Applesauce keeps the brownies soft. The maple syrup or agave nectar sweetens them naturally. You can use vegetable oil or coconut oil, depending on your preference. Using high-quality cocoa powder makes a big difference in flavor. The baking soda and baking powder help the brownies rise. Finally, the chocolate chips give a delightful chocolate burst in every bite. For the full recipe, check out the [Full Recipe]. - Set temperature to 350°F (175°C). - Prepare your baking pan by greasing it or lining it with parchment paper. - In a large bowl, combine shredded zucchini, applesauce, maple syrup, oil, and vanilla. - Mix until the mixture is smooth and well blended. - In a separate bowl, whisk together flour, cocoa powder, baking soda, baking powder, and salt until mixed well. - Gradually add the dry ingredients to the wet mixture. - Mix gently to avoid overmixing, which can make the brownies dense. - Fold in the chocolate chips. - Make sure they are evenly spread throughout the batter for a rich flavor. - Pour the batter into the prepared pan. - Bake for 25-30 minutes. - After baking, cool in the pan for at least 15 minutes before cutting. Enjoy the delightfully unexpected zucchini boost hidden in every bite with this full recipe! To make your brownies moist, avoid overmixing the batter. Overmixing adds air, which can make them dry. Mix until just combined for a fudgy treat. Using ripe zucchini is key too. Ripe zucchini has more water, which adds moisture and flavor. Shred the zucchini and squeeze out excess water. This keeps your brownies rich and tasty. You can add nuts or spices to boost flavor. Chopped walnuts or pecans add crunch. A sprinkle of cinnamon or nutmeg makes them warm and cozy. You could also mix in chocolate chunks for extra gooeyness. For toppings, serve with ice cream or whipped cream. A scoop of vanilla ice cream on warm brownies is heavenly! Check your brownies for doneness by inserting a toothpick in the center. It should come out with a few moist crumbs. If you live at a high altitude, bake for less time. High altitude can change how baked goods rise and cook. Start checking at the lower end of baking time, around 25 minutes. Adjust as needed. {{image_4}} You can make these brownies gluten-free. Just swap the all-purpose flour for a gluten-free flour blend. Many blends work well. Look for ones that contain rice flour or almond flour. These blends give the brownies a nice texture. Make sure to check the package for the right measurements. This way, you still get that rich, fudgy taste. For a vegan version, you can replace the eggs. Use a flaxseed or chia seed mixture instead. To make this, mix one tablespoon of ground flaxseed or chia seeds with three tablespoons of water. Let it sit for five minutes until it thickens. This works great in the recipe. Your brownies will still be moist and delicious without eggs. If you want a healthier treat, try different sweeteners. You can use stevia or coconut sugar instead of maple syrup. Both options lower the sugar content. Stevia is quite sweet, so use less. Coconut sugar adds a nice caramel flavor. These substitutes keep your brownies tasty while making them a bit healthier. For the full recipe, check out the main article. To keep your zucchini brownies fresh, use an airtight container. This helps seal in moisture and flavor. You can store them at room temperature for up to two days. If you want to keep them longer, refrigerate them for up to a week. If you want to save some for later, freezing is a great option. First, cut the brownies into squares. Wrap each square in plastic wrap, and then place them in a freezer-safe bag. This way, they won’t stick together. You can freeze them for up to three months. When you’re ready to enjoy, take them out and thaw at room temperature. For the best texture, you can also warm them in the microwave for a few seconds. These tips will help you enjoy your zucchini brownies at their best! For the complete recipe, check out the [Full Recipe]. Yes, you can use yellow squash. The texture will be similar, but the flavor differs. Yellow squash has a slightly sweeter taste. Zucchini tends to have a more neutral flavor. This can change how the brownies taste. If you like sweetness, yellow squash is a great choice. To check if brownies are done, insert a toothpick into the center. If it comes out with a few moist crumbs, they are ready. If it comes out wet with batter, they need more time. Brownies should look set but still soft. These brownies can be made ahead of time. Bake them, let them cool, then store them. Wrap them in plastic wrap or place them in an airtight container. They keep well for about three days at room temperature. You can also refrigerate them for up to a week. If your brownies are dense, try a few tips. First, check your mixing. Overmixing can cause density. Mix until just combined. You can also add a bit more liquid. Adding an extra tablespoon of applesauce can help. Lastly, ensure your baking powder is fresh for proper rise. These zucchini brownies are easy to make and taste great. We covered the ingredients, step-by-step instructions, and tips to boost flavor and texture. You learned how to store them and gave answers to common questions. Experiment with different flours or sweeteners to fit your needs. Enjoy these tasty treats that offer a fun twist on the classic brownie! Happy baking!](https://fastmealmate.com/wp-content/uploads/2025/06/384a547d-f08a-42f3-b5f4-9a38b6c4e0e7-768x768.webp)
![To make a delicious Pineapple Cucumber Salad, gather the following ingredients: - Ripe pineapple - Large cucumbers - Red bell pepper - Red onion - Fresh mint leaves - Fresh cilantro - Lime juice - Honey (optional) - Salt and pepper This list has all you need for a fresh and tasty salad. The ripe pineapple brings sweetness, while the cucumbers add crunch. The red bell pepper adds a nice pop of color and flavor. Red onion gives a sharp taste that balances the sweet and fresh notes. Fresh mint and cilantro boost the herb flavor, making every bite refreshing. Lime juice ties everything together with a zesty kick. If you like a touch of sweetness, add honey. Finally, season with salt and pepper to bring out all the flavors. When you have everything ready, you can create a vibrant and healthy dish. This salad is perfect for a quick snack or as a side. For the full recipe, check the earlier section. Enjoy making this simple yet flavorful dish! To make the pineapple cucumber salad, start by cutting the pineapple. You want it ripe and juicy. Peel it, then cut it into bite-sized cubes. This makes each piece easy to eat. Next, take the cucumbers. Wash them well, then cut them into similar-sized dice. This helps the salad look nice and makes every bite fresh. Now, let’s chop some vegetables and herbs. Grab the red bell pepper and red onion. Cut the red bell pepper into small pieces. This adds a sweet crunch to the mix. For the red onion, chop it finely for a hint of sharpness. Finally, take fresh mint and cilantro. Chop them finely as well. They bring a burst of flavor and freshness to our salad. In a large mixing bowl, place the diced pineapple and cucumbers. Add the chopped red bell pepper and red onion. Make sure to distribute everything evenly. This will give you a perfect mix of flavors in every bite. Then, sprinkle in the fresh mint and cilantro. Their bright flavors will really make the salad pop. Now it's time to prepare the dressing. In a small bowl, whisk together the lime juice and honey, if you choose to use it. Mix until the honey dissolves completely. This creates a tangy-sweet dressing that will add a lovely zing. Drizzle the dressing over your salad. Use a large spoon to gently toss everything together. Make sure all the ingredients are well coated with the dressing. This is key to bringing out the flavors. Next, season with salt and pepper to taste. Start with a little and adjust based on your preference. This simple step elevates the flavor of your salad. After mixing, cover the bowl tightly with plastic wrap. Place it in the fridge for at least 30 minutes. This chilling time allows the flavors to meld together beautifully. Enjoy this refreshing dish as a bright addition to any meal. You can find the full recipe to make this salad at any time. To make your pineapple cucumber salad shine, focus on freshness. Select ripe fruits and vegetables. A ripe pineapple smells sweet at the base and feels slightly soft when pressed. For cucumbers, look for firm ones with smooth skin. These choices boost your salad's flavor. When seasoning, use salt and pepper to taste. Start with a little. You can always add more. Lime juice adds brightness, while honey can sweeten it up. Mix well to blend all flavors. Serve your salad in a clear glass bowl. This highlights the bright colors of the pineapple, cucumber, and peppers. For added charm, layer the ingredients. This creates a beautiful effect. Garnish with fresh mint leaves right before serving. This enhances the salad's look and adds a lovely scent. You can also sprinkle some lime zest on top for extra flair. This salad pairs well with grilled chicken or fish. The fresh flavors complement the smoky taste of grilled meats. You can also enjoy it with tacos or rice dishes. For drinks, a refreshing mint lemonade or iced tea suits this salad perfectly. Serve it at summer barbecues, picnics, or family gatherings. It adds a tropical vibe to any meal. Don't forget to check the Full Recipe for all the details! {{image_4}} You can change this salad in fun ways. Start by adding other fruits. Consider using mango, kiwi, or strawberries. Each fruit brings its sweet twist. You can also add a little crunch with diced apples. They pair well with the pineapple and cucumber. Next, incorporate different herbs. Besides mint and cilantro, try basil or parsley. These herbs will give the salad a fresh feel. Each herb adds its own flavor, making the salad unique. Experiment and find your favorite mix! Many people want meals that fit their diet. This salad is easy to tweak for vegan or gluten-free diets. All the main ingredients are naturally vegan. Just skip the honey for a vegan option. If you want a low-sugar version, leave out the honey. The pineapple will add enough sweetness. You can also swap lime juice with lemon juice for a tart taste. Adjust these ingredients to suit your health needs. Enjoy the fresh flavors without worry! For the full recipe, check out [Full Recipe]. To keep your leftover salad fresh, store it in the fridge. Use an airtight container to prevent moisture loss. This helps the flavors stay vibrant. If you don’t have one, plastic wrap works too but may not seal as well. Avoid storing in a glass bowl without a lid, as this can lead to quicker spoilage. The salad stays fresh for about 2 days when stored correctly. After that, the flavors might fade. Check for signs of spoilage, such as a sour smell or mushy cucumbers. If you notice these signs, it's best to toss the salad. Keeping an eye on freshness ensures you enjoy the best taste and texture. For the full recipe, refer back to the beginning! What can I substitute for honey? You can use agave syrup or maple syrup instead of honey. Both add sweetness. You can also skip it if you prefer a tart taste. Can I make the salad ahead of time? Yes, you can make this salad a few hours ahead. Chill it in the fridge. This allows the flavors to blend nicely. How do I keep the cucumbers from becoming soggy? To prevent soggy cucumbers, salt them first. Let them sit for a bit, then rinse and dry. This removes extra water. What are the nutritional benefits of this salad? This salad is low in calories and high in vitamins. Pineapple adds vitamin C, while cucumbers hydrate. Mint and cilantro provide antioxidants. Can I serve it warm? This salad is best served cold. Serving it warm may change the texture. Enjoy it fresh for the best taste! This blog post covered how to make a refreshing pineapple cucumber salad. I shared the key ingredients and provided step-by-step instructions. You learned tips to enhance flavor and options for meal pairings. We also explored variations and important storage tips. Remember, this salad is versatile and easy to customize. Enjoy experimenting with different fruits and herbs. Fresh flavors make this dish a winner for any occasion.](https://fastmealmate.com/wp-content/uploads/2025/06/6ff9bfd2-b4bb-4aa9-9811-0e757a52e6a8-768x768.webp)

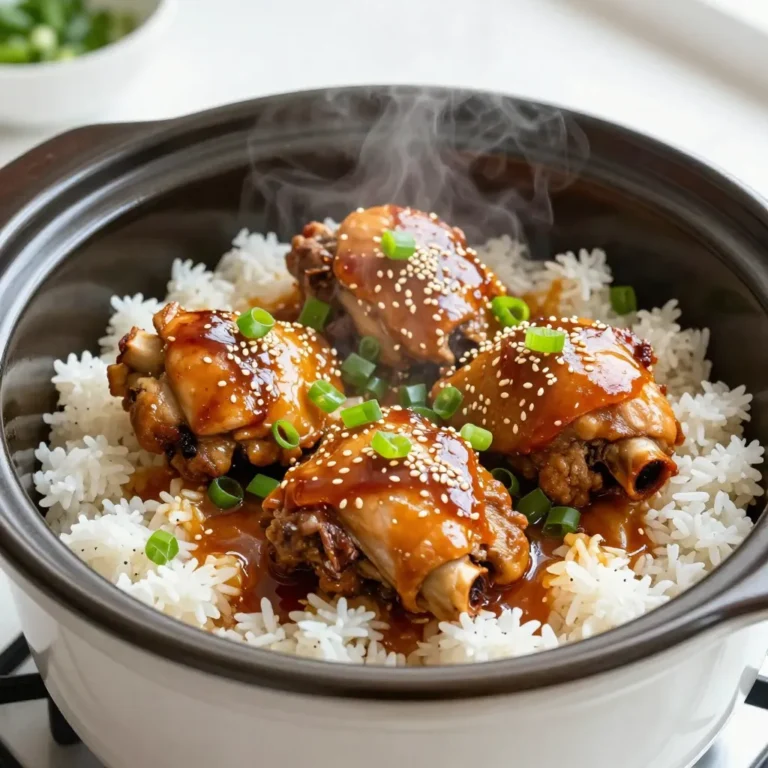
![To make Honey Garlic Chicken, gather these simple ingredients: - 4 boneless, skinless chicken thighs - 1/4 cup honey - 3 tablespoons soy sauce - 4 cloves garlic, finely minced - 1 tablespoon fresh ginger, freshly grated - 1 tablespoon apple cider vinegar - 1 tablespoon sesame oil - Salt and freshly cracked pepper to taste - 2 green onions, thinly sliced (for garnish) - 1 tablespoon sesame seeds (for garnish) You will need a few kitchen tools for this recipe: - Medium mixing bowl - Whisk - Sealable plastic bag or shallow dish - Baking dish - Parchment paper - Small saucepan If you don’t have some items, here are easy swaps: - Chicken thighs can be replaced with chicken breasts for a leaner option. - Maple syrup can replace honey for a vegan choice. - Tamari works in place of soy sauce for a gluten-free meal. - Fresh garlic can swap for garlic powder, but use less. - Rice vinegar can replace apple cider vinegar if needed. For the full recipe, check out the instructions above! First, gather your ingredients. You will need honey, soy sauce, garlic, ginger, apple cider vinegar, and sesame oil. In a medium bowl, mix the honey, soy sauce, minced garlic, grated ginger, apple cider vinegar, and sesame oil. Whisk these items until they blend well. This creates a tasty marinade that adds flavor to your chicken. Next, take the chicken thighs and pat them dry with paper towels. This step helps the marinade stick better. Season the chicken with salt and freshly cracked pepper. Place the seasoned chicken in a sealable bag or shallow dish. Pour the marinade over the chicken. Make sure each piece is well coated. Seal the bag or cover the dish, then place it in the fridge. Let it marinate for at least 30 minutes or up to 2 hours. This helps the chicken soak up all those great flavors. Now, preheat your oven to 375°F (190°C). Line a baking dish with parchment paper. This makes cleanup easy. After marinating, remove the chicken from the marinade and set the excess marinade aside. Arrange the chicken in a single layer in the baking dish. Bake for about 25-30 minutes. The chicken is done when its internal temperature reaches 165°F (75°C) and has a lovely golden color. While the chicken bakes, pour the reserved marinade into a small saucepan. Bring it to a boil over medium heat. Then, reduce the heat to low and let it simmer for about 5 minutes. This thickens the sauce and boosts the flavor. Once the chicken is cooked, take it out of the oven and brush the thickened marinade over each piece. This adds extra flavor and a shiny look. Garnish the chicken with thinly sliced green onions and a sprinkle of sesame seeds. These add a nice crunch and make the dish look pretty. You can find the full recipe above to guide you through the whole process. Enjoy your Honey Garlic Chicken! To cook chicken just right, choose thighs instead of breasts. Thighs stay moist during cooking. Always pat the chicken dry before seasoning. This step helps the marinade stick better. Use a meat thermometer to check the temperature. Aim for 165°F (75°C) for safe eating. Let the chicken rest for a few minutes after cooking. This helps keep it juicy. You can boost the flavor of your honey garlic chicken easily. Add a splash of lime juice for a zesty kick. Fresh herbs, like cilantro or basil, work well too. For a bit of heat, include red pepper flakes or chili paste. If you want a deeper taste, use dark soy sauce instead of light. Don’t skip the reserved marinade; brush it on after cooking for extra flavor. Serve honey garlic chicken over rice for a hearty meal. Steamed vegetables add color and nutrition. You can also pair it with a fresh salad. For a fun twist, serve it in lettuce wraps. This adds crunch and freshness. Garnish with green onions and sesame seeds for a beautiful touch. Enjoy your delicious creation! Check out the Full Recipe for more details. {{image_4}} You can turn Honey Garlic Chicken into a stir-fry. Start by cutting the chicken into bite-sized pieces. Use a hot pan with a bit of oil. Cook the chicken until it is golden. Add your favorite vegetables, like bell peppers and broccoli. Pour in the honey garlic sauce. Stir until everything is coated and tender. Serve it over rice or noodles for a quick meal. Grilling adds a smoky flavor to Honey Garlic Chicken. Marinate the chicken thighs as usual. Preheat your grill to medium-high heat. Place the chicken on the grill and cook for about 6-7 minutes on each side. Brush with the marinade while grilling. This gives a nice glaze. Check the chicken's doneness with a meat thermometer. It should reach 165°F (75°C). Enjoy with a fresh salad or grilled veggies. For a one-pan meal, add vegetables to your baking dish. Use carrots, zucchini, or snap peas. Toss them with a little oil, salt, and pepper. Arrange them around the chicken in the dish. Bake as directed in the recipe. The veggies soak up the sauce and cook perfectly. This way, you get a full meal in one go. You can find the full recipe here: [Full Recipe]. To keep your Honey Garlic Chicken fresh, place leftovers in an airtight container. Make sure the chicken cools down first. Store it in the fridge for up to three days. This way, you can enjoy it later without losing flavor. When you're ready to eat your leftovers, preheat your oven to 350°F (175°C). Place the chicken in a baking dish, cover it with foil, and heat for about 15-20 minutes. This keeps the chicken moist. You can also use a microwave, heating in short bursts of 30 seconds. Stir between intervals to ensure even heating. If you want to save some for later, you can freeze the chicken. First, let it cool down completely. Then, wrap it tightly in plastic wrap or place it in a freezer-safe bag. Remove as much air as possible. It can stay in the freezer for up to three months. When you’re ready to eat, thaw it in the fridge overnight before reheating. This method helps maintain the taste and texture. For the full recipe, check out the earlier section! You can serve Honey Garlic Chicken with many sides. I love pairing it with steamed rice. The rice soaks up the tasty sauce well. You can also add sautéed vegetables, like broccoli or bell peppers. A fresh salad works great too. Try including some pickled vegetables for a nice crunch. All these sides make a colorful and tasty meal. Yes, you can use other meats! Chicken is great, but pork works well too. I have made this with pork chops, and they turn out juicy. You can also use shrimp for a quick meal. Just remember to adjust the cooking time. Shrimp cooks fast, so watch it closely. Each meat gives a different flavor, but all can be delicious. To check if the chicken is done, use a meat thermometer. The chicken should reach 165°F (75°C). Insert the thermometer into the thickest part of the thigh. If you don’t have one, cut into the chicken. The meat should be white and the juices clear. If you see pink, keep cooking it. Always ensure the chicken is safe to eat. For the full recipe, check out the detailed instructions. You’ve learned about the key ingredients and tools needed. I shared how to prepare the marinade and marinate the chicken. You now know cooking tips to ensure perfect results. We discussed variations like stir-fry and grilling for added flavor. Lastly, I covered how to store and reheat your meals. Enjoy trying these recipes and tips in your kitchen. With practice, you’ll make a delicious dish every time. Happy cooking!](https://fastmealmate.com/wp-content/uploads/2025/06/07de3b66-fdce-4709-a69c-db5538c90d7b-768x768.webp)