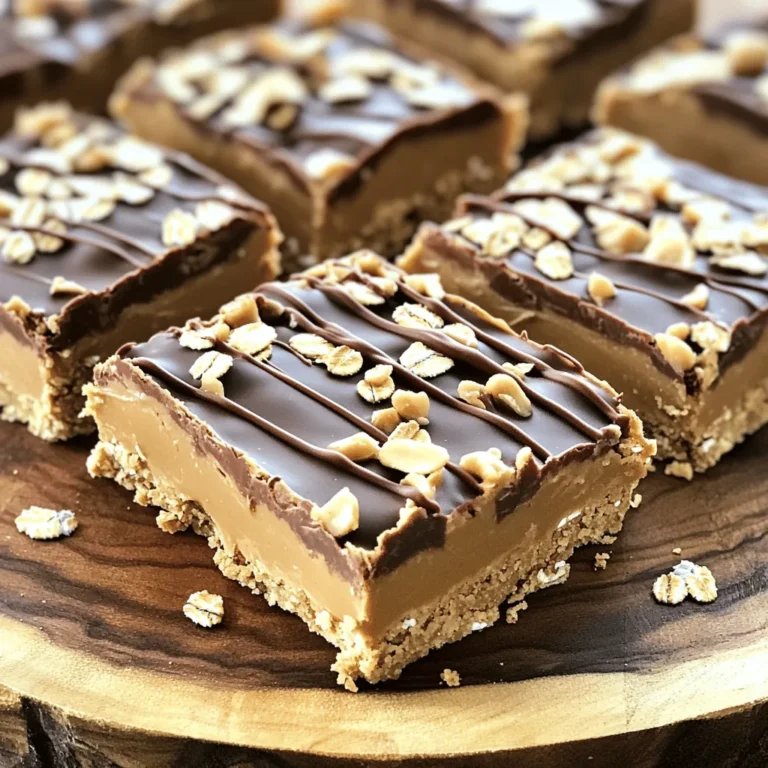
Perfect Chocolate Cake Mix Recipe Delightfully Easy

If you crave a moist and rich chocolate cake, you’re in the right place! My Perfect Chocolate Cake Mix Recipe is delightfully easy to follow and perfect for any occasion. With just a few simple ingredients and steps, you can whip up a homemade dessert that tastes incredible. Ready to impress your friends and family? Let’s dive into the sweet details and make some magic happen in your kitchen!
Ingredients
List of Required Ingredients
To make the perfect chocolate cake, gather these key items:
– 2 cups all-purpose flour
– 1 ¾ cups granulated sugar
– ¾ cup unsweetened cocoa powder
– 1 ½ teaspoons baking powder
– 1 ½ teaspoons baking soda
– 1 teaspoon salt
– 2 large eggs, at room temperature
– 1 cup whole milk, at room temperature
– ½ cup vegetable oil
– 2 teaspoons pure vanilla extract
– 1 cup boiling water
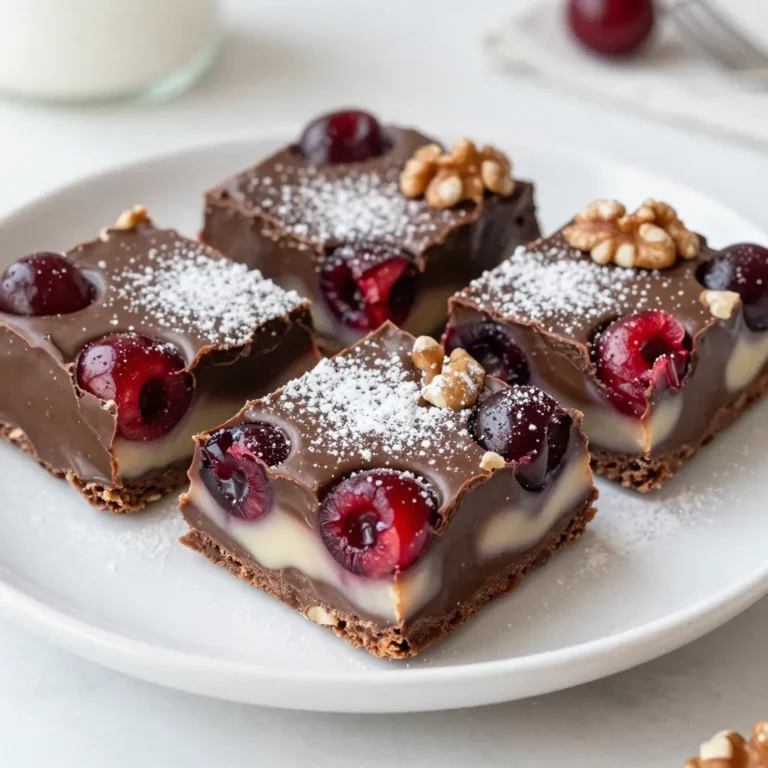
– 1 cup semi-sweet chocolate chips
– ½ cup white chocolate chips
– ½ cup dark chocolate chips
You can also add some optional ingredients for a flavor boost. Try a splash of coffee or a hint of almond extract. These can enhance the rich taste of your cake.
Ingredient Substitutions
If you need dairy-free options, you can use almond milk or oat milk instead of whole milk. For a gluten-free cake, swap the all-purpose flour with a gluten-free blend. Just make sure it’s a 1:1 swap for the best results.
Recommended Tools
To bake your cake, you will need:
– Two 9-inch round cake pans
– A large mixing bowl
– A whisk or electric mixer
– Measuring cups and spoons
– A spatula for spreading batter
For decoration, consider using a cake stand and an offset spatula. These will help you create a beautiful finish on your cake. Enjoy the process, and remember, the goal is to have fun while baking!
Step-by-Step Instructions
Prepping the Cake Batter
1. Start by mixing your dry ingredients. In a large bowl, combine:
– 2 cups all-purpose flour
– 1 ¾ cups granulated sugar
– ¾ cup unsweetened cocoa powder
– 1 ½ teaspoons baking powder
– 1 ½ teaspoons baking soda
– 1 teaspoon salt
Use a whisk to blend these until even. This step is key for a smooth cake.
2. Next, add your wet ingredients. Pour in:
– 2 large eggs, at room temperature
– 1 cup whole milk, at room temperature
– ½ cup vegetable oil
– 2 teaspoons pure vanilla extract
Beat on medium speed for 2 minutes. The batter should turn creamy and smooth.
3. Slowly stir in 1 cup of boiling water. The batter will look thin, and that’s okay! This helps keep the cake moist.
4. Finally, gently fold in:
– 1 cup semi-sweet chocolate chips
– ½ cup white chocolate chips
– ½ cup dark chocolate chips
This adds a rich chocolate flavor to every bite.
Baking the Cake
1. Preheat your oven to 350°F (175°C). Prepare two 9-inch round cake pans. Grease and flour them or line with parchment paper for easy removal.
2. Once your batter is ready, divide it evenly between the two pans. Smooth the tops if needed.
3. Bake in the preheated oven for 30-35 minutes. To check if they are done, insert a toothpick into the center. If it comes out clean, your cake is ready!
Cooling and Preparing for Frosting
1. After baking, let the cakes cool in their pans for about 10 minutes. This helps them set properly.
2. Carefully transfer the cakes to a wire rack to cool completely. This step is important before frosting.
3. Once cool, your cakes will be ready for frosting. They will be soft and delicious, perfect for your favorite chocolate frosting.
Tips & Tricks
Ensuring Moisture
To keep your chocolate cake moist, focus on a few key techniques. Start with room temperature ingredients. This means eggs and milk should sit out for a bit before mixing. This helps the batter blend well.
Another trick is to add boiling water to your batter. It might seem odd, but it adds moisture. The hot water makes the cocoa bloom, enhancing flavor. Keep an eye on baking time too. Overbaking can dry out your cake. Check it a few minutes early.
Cake Mix Enhancements
You can easily boost flavor with simple additions. A splash of coffee enhances the chocolate taste. You could also add a tablespoon of instant espresso powder. This little trick deepens the flavor without being overpowering.
Using instant pudding mix is another great idea. It gives the cake a richer taste and a softer texture. Just mix in a small box with the dry ingredients. It’s a simple way to turn a good cake into a great one.
Frosting Tips
Choosing frosting is key for a chocolate cake. A rich chocolate buttercream pairs wonderfully. You can also try cream cheese frosting for a tangy twist. Both options add creaminess and balance the cake’s sweetness.
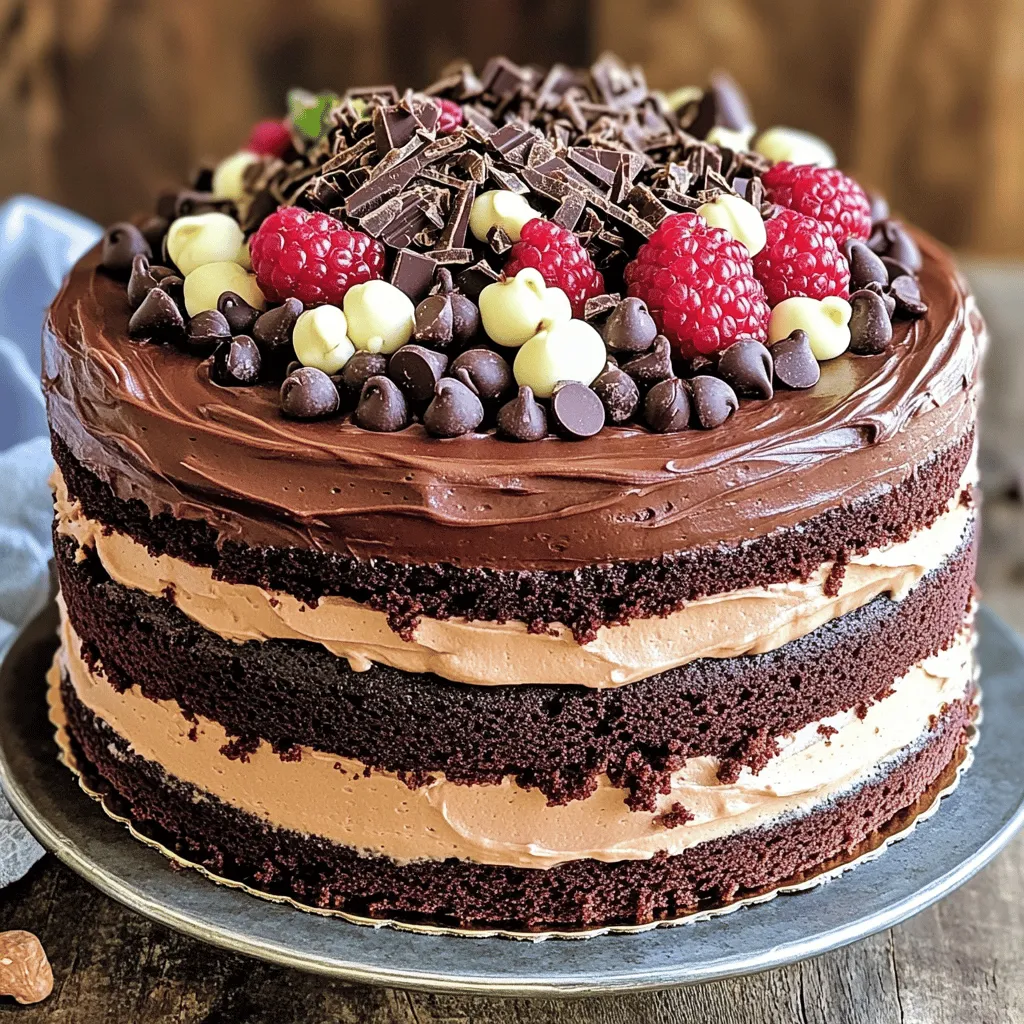
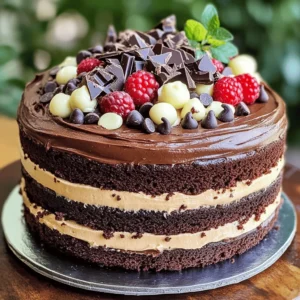
For decorating, think about layers and toppings. You can stack the cakes with frosting in between. Use chocolate shavings or fresh berries on top for a stunning finish. A sprinkle of sea salt can also enhance the sweet flavor.
Variations
Flavor Variations
You can take your chocolate cake to new heights by adding fruit or nuts. Try adding fresh raspberries or diced strawberries to the batter. These fruits add a nice tartness that pairs well with chocolate. Nuts like walnuts or pecans also add a great crunch. Just chop them up and fold them into the batter.
Different types of chocolate can change your cake’s flavor. Use dark chocolate for a richer taste. Semi-sweet chocolate gives a nice balance of sweet and bitter. You can even use white chocolate chips for a sweet surprise. Mix and match to find your favorite combo.
Layered Cake Ideas
Creating a multi-layered cake can make your dessert even more impressive. Bake three or four layers instead of two. Stack them high for a show-stopping effect.
For fillings, consider using whipped cream or fruit preserves between layers. Chocolate ganache adds extra richness and keeps the layers moist. You can even use a layer of peanut butter or Nutella for a fun twist.
Cupcake Version
You can easily convert this recipe to make cupcakes. Simply pour the batter into cupcake liners instead of cake pans. Fill each liner about two-thirds full.
For baking time, check for doneness after 18 to 20 minutes. A toothpick inserted should come out clean.
For presentation, top your cupcakes with swirls of chocolate frosting. Adding sprinkles or chocolate shavings makes them even more fun. You can also use fruit slices on top for a fresh look.
Storage Info
Short-Term Storage
To store a baked cake, let it cool completely. Place it in an airtight container. This keeps the cake fresh and moist. If you have leftovers, wrap individual slices in plastic wrap. This way, each piece stays tasty.
Long-Term Storage
You can freeze the cake for later use. First, wrap it tightly in plastic wrap. Then, place it in a freezer bag. This helps prevent freezer burn. When you are ready to eat it, take it out to thaw. Leave it at room temperature for a few hours for the best taste.
Storing Frosted Cakes
To keep a frosted cake fresh, store it in a cool place. An airtight container works best. If the frosting has delicate toppings, cover them lightly with plastic wrap. This protects them from sticking. Always place a piece of wax paper under the cake to avoid mess.
FAQs
How do I make my cake mix taste homemade?
To enhance the flavor of your cake mix, start with these tips:
– Use high-quality vanilla extract for a richer taste.
– Add a pinch of salt to balance sweetness.
– Mix in a bit of coffee or espresso powder to deepen the chocolate flavor.
– Consider adding sour cream or yogurt for moistness and tang.
These adjustments will make your cake mix taste like it came from a bakery.
What is the best way to ensure my cake rises?
To help your cake rise well, follow these tips:
– Ensure all ingredients are at room temperature, especially eggs and milk.
– Don’t skip the baking powder; it’s essential for lift.
– Mix the batter just until combined; overmixing can lead to a dense cake.
– Place your cake in a preheated oven right away for optimal rising.
These steps will give your cake a lovely, fluffy texture.
Can I use milk instead of water in the cake mix?
Yes, using milk instead of water can enhance your cake’s texture and flavor.
– Milk adds richness and moisture, making the cake softer.
– Whole milk works best, but you can use any milk you have on hand.
– If you choose non-dairy milk, the cake will still taste great, but the texture may vary slightly.
This simple swap can elevate your cake mix to a new level.
How long does the cake stay fresh?
Proper storage keeps your cake fresh for days.
– Store the cake in an airtight container at room temperature for up to three days.
– If you frost the cake, place it in the fridge; it lasts about a week.
– For longer storage, wrap the cake well and freeze it for up to three months.
Thaw in the fridge overnight before serving for the best taste.
This article walked you through the essential steps for baking a great cake. We covered ingredients, how to mix and bake your cake, and tips for keeping it moist. Plus, you learned about fun variations and storage tips.
Baking is meant to be enjoyable. With the right tools and a few tricks, you can create delicious cakes to impress anyone. Now, it’s time for you to put your skills to the test. Happy baking!
![- 2 ripe mangoes, peeled and diced - 1 cup freshly squeezed lemon juice (approximately 4-5 lemons) - 4 cups cold water - 1/2 cup honey or agave syrup (adjust for sweetness) - 1/4 teaspoon sea salt - Ice cubes - Fresh mint leaves and lemon slices for garnish In this recipe, ripe mangoes are key. They give the drink a rich, sweet flavor. Fresh lemon juice adds a tangy twist that balances the sweetness. I recommend using cold water for a refreshing drink. Honey or agave syrup allows you to control the sweetness level. Adding a pinch of sea salt enhances the taste and brings out the flavors. Don't forget the ice cubes! They keep your drink cool and refreshing. Lastly, fresh mint leaves and lemon slices make a beautiful garnish. They add a nice touch to your glass and make it look appetizing. For the complete recipe, check out the [Full Recipe]. To start, you need ripe mangoes. Peel and dice two mangoes. Place the diced mangoes in a blender. Add 1 cup of cold water. Blend on high until smooth and creamy. This mango puree gives your drink a rich flavor. Next, grab a large pitcher. Pour in 1 cup of freshly squeezed lemon juice. Use about 4-5 lemons for this. Add 3 cups of cold water. Mix in 1/2 cup of honey or agave syrup. Stir until everything is well combined. This mixture will be your refreshing lemonade base. Now, it’s time to combine. Gently pour the mango puree into the pitcher with the lemonade. Stir carefully until everything is mixed. You want the mango and lemonade to blend perfectly for a smooth taste. Take a moment to taste your mixture. If it’s too sweet, add more lemon juice. If you want it sweeter, mix in more honey or agave. Don't forget the salt! Stir in 1/4 teaspoon of sea salt to balance the flavors. Adjust until it tastes just right for you. It’s almost time to serve! Fill your glasses with ice cubes. Carefully pour the mango lemonade over the ice. Each glass should be full of that bright, fruity goodness. For a nice touch, garnish with fresh mint leaves and a lemon slice on the rim. This makes your drink look inviting and fresh. For the full recipe, check out the detailed steps above! To make your mango lemonade sweet, you can adjust the honey or agave syrup. Start with the half cup stated in the recipe. After mixing, taste it. If it’s not sweet enough, add more sweetener a little at a time. This way, you control the flavor. Remember, mangoes also add some natural sweetness. So, your lemonade may not need much more. Want to add some extra flavor? Fresh herbs like mint or basil work great. Just chop them up finely and mix them into the lemonade. You can also try adding a pinch of ginger or a dash of cinnamon. These spices bring a new twist to your drink. They can brighten the mango's flavor and make it even more refreshing. Mango lemonade pairs well with light snacks. Think about serving it with fresh fruit or a light salad. It also goes perfectly with grilled chicken or fish. For a fun twist, try it with spicy tacos. The sweet and tangy lemonade cools down the heat. Serve it over ice for a refreshing treat. Enjoy the colorful look with mint and lemon slices on top, making your table even more inviting. {{image_4}} You can make mango lemonade even better by adding other fruits. Try mixing in fresh berries like strawberries or blueberries. Pineapple also works great. These fruits add extra color and fun flavors. To do this, simply blend the fruits with the mango before mixing with the lemonade. Each fruit brings its own unique taste, making your drink more exciting. Want to spice things up? You can turn mango lemonade into a fun adult drink. Add rum or vodka for a spiked version. Use about 1 to 2 ounces of your favorite spirit per glass. This addition gives the drink a kick, perfect for parties or summer gatherings. Just remember to drink responsibly! Get creative by using flavored teas or herbal infusions in your mango lemonade. You can brew a light green tea or a refreshing mint tea. Once it cools, mix it into your lemonade base. This adds a whole new layer of flavor. You can even try herbal infusions like chamomile for a soothing twist. Explore these options to find your favorite mix. The full recipe will guide you through making this delightful drink. To keep your mango lemonade fresh, store it in an airtight container. A glass jar or a pitcher works well. Make sure to seal it tightly to prevent any odors from the fridge from mixing in. Always place it in the coldest part of the fridge, usually towards the back. This helps keep it cool and refreshing. Your mango lemonade will stay fresh for about 3 to 5 days. After that, the flavors may start to fade. If it starts to taste less vibrant, you might want to add a little more lemon juice or honey to revive it. Always check for any changes in smell or color before drinking. If you want to save some for later, freezing is a great option. Pour the mango lemonade into ice cube trays or freezer-safe bags. Leave a little space at the top, as liquids expand when frozen. When you want to enjoy it again, just thaw it in the fridge overnight. You can also blend the frozen cubes into smoothies for an instant fruity treat. For the full recipe, check out the [Full Recipe]. Mango lemonade is packed with vitamins. Mangoes are rich in vitamin C, which helps boost your immune system. They also contain vitamin A, good for your eyes and skin. The lemon juice adds more vitamin C and antioxidants. Together, they help you stay hydrated and healthy. Drinking mango lemonade can also support digestion due to its natural enzymes. Yes, you can use frozen mangoes! They make a great substitute. When you use frozen mango, it still blends well into a smooth puree. You do not need to thaw them first. Just add them to the blender with some water and blend until smooth. This makes it easy for you to enjoy mango lemonade anytime, even when fresh mangoes aren't available. To make your mango lemonade less tart, add more sweetness. You can increase the honey or agave syrup. Start with a little, then taste and add more if needed. If it’s still too sour, you can add more mango puree. A pinch of salt can also help balance the flavors. This way, you will enjoy a sweeter, more balanced drink. This mango lemonade recipe is sure to refresh you. We covered the ingredients, step-by-step instructions, and variations to try. Don't forget to adjust sweetness and explore fun combos. You can enjoy this drink fresh or store it for later. Whether you sip it by itself or with snacks, it's a bright treat. I hope you’re excited to make this delicious drink and share it with others!](https://fastmealmate.com/wp-content/uploads/2025/07/c517a603-1516-4e83-8a0a-b9bae852f1a0-768x768.webp)