
Easy Honey Garlic Chicken Flavorful Weeknight Meal
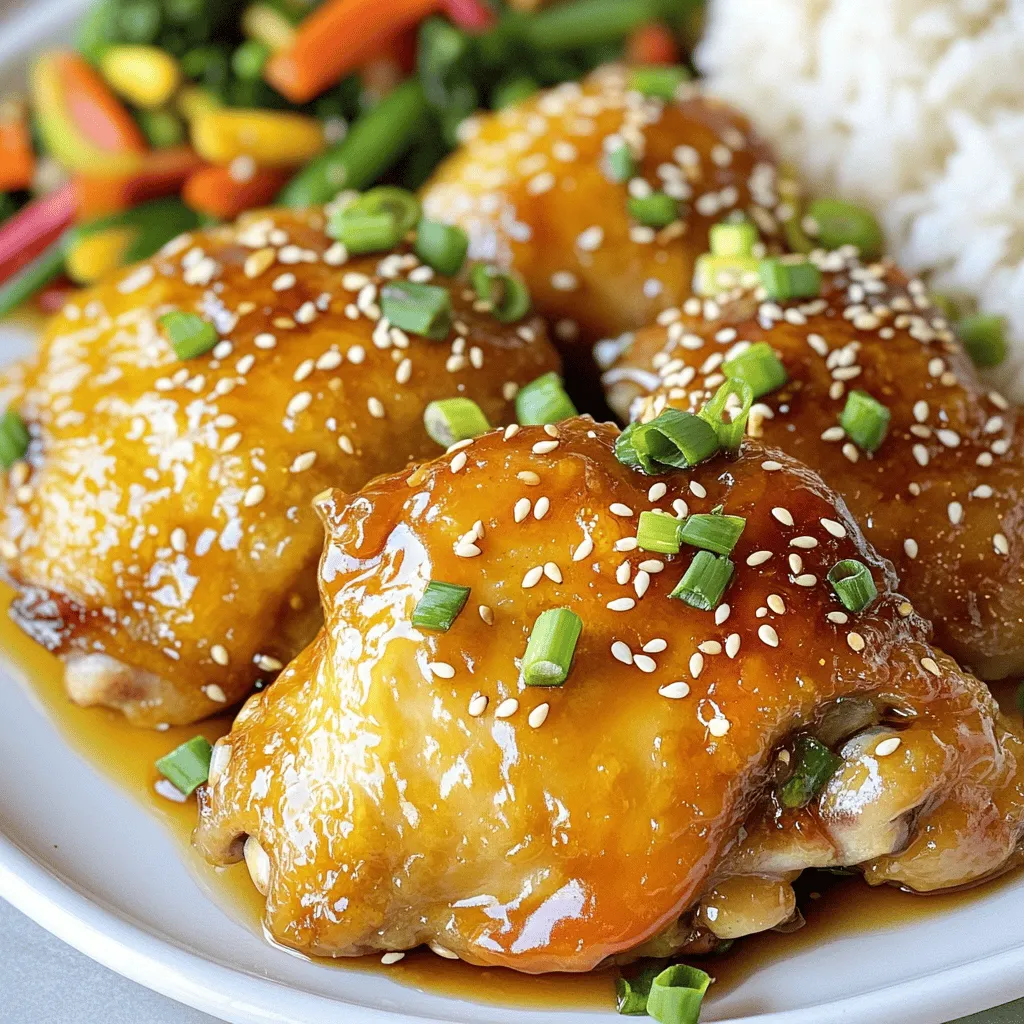
If you’re looking for a quick and tasty dinner, Easy Honey Garlic Chicken is for you. This dish combines sweet honey, savory garlic, and juicy chicken for a meal that wins every time. You’ll love how simple it is to make with just a few ingredients. In this post, I’ll share clear steps, tips for the perfect sauce, and ideas for sides. Let’s make your weeknight dinner exciting and delicious!
Ingredients
Main Ingredients for Easy Honey Garlic Chicken
To make this dish, you need a few key items:
– 4 boneless, skinless chicken thighs
– 1/4 cup honey
– 1/4 cup low-sodium soy sauce
– 4 cloves of garlic, finely minced
– 1 tablespoon fresh ginger, finely grated
– 2 tablespoons vegetable oil
– 1 teaspoon sesame oil
– Salt and freshly cracked black pepper, to taste
– 1 teaspoon cornstarch (optional, for thickening the sauce)
– Chopped green onions for garnish
– Sesame seeds for garnish (optional)
These ingredients blend to create a sweet and savory flavor that makes this meal a favorite.
Optional Ingredients for Customization
You can make this dish your own with a few fun twists. Here are some ideas:
– Add a dash of chili flakes for heat.
– Use lime juice for a zesty kick.
– Swap in different proteins like shrimp or tofu.
– Mix in veggies like bell peppers or snap peas for color and crunch.
These options let you tailor the dish to your taste and mood.
Tools and Equipment Needed
To prepare Easy Honey Garlic Chicken, gather these tools:
– A large skillet for cooking the chicken.
– A mixing bowl to combine the sauce.
– A whisk to blend the ingredients well.
– A sharp knife for chopping and mincing.
– A cutting board for safe prep.
Having the right tools makes cooking easier and more fun.
Step-by-Step Instructions
Prep the Ingredients
Start by gathering all your ingredients. You will need:
– 4 boneless, skinless chicken thighs
– 1/4 cup honey
– 1/4 cup low-sodium soy sauce
– 4 cloves of garlic, finely minced
– 1 tablespoon fresh ginger, finely grated
– 2 tablespoons vegetable oil
– 1 teaspoon sesame oil
– Salt and freshly cracked black pepper, to taste
– 1 teaspoon cornstarch (optional, for thickening the sauce)
– Chopped green onions for garnish
– Sesame seeds for garnish (optional)
Next, finely mince the garlic and grate the ginger. This step adds great flavor to your dish.
Cooking the Chicken
Now, season the chicken thighs. Sprinkle salt and black pepper on both sides. Heat vegetable oil in a skillet over medium-high heat. When the oil is hot, add the chicken thighs. Sear them for 5-6 minutes on each side. Look for a golden brown color. Make sure the chicken reaches an internal temperature of 165°F (74°C). This ensures it is fully cooked.
Making the Honey Garlic Sauce
Once the chicken is ready, lower the heat to medium. Grab your mixing bowl with the honey, soy sauce, garlic, and ginger mixture. Pour this sauce over the chicken in the skillet. Let it simmer for about 5 minutes. As it cooks, the sauce will thicken.
If you want a thicker sauce, mix cornstarch with one tablespoon of water. Stir this slurry into the skillet. Keep stirring until the sauce reaches your desired thickness.
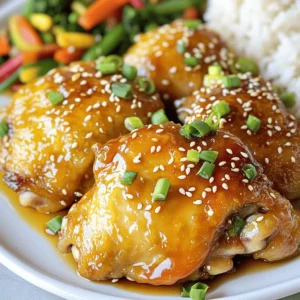
After that, remove the skillet from heat. Serve the chicken with a sprinkle of chopped green onions and sesame seeds for a nice look. Enjoy your Easy Honey Garlic Chicken!
Tips & Tricks
Perfecting the Chicken Thighs
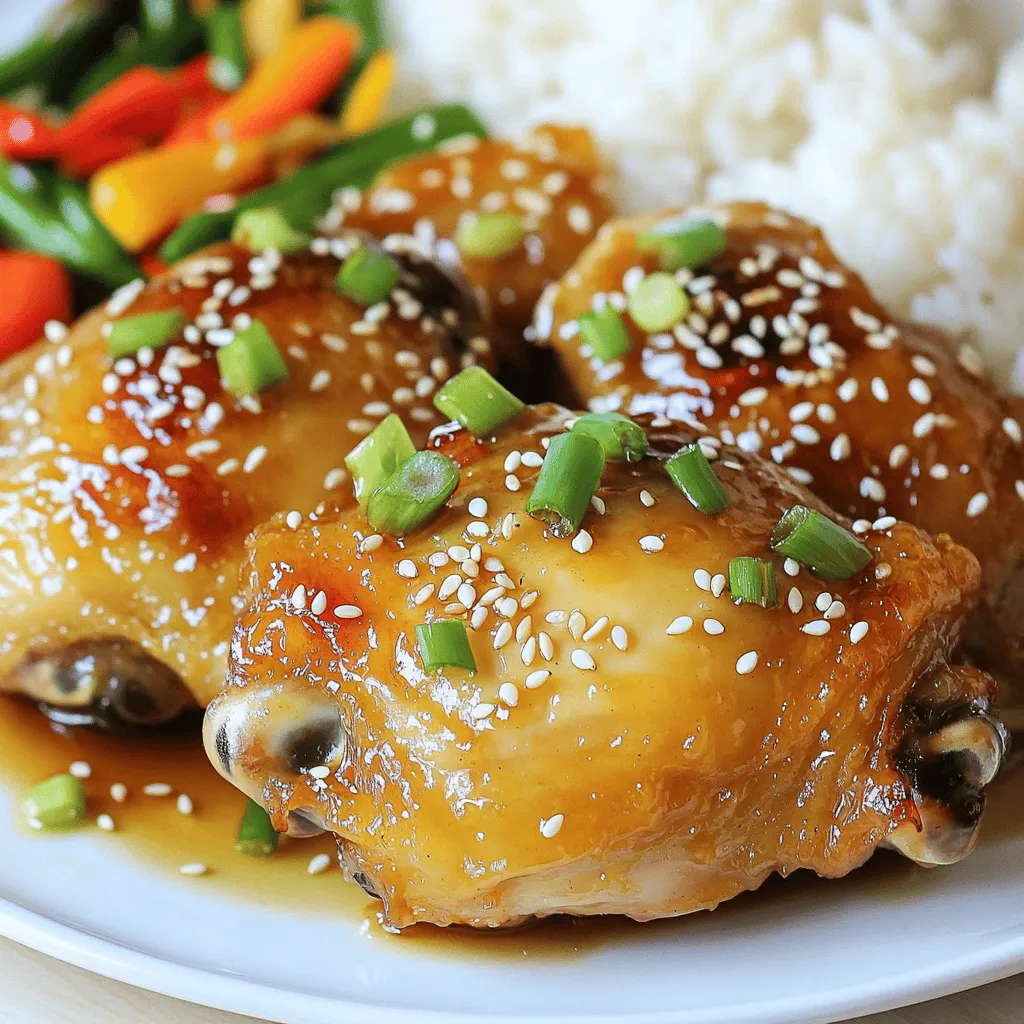
To get juicy chicken thighs, choose the right cut. Boneless, skinless thighs work best. They stay moist and tender during cooking. Season the chicken well with salt and pepper before cooking. This adds flavor right from the start. Sear the chicken in hot oil for a golden crust. Cook each side for about 5-6 minutes. Always check the internal temperature to ensure it reaches 165°F (74°C). This keeps the chicken safe to eat.
Achieving the Ideal Sauce Consistency
The sauce is key to this dish. Start by mixing honey, soy sauce, garlic, and ginger. Whisk them together until smooth. Pour this sauce over cooked chicken in the skillet. Allow it to simmer for about 5 minutes. If you want a thicker sauce, use cornstarch mixed with water. Stir it in slowly until the sauce coats the chicken. This will give it a nice, rich finish.
Serving Suggestions and Pairings
Serve your honey garlic chicken with fluffy rice. This balances the sweet and savory flavors nicely. A side of stir-fried vegetables adds color and nutrition. For presentation, garnish with chopped green onions and sesame seeds. It makes the dish look appealing and adds extra crunch. Enjoy this meal with family or friends for a tasty weeknight dinner.
Variations
Alternative Proteins
You can switch up the protein in this dish. Chicken thighs are great, but try chicken breasts for a leaner option. If you want something different, use shrimp or tofu. Both will soak up that sweet and savory honey garlic sauce. For a heartier choice, pork tenderloin works well too. Just adjust the cooking time to ensure everything cooks through.
Modifying Flavor Profiles
Want to change the taste? You can easily modify the flavor. Add a splash of rice vinegar for tanginess. If you love spice, toss in some red pepper flakes or sriracha. Want a fresh herb twist? Add chopped cilantro or basil right before serving. Each change gives this dish a new vibe, so have fun experimenting!
Low-Carb or Keto-Friendly Options
If you’re on a low-carb or keto diet, you can still enjoy this dish. Substitute honey with a sugar-free sweetener like erythritol. Replace soy sauce with coconut aminos for a lower carb count. You can also serve the chicken over cauliflower rice instead of regular rice. This way, you keep the taste while staying on track with your diet.
Storage Info
Storing Leftovers
After enjoying your easy honey garlic chicken, you might have some left. To store leftovers, let the chicken cool down first. Then, place it in an airtight container. The chicken will stay fresh in the fridge for up to three days. If you want to keep it longer, consider freezing it.
Reheating Instructions
When you’re ready to eat your leftovers, reheating is simple. You can use the microwave or a skillet. For the microwave, place the chicken on a plate and cover it. Heat in 30-second intervals until warm. If you prefer the skillet, add a bit of water to the pan. Heat over medium heat, turning the chicken until it’s hot. This keeps the chicken juicy.
Freezing Honey Garlic Chicken
To freeze honey garlic chicken, first, let it cool completely. Then, wrap it tightly in plastic wrap or foil. Place it in a freezer-safe bag and remove as much air as possible. Label it with the date. This dish can last up to three months in the freezer. When you’re ready to eat, thaw it in the fridge overnight before reheating.
FAQs
Can I use chicken breast instead of thighs?
Yes, you can use chicken breast instead of thighs. Chicken breast is leaner, which means it may cook faster. Keep an eye on the cooking time. Cook it until it reaches 165°F (74°C). Thighs tend to be juicier and more flavorful, but breasts work just fine in this recipe.
How to adjust the sweetness of the sauce?
To adjust the sweetness, you can add more or less honey. If you want it sweeter, add a tablespoon more honey. If you prefer a less sweet sauce, reduce the honey by a tablespoon. You can also balance the sweetness with a splash of apple cider vinegar or lime juice. This adds a nice tang and depth to the flavor.
What can I serve with Easy Honey Garlic Chicken?
This dish pairs well with several sides. Here are some great options:
– Steamed rice
– Stir-fried vegetables
– Quinoa
– Mashed potatoes
– A fresh salad
Each side complements the sweet and savory flavors of the chicken. For a full meal, try serving the chicken with a mix of fluffy rice and colorful stir-fried veggies.
You now have a clear guide to making Easy Honey Garlic Chicken. We covered key ingredients, tools, and step-by-step cooking directions. I shared tips to perfect your dish, including how to adjust flavors and enjoy different variations. Finally, we discussed storage options for leftovers. Remember, this dish is easy to make and can suit any taste. Enjoy experimenting with it in your kitchen!
![- 1 pound ground beef (80/20 blend) - ½ teaspoon salt - ½ teaspoon black pepper - ½ cup cheddar cheese, shredded - ½ cup mozzarella cheese, shredded - 4 large flour tortillas - 4 tablespoons cream cheese, softened - ¼ cup dill pickles, diced - ¼ cup diced tomatoes - ¼ cup onion, minced - 2 tablespoons ketchup - 2 tablespoons mustard - Olive oil, for cooking Creating Cheeseburger Quesadilla Smash Sliders is a fun way to enjoy flavors. With the right ingredients, your sliders burst with taste. First, let’s start with the beef. I like using an 80/20 blend. This mix gives a juicy bite. Next, season it well with salt and pepper. Don't skip this step; flavor is key. For the cheese, I use both cheddar and mozzarella. The cheddar brings a sharp taste, while mozzarella melts beautifully. You can feel the cheese stretch in every bite. The flour tortillas are the base for these sliders. They hold everything together and crisp up nicely when cooked. I recommend using large tortillas for easier assembly. Cream cheese adds richness. Spread it on the tortillas for a creamy layer. Then, top it off with diced dill pickles, tomatoes, and onions. These toppings add crunch and freshness. Finally, drizzle some ketchup and mustard for that classic burger taste. Use olive oil to cook the quesadillas. It helps create a golden brown crust while keeping everything moist inside. For the full recipe, check the details above. This will guide you step by step to create your own Cheeseburger Quesadilla Smash Sliders. Enjoy the flavor explosion! To start, grab a medium mixing bowl. Add 1 pound of ground beef, ½ teaspoon of salt, ½ teaspoon of black pepper, and 1 teaspoon of garlic powder. Use your hands to mix everything gently. Once mixed, divide the beef into small patties, each about 2-3 ounces. Next, heat a skillet on medium heat. Add a drizzle of olive oil. When the pan is hot, place the patties in the skillet. Cook for 3-4 minutes until they turn brown. Flip them over and cook for another 3-4 minutes. Once done, remove the patties and set them aside on a plate. Now it's time to build your quesadilla! Lower the skillet heat to medium-low. Take 4 large flour tortillas and spread 1 tablespoon of softened cream cheese on one side of each tortilla. Place one tortilla in the skillet with the cream cheese-side facing up. Add a generous amount of cheddar cheese, then stack half of the cooked burger patties on top. Next, sprinkle on the diced pickles, diced tomatoes, and minced onions. Drizzle a bit of ketchup and mustard over this. Finish by adding a layer of shredded mozzarella cheese. Carefully place another tortilla on top, cream cheese-side down. Press it gently with a spatula to hold everything together. Cook the quesadilla for about 2-3 minutes. Look for a golden-brown color on the bottom tortilla and melted cheese. Now, flip the quesadilla gently and cook the other side for another 2-3 minutes. When both sides are browned, take the quesadilla off the heat. Let it cool for a minute, then slice it into quarters or sliders. Repeat this for the rest of your tortillas and filling ingredients. Serve the warm cheeseburger quesadilla sliders on a platter. I like to add extra diced pickles and some ketchup and mustard for dipping on the side. Enjoy this flavor explosion! For the full recipe, check out the [Full Recipe]. To make the best burger texture, use ground beef that is 80/20. This mix provides the right fat content for juicy patties. When you form the patties, handle the meat gently. Overworking it can make the burgers tough. Aim for small patties, about 2-3 ounces, for sliders. For seasoning, keep it simple. A mix of salt, black pepper, and garlic powder works great. These flavors enhance the beef without overpowering it. Be sure to season both sides of each patty before cooking. This will help lock in the taste. To get that perfect cheese melt, use a mix of cheeses. Cheddar and mozzarella are my go-tos. Cheddar adds sharpness, while mozzarella brings stretchiness. Spread cheese evenly, so it melts all the way through. For a fun twist, try pepper jack cheese for a spicy kick. You can also experiment with gouda or fontina. These will add richness and depth. Just remember to slice the cheese thinly for quicker melting. Cooking your quesadillas to a perfect golden brown is key. Use medium-low heat for even cooking. This prevents burning while letting the cheese melt fully. When flipping quesadillas, use a large spatula. Slide it under the quesadilla gently to avoid spills. If you're nervous about flipping, consider using a plate. Simply slide one side onto the plate, then flip it back into the pan. This method keeps your fillings intact. {{image_4}} You can switch up the meat in this dish. Ground turkey or chicken works well. Both have a lighter flavor but still taste great. For a plant-based option, try lentils or black beans. These give you a nice texture and flavor. Using these options can help you cater to different diets. To boost taste, add spices like paprika or cumin. These spices add warmth and depth. You can also mix in sauces, like barbecue or sriracha, for a kick. Experimenting with different cheeses can change the flavor too. Pepper jack adds heat, while gouda brings a smoky taste. Topping with fresh herbs, like cilantro or chives, can brighten each bite. You can serve these quesadilla sliders in many ways. They work as a classic quesadilla or as fun sliders. For parties, cut them into smaller pieces. Arrange them on a colorful platter to impress your guests. You might also serve them with dips, like guacamole or salsa, for extra flavor. Each style can make your meal exciting and unique. To keep your cheeseburger quesadilla sliders fresh, place them in an airtight container. This helps lock in flavor and moisture. Store them in the fridge for up to three days. After that, the taste may decline, and the texture could change. If you want to save them longer, freezing is a good option. Wrap each quesadilla slider tightly in plastic wrap. Then, place them in a freezer-safe bag or container. This keeps them safe from freezer burn. You can freeze them for up to three months. When you're ready to eat, let them thaw overnight in the fridge before reheating. For the best taste, reheat using the oven. Preheat it to 350°F (175°C). Place the quesadilla sliders on a baking sheet. Heat for about 10-15 minutes, until warm and crispy. If you use a microwave, put them on a plate. Heat for 30-60 seconds. This method is faster but may not keep the crunch. To restore crunchiness, consider finishing in a hot pan for a minute. Yes, you can prepare these sliders ahead. Make the patties and cook them. Let them cool. Then, store them in the fridge. When ready to serve, assemble the quesadillas. You can use either fresh tortillas or pre-made ones. If you use pre-made tortillas, spread cream cheese and layer the fillings. Cook them quickly in a hot skillet. This way, they stay crispy and warm. You can serve many tasty sides with these sliders. Consider some crispy fries or sweet potato fries. They pair well with the cheesy sliders. A fresh salad can balance the richness. You might also try dipping sauces like ranch or spicy mayo. These add extra flavor and fun. You could even serve a zesty salsa for a fresh kick. To make these sliders vegetarian, swap out the beef for a meat alternative. You could use black beans or lentils as a base. Another option is to use plant-based burger patties. Just season them like the beef. Add your favorite toppings, like cheese and veggies. You can still enjoy the same great flavors without meat. Just make sure all the other ingredients are vegetarian-friendly. You can make tasty Cheeseburger Quesadilla Smash Sliders easily. Start with classic ingredients and follow straightforward steps for delicious results. Don’t forget to try different proteins and toppings to suit your taste. Storing any leftovers is simple, and reheating them will keep them just as good. With these tips, you can impress guests or enjoy a fun meal at home. Making this dish lets you explore flavors while fitting right into your busy day. Enjoy your cooking adventure!](https://fastmealmate.com/wp-content/uploads/2025/07/3ea5f9d6-0f24-4765-99ee-1beab0673b04-768x768.webp)
![- 2 cups grated zucchini or yellow squash - 1 cup breadcrumbs (preferably seasoned) - 1/2 cup grated parmesan cheese - 1/4 cup finely chopped onion - 2 cloves garlic, minced - 2 large eggs - 1 teaspoon dried oregano - 1/2 teaspoon salt - 1/4 teaspoon black pepper - 1/4 cup fresh parsley, chopped (optional) - Skillet - Cooking oil - Mixing bowl - Kitchen towel Mom's squash patties use simple ingredients. The main ones are zucchini or yellow squash. You need seasoned breadcrumbs to add flavor. Parmesan cheese gives a nice touch. Onions and garlic boost the taste. Eggs help bind everything together. Spices like oregano, salt, and pepper add extra flavor. Fresh parsley adds color and freshness to the mix. For cooking, you will need a skillet and some oil. A mixing bowl helps combine all ingredients. A kitchen towel is handy for squeezing out squash moisture. This is part of the [Full Recipe]. Start by grating the zucchini or yellow squash. I use a box grater for this. Then, take the grated squash and put it in a clean kitchen towel or cheesecloth. Squeeze it hard to drain as much moisture as you can. This step is key. If there is too much moisture, the patties will be soggy. We want them crispy and delicious. In a large bowl, combine the drained squash with the other ingredients. Add breadcrumbs, grated parmesan cheese, chopped onion, minced garlic, eggs, dried oregano, salt, and black pepper. If you like, toss in some chopped parsley too. Mix everything well using your hands or a spoon. The mixture should feel a bit sticky and hold together well. This texture helps the patties stay intact while cooking. Next, heat a large skillet on medium heat. Pour in enough olive oil to cover the bottom of the pan. Wait until the oil shimmers, but don’t let it smoke. This shows it’s hot enough for frying. Scoop about 1/4 cup of the squash mix and shape it into a patty. Gently place it in the hot skillet. Don’t overcrowd the pan. Leave space between each patty for even cooking. Cook the patties for about 4 to 5 minutes on each side. They should turn golden brown and crispy. Keep an eye on the heat. Adjust it as needed to prevent burning. You might need to fry in batches, depending on your skillet size. Once cooked, take them out and place them on a plate lined with paper towels. This will soak up any extra oil and keep the patties crispy. Follow these steps, and you'll have lovely, golden squash patties ready to enjoy! For the full recipe, check out the earlier section. To get the best texture, you want your patties crispy, not soggy. Start by squeezing out moisture from the grated squash. Use a clean kitchen towel for this. If you skip this step, your patties may fall apart or become mushy. Keep the right ratio of ingredients. Too much squash can lead to sogginess. Aim for two cups of squash to one cup of breadcrumbs. This balance helps create a sturdy patty. Cooking time is key. Heat your skillet to medium. This temperature helps the patties cook evenly. If the heat is too low, they won’t crisp up. If it’s too high, they may burn. Fry each side for 4-5 minutes. Check for a golden brown color. Don’t rush this process. Undercooked patties can be mushy, while overcooked ones can taste dry. For serving, add tasty condiments. A dollop of yogurt or sour cream works great. Fresh herbs like parsley add color and flavor. You can also pair these patties with a salad or roasted veggies. They make a lovely side for grilled meats too. Explore different sauces like tzatziki or spicy ketchup for extra flavor. Enjoy making these patties your own! {{image_4}} You can change the squash for variety. Try using butternut squash or pattypan squash. Each type gives a unique taste and texture. You can also add more veggies. Grated carrots or bell peppers mix well. Fresh herbs, like basil or thyme, add a fresh kick. You can bake these patties instead of frying them. Just place them on a baking sheet and drizzle with olive oil. Bake at 400°F for 20 minutes, flipping halfway through. This method makes them a bit healthier. An air fryer is another option. It cooks them fast and gives a nice crisp without much oil. Set the air fryer to 375°F and cook for about 12-15 minutes. Adding cheese can elevate the flavor. Try feta, cheddar, or even goat cheese. Each brings a different taste. You can also play with spices. Add a pinch of cumin for warmth or smoked paprika for depth. Experimenting with flavors can lead to your perfect batch of patties. Check out the Full Recipe for more ideas! To store leftovers, let the patties cool first. Place them in an airtight container. This helps to keep them fresh. You can store them in the fridge for up to three days. To extend freshness, reheat only what you will eat. This avoids sogginess in the remaining patties. For freezing, make sure the patties are fully cooled. Arrange them in a single layer on a baking sheet. Place the sheet in the freezer until they are solid. Then transfer them to a freezer bag. This method helps prevent them from sticking together. When ready to eat, reheat frozen patties in the oven. Bake them at 350°F for about 15 minutes or until hot. The expected freshness duration is about three days in the fridge. Frozen patties can last up to three months. Signs of spoilage include a sour smell or a change in color. If you notice any of these, it’s best to discard them. Fry the patties for about 4 to 5 minutes on each side. This cooking time gives them a nice golden color and crispy texture. Make sure to keep an eye on them. If the heat is too high, they may burn. Adjust the heat as needed for even cooking. Yes, you can make these patties gluten-free. Instead of breadcrumbs, use gluten-free breadcrumbs or crushed gluten-free crackers. You can also use ground oats as a substitute. Just check the labels to ensure they're gluten-free. These patties pair well with many side dishes and sauces. Here are some great options: - A fresh salad with lemon vinaigrette - Creamy yogurt or sour cream for dipping - Applesauce for a sweet contrast - Grilled vegetables or a medley of roasted root veggies - A slice of lemon to brighten the dish For the full recipe, check out Mom's Heavenly Squash Patties. Enjoy! This blog post covered how to make delicious squash patties. We looked at key ingredients, preparation steps, and cooking tips. I shared ways to adjust the recipe and storage methods for leftovers. Making these patties can be fun and simple. You can explore new flavors and textures that suit your taste. Enjoy these tips, and I hope you create something tasty. Experimenting in the kitchen leads to great meals!](https://fastmealmate.com/wp-content/uploads/2025/06/c31883a2-1cc5-40ff-adb3-b1ed6b0d87a1-768x768.webp)