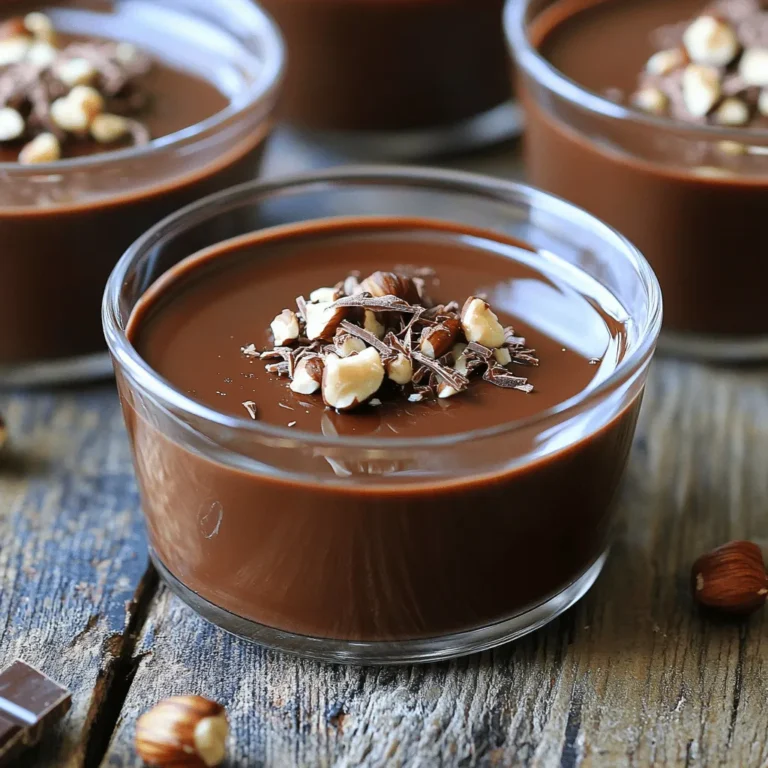
No Bake Mini Lemon Cheesecakes Fresh and Easy Treat

Looking for a quick and tasty dessert? You’ll love these No Bake Mini Lemon Cheesecakes! They are fresh, creamy, and so simple to make. With just a few ingredients like cream cheese, fresh lemons, and graham crackers, you can whip up these delightful treats in no time. Whether you’re entertaining guests or craving a sweet snack, these cheesecakes are perfect. Let’s dive into the easy steps to create this delicious dessert!
Ingredients
Main Ingredients
– 1 cup crushed graham crackers
– 1/4 cup granulated sugar
– 1/2 cup unsalted butter, melted
– 16 oz cream cheese, softened
– 1 cup powdered sugar
– 1/4 cup fresh lemon juice (about 1-2 lemons)
– Zest of 2 lemons
– 1 teaspoon vanilla extract
– 1 cup heavy whipping cream, cold
To make these mini lemon cheesecakes, you will need a few key items. First, the crust gets its crunch from crushed graham crackers. I mix them with sugar and melted butter. This forms a base that is rich and tasty.
Next, the filling is where the magic happens. Cream cheese makes it creamy. Heavy cream adds lightness. Fresh lemons give it that zesty kick. Finally, a splash of vanilla extract brings everything together. These flavors create a treat that feels special.
Optional Garnishes
– Fresh berries (blueberries, raspberries)
– Extra lemon zest
For a finishing touch, you can add some fresh berries. Blueberries and raspberries look great. They also boost the flavor. A sprinkle of lemon zest on top adds color and extra zing. These garnishes make your cheesecakes pop!
Step-by-Step Instructions
Preparing the Crust
First, gather your ingredients. You need graham crackers, sugar, and melted butter. In a mixing bowl, combine one cup of crushed graham crackers with a quarter cup of sugar and half a cup of melted butter. Mix until it looks like wet sand. This will hold together well.
Next, line a muffin tin with mini cupcake liners. Divide the mixture evenly among the liners. Use about a tablespoon for each one. Press it down firmly. This forms a nice base. Place the muffin tin in the fridge while you prepare the filling.
Making the Cheesecake Filling
Now it’s time for the cheesecake filling. In a large bowl, beat sixteen ounces of softened cream cheese until it’s smooth. This should take about two to three minutes.
Slowly add in one cup of powdered sugar, a quarter cup of fresh lemon juice, the zest of two lemons, and one teaspoon of vanilla extract. Mix on low speed for two more minutes. You want it to be fluffy and well combined.
Assembling the Cheesecakes
In a separate bowl, pour one cup of cold heavy whipping cream. Whip it on medium-high speed until stiff peaks form. This will take about three to five minutes.
Gently fold the whipped cream into the cream cheese mix. Use a spatula and be careful not to deflate the whipped cream. You want the filling to be light and airy.
Now, fill each mini cheesecake crust with the lemon filling. You can use a spoon or a piping bag for this. Smooth the tops with a spatula or the back of a spoon for a polished look.
Chilling Process
Cover the muffin tin with plastic wrap. Refrigerate the cheesecakes for at least four hours. For the best taste, chill them overnight. This helps them set properly.
When you’re ready to serve, gently remove each mini cheesecake from the muffin tin. Garnish with fresh berries on top. A light sprinkle of lemon zest adds color and flavor.
Tips & Tricks
Preventing Sogginess
To keep your crust dry, avoid overmixing the graham cracker mix. When you combine the crushed graham crackers, sugar, and butter, mix just until it looks like wet sand. Too much mixing can add moisture and make the crust soggy.
Chilling is key! After pressing the crust into the liners, refrigerate the muffin tin for at least 30 minutes. This helps the crust hold its shape when you add the filling.
Achieving the Perfect Whip
Whipping cream is easy if you follow a few tips. Make sure your heavy cream is very cold before you start. Use a clean bowl and beaters for best results. As you whip the cream, watch for stiff peaks to form. This will take about 3-5 minutes on medium-high speed.
When folding the whipped cream into the cream cheese mix, use a spatula. Gently lift and fold without stirring too hard. This keeps the mixture light and fluffy.
Serving Suggestions
When it’s time to serve, think about how to make it look nice. Place the mini cheesecakes on a colorful platter. You can add whole berries around them to create a vibrant display.
For the best taste, pair these cheesecakes with a refreshing drink, like lemonade or iced tea. The bright flavors will match perfectly with your treats. For extra appeal, sprinkle lemon zest on top right before serving to add color and flavor.

Variations
Flavor Swaps
You can easily change the flavor of these mini cheesecakes. Try using lime or orange instead of lemon. These fruits give a fresh twist to the taste. You can also add chocolate or berry flavors. Mix in some melted chocolate for richness. Swirl in berry puree for a fruity touch. Each swap can create a fun new dessert.
Dietary Adjustments
If you need gluten-free options, use gluten-free graham crackers. They work just as well for the crust. For those who want dairy-free cheesecakes, try using a dairy-free cream cheese. Many brands offer great alternatives. This way, everyone can enjoy a tasty dessert without worry.
Storage Info
Best Practices for Refrigeration
No Bake Mini Lemon Cheesecakes stay fresh in the fridge for about five days. Store them in an airtight container. This keeps them from drying out and protects their bright flavors.
Freezing Guidelines
Yes, you can freeze mini cheesecakes! They freeze well and can last up to three months. To freeze, first place them in a single layer on a baking sheet. Once they are frozen solid, transfer them to a freezer-safe container. Make sure to separate layers with parchment paper to avoid sticking. When ready to enjoy, thaw them in the fridge overnight for a fresh taste.
FAQs
How to make No Bake Mini Lemon Cheesecakes?
To make No Bake Mini Lemon Cheesecakes, follow these easy steps:
1. Start by mixing crushed graham crackers, sugar, and melted butter.
2. Press this mixture into mini cupcake liners to form the crust.
3. In a bowl, beat softened cream cheese until smooth.
4. Add powdered sugar, lemon juice, lemon zest, and vanilla.
5. In another bowl, whip cold heavy cream to stiff peaks.
6. Gently fold the whipped cream into the cream cheese mix.
7. Fill each crust with the lemon cheesecake filling.
8. Cover and chill for at least four hours.
This process gives you a creamy, tangy treat without baking.
How long do No Bake Mini Lemon Cheesecakes need to set?
These mini cheesecakes need to chill for at least four hours. I recommend leaving them overnight. This extra time helps the flavors blend and the texture firm up. A longer chill also makes them easier to remove from the liners. The cheesecakes will taste better when fully set!
Can I substitute ingredients in the recipe?
Yes, you can! Here are some common substitutions:
– Gluten-free crust: Use gluten-free graham crackers or almond flour.
– Dairy-free option: Swap cream cheese for a dairy-free version.
– Sweetener swap: Use honey or maple syrup instead of sugar.
These swaps can make the recipe fit your diet. Enjoy your delicious treats!
In this post, we explored how to make easy no-bake mini lemon cheesecakes. You learned about the key ingredients like crushed graham crackers and cream cheese. We also covered step-by-step instructions, tips for success, and storage methods.
These mini cheesecakes are simple and fun to prepare. They impress at any gathering. With some creativity, you can personalize flavors and toppings. Enjoy making these tasty treats!


![To make Easy Roasted Tomato Soup, gather these key ingredients: - 2 pounds of ripe, juicy tomatoes, halved - 1 medium onion, cut into quarters - 4 cloves of garlic, left unpeeled - 2 tablespoons of extra virgin olive oil - Sea salt and freshly cracked black pepper, to taste - 1 teaspoon of dried basil - 1 teaspoon of sugar (optional, to counterbalance acidity) - 4 cups of rich vegetable broth - 1/2 cup of heavy cream (optional, for a luscious finish) - Fresh basil leaves, for a lovely garnish These ingredients create a base that bursts with flavor. The tomatoes give the soup its rich taste. The onion adds sweetness, while garlic brings depth. You can add optional ingredients to boost the flavor: - A splash of balsamic vinegar for acidity - A pinch of red pepper flakes for heat - A teaspoon of smoked paprika for a smoky taste These extras can transform the soup into something special. Feel free to experiment and find your favorite combination. To prepare this soup, you’ll need a few handy tools: - A large baking sheet for roasting - A pot for cooking the soup - An immersion blender or a standard countertop blender - A cutting board and sharp knife for prep Having the right tools makes cooking easier. With these, you’ll create a smooth, tasty soup that warms the soul. For the complete recipe, check out the [Full Recipe]. To start, gather all your ingredients. You need: - 2 pounds of ripe, juicy tomatoes, halved - 1 medium onion, cut into quarters - 4 cloves of garlic, left unpeeled - 2 tablespoons of extra virgin olive oil - Sea salt and freshly cracked black pepper, to taste - 1 teaspoon of dried basil - 1 teaspoon of sugar (optional) - 4 cups of rich vegetable broth - 1/2 cup of heavy cream (optional) - Fresh basil leaves for garnish First, wash the tomatoes well. Cut them in half and place them on a baking sheet. Next, quarter the onion and add it to the sheet. Toss in the unpeeled garlic cloves. Now, drizzle the olive oil over the veggies. Sprinkle sea salt, black pepper, and dried basil on top. If you want to balance the soup's acidity, add sugar now. Preheat your oven to 400°F (200°C). Once the oven is ready, slide in your baking sheet. Roast the vegetables for 25-30 minutes. The tomatoes should soften and caramelize. After roasting, take the sheet out and let the veggies cool. Once cool enough to handle, peel off the garlic skins. In a large pot, combine the roasted tomatoes, onion, and garlic. Add the vegetable broth and place the pot over medium heat. Bring the mixture to a gentle simmer. Use an immersion blender to puree the soup until smooth. If you don’t have one, carefully transfer the soup to a blender. Make sure to leave space for steam to escape. If you want a rich finish, stir in the heavy cream now. Taste the soup and adjust the seasoning. Heat until hot throughout. Finally, serve the soup in bowls. Garnish with fresh basil leaves for color and flavor. Enjoy your delicious, comforting bowl of roasted tomato soup! To get a smooth soup, use an immersion blender. It makes blending easy. If you prefer, you can blend in batches with a regular blender. Just leave space for steam. For a thicker texture, add less broth. If you like it thinner, add more broth. You can also stir in heavy cream for extra richness. It adds a nice velvety feel. One mistake is not roasting the tomatoes long enough. They need time to caramelize and develop flavor. Don’t skip the sugar if your tomatoes are very acidic. It balances the taste. Also, remember to peel the garlic after roasting. Skins can affect the smoothness of your soup. Finally, taste your soup before serving. Adjust salt and pepper to match your flavor. Serve your soup hot, garnished with fresh basil leaves. They add color and flavor. Pair it with a grilled cheese sandwich for a classic combo. You can also serve it with crusty bread for dipping. For a twist, add a drizzle of balsamic glaze on top. This adds a sweet tang that enhances the soup. For the full recipe, check the details above. {{image_4}} You can easily make this soup vegan. Just skip the heavy cream. Use more vegetable broth instead. This keeps the soup rich and tasty. The roasted tomatoes give it a great flavor. You won’t miss the cream at all. Add a splash of coconut milk for creaminess if you like. It adds a nice twist! Want to spice things up? Add a pinch of red pepper flakes for heat. A dash of smoked paprika gives a warm flavor. Fresh herbs like thyme or oregano enhance the soup, too. You can also stir in a tablespoon of balsamic vinegar. It adds depth and a little sweetness. Don't forget to taste as you go! This soup is naturally gluten-free. You don’t need any flour or wheat. Just use certified gluten-free vegetable broth. This way, everyone can enjoy it. If you want to thicken the soup, use blended potatoes or a cornstarch slurry. It keeps the soup smooth without gluten. Enjoy this comforting bowl without worries! To store leftover soup, let it cool first. Pour it into an airtight container. Make sure to seal it well. Place it in the fridge. It will stay fresh for about three days. If you want to keep it longer, freezing is better. Freezing is a great way to prepare meals ahead. Use freezer-safe containers or bags. Fill them with soup, leaving some space at the top. This allows for expansion. Label the containers with the date. It can last up to three months in the freezer. When you’re ready to use it, just thaw it in the fridge overnight. To reheat your soup, use a pot on the stove. Heat it gently over medium-low. Stir often to avoid burning. If the soup is too thick, add a splash of broth or water. You can also use a microwave. Heat it in short bursts, stirring in between. Always taste before serving to check the flavor. Adjust seasoning if needed for that perfect bowl of comfort. The best tomatoes for this soup are ripe, juicy varieties. I love using Roma or vine-ripened tomatoes. They have great flavor and are less watery. You can also mix in some heirloom tomatoes for extra depth. Their sweetness adds a lovely touch to the soup. Yes, you can make this soup ahead of time. It keeps well in the fridge for up to four days. Just make sure to cool it completely before storage. You can also freeze it for up to three months. For the best taste, reheat the soup gently on the stove. To make roasted tomato soup without cream, simply skip the heavy cream. Instead, you can add a splash of vegetable broth for richness. For added creaminess, blend in some cooked white beans or cashews. They blend smoothly and give a nice texture without dairy. You’ll still enjoy a flavorful bowl of comfort. For the full recipe, check out the detailed instructions above. In this post, we explored how to make easy roasted tomato soup. We discussed key ingredients, optional flavors, and tools you need. Following the step-by-step instructions ensures success every time. I shared tips for the perfect consistency and common mistakes to avoid. You can even try vegan and gluten-free options. Lastly, I covered storage and reheating for later enjoyment. Enjoy making this warm soup and share it with others.](https://fastmealmate.com/wp-content/uploads/2025/07/8c50acbe-b26b-4fce-9348-24a1062b636d-768x768.webp)

![- 1 lb (450g) boneless, skinless chicken thighs, cut into bite-sized pieces - 4 tablespoons unsalted butter, divided - 4 cloves garlic, minced finely - 1 large lemon, zested and juiced - 1 teaspoon dried thyme - 1 teaspoon paprika - Salt and freshly ground black pepper to taste - Fresh parsley, chopped (for garnish) These ingredients make the dish shine. The chicken thighs give a tender bite. Garlic adds a strong aroma. Lemon brings brightness and tang. Butter makes everything rich and smooth. Thyme and paprika add depth and warmth. - Red pepper flakes for heat - Fresh herbs like basil or cilantro - A splash of white wine for extra richness - Honey for a touch of sweetness Adding some of these can make your dish unique. Red pepper flakes can spice things up. Fresh herbs can add a pop of freshness. A splash of wine creates a deeper flavor. Honey can balance the tartness of lemon. - Large skillet for cooking - Cutting board for prepping the chicken - Sharp knife for cutting the chicken - Measuring spoons for accuracy - Tongs for turning the chicken These tools will help you cook efficiently. A large skillet allows even cooking. A cutting board keeps the workspace tidy. A sharp knife ensures safe and quick cutting. Measuring spoons keep your flavors balanced. Tongs help with easy flipping and serving. For the detailed cooking steps and more, check the Full Recipe. Start by gathering your ingredients. You will need: - 1 lb boneless, skinless chicken thighs, cut into bite-sized pieces - 4 tablespoons unsalted butter, divided - 4 cloves garlic, minced finely - 1 large lemon, zested and juiced - 1 teaspoon dried thyme - 1 teaspoon paprika - Salt and freshly ground black pepper to taste - Fresh parsley, chopped (for garnish) Next, melt 2 tablespoons of butter in a skillet over medium heat. As it melts, season the chicken thighs with paprika, salt, and pepper. This step adds great flavor. Once the butter is bubbling, add the chicken pieces to the skillet. Spread them out evenly for the best sear. Sear the chicken for 5-7 minutes. Turn the chicken occasionally until it turns golden brown on all sides. This browning adds depth to the dish. When done, remove the chicken and set it aside on a plate. In the same skillet, melt the remaining 2 tablespoons of butter. Add the minced garlic and sauté it for about 30 seconds. Stir constantly to prevent burning. Once fragrant, stir in the lemon juice and zest, along with the dried thyme. Let this simmer for 1-2 minutes. This step melds all the flavors together. Now, return the cooked chicken to the skillet. Toss it in the lemon garlic butter sauce until well coated. Cook everything together for another 2 minutes. This helps the chicken absorb the sauce and heat through completely. Once finished, remove the skillet from the heat. Sprinkle fresh parsley over the chicken bites for a vibrant look. Serve the chicken bites in a large dish or individual bowls. Drizzle any remaining garlic butter sauce over the top. Add lemon wedges and extra parsley for an inviting presentation. For the full recipe, check the earlier section. To get juicy chicken, use boneless, skinless thighs. They cook faster and stay moist. Cut the chicken into even pieces for uniform cooking. Sear the chicken in a hot skillet. This gives a nice brown crust. Cook it for 5-7 minutes, flipping halfway through. Always check for doneness; the chicken should reach 165°F (75°C) inside. For a richer sauce, use high-quality butter. Add fresh herbs like rosemary or basil. If you like heat, toss in red pepper flakes. A splash of white wine adds depth, too. For extra zing, use fresh lemon juice instead of bottled. Don’t forget to taste and adjust seasoning. Every bite should burst with flavor. Prep your ingredients before you start cooking. Chop garlic and zest the lemon ahead of time. Use a sharp knife for quick cutting. Consider using a pre-made garlic butter if you’re short on time. You can also marinate the chicken a few hours before cooking. This step adds flavor and cuts down on cooking time. Feel free to explore the [Full Recipe] for complete instructions! {{image_4}} You can swap chicken thighs for other proteins. Try shrimp for a quick cook. Just sauté until they turn pink. You can use pork tenderloin, cut into small pieces. It cooks fast and absorbs flavor well. Even beef cubes work if you like a heartier bite. Adjust cooking time to match the protein you choose. For a vegetarian version, use mushrooms or tofu. Both soak up flavors like a sponge. Sauté mushrooms until golden brown. For tofu, press to remove water, then cut into cubes. Cook until crispy on all sides. Toss these in the lemon garlic butter sauce just like the chicken. If you have allergies, there are easy swaps. Use olive oil instead of butter for a dairy-free option. You can replace garlic with garlic powder if you're sensitive to fresh garlic. For a low-sodium version, use less salt and a salt substitute. Adjust the recipe to fit your taste and needs. Check out the Full Recipe for more ideas and details! To keep your leftover chicken bites fresh, place them in an airtight container. Make sure to let them cool to room temperature first. Store the container in the refrigerator. They will stay good for up to three days. Label the container with the date for easy tracking. Reheating is simple! You can use a skillet or microwave. For the skillet, heat a little butter over medium heat. Add the chicken bites and stir until warmed through. This keeps the flavors intact. If using a microwave, place the chicken in a microwave-safe dish. Cover it with a damp paper towel and heat in 30-second intervals until hot. If you want to freeze the chicken bites, make sure they are cool first. Place them in a freezer-safe bag or container. Remove as much air as possible to avoid freezer burn. They can last for up to three months in the freezer. When ready to eat, thaw them in the fridge overnight. Then reheat them as mentioned above. Enjoy your Lemon Garlic Butter Chicken Bites again! For the full recipe, check out the earlier section. Yes, you can use chicken breast instead of thighs. Chicken breast is leaner and will cook faster. Just make sure to cut it into similar bite-sized pieces. You may need to adjust the cooking time to keep it juicy. Lemon Garlic Butter Chicken Bites pair well with many sides. Here are a few ideas: - Steamed rice - Pasta with olive oil - Roasted vegetables - A fresh green salad - Garlic bread These options balance the rich flavors of the chicken and add variety to your meal. This recipe is not spicy. It focuses on lemon, garlic, and herbs for flavor. If you want some heat, you can add red pepper flakes. Start with a small amount and taste as you go. To keep the chicken juicy, follow these tips: - Do not overcook the chicken. Use a meat thermometer to check for doneness. - Let the chicken rest for a few minutes after cooking. This helps keep the juices inside. - Use the butter and garlic sauce generously. It adds moisture and flavor. Following these steps will help you achieve tender and juicy chicken bites. For the complete recipe, check out the [Full Recipe]. This blog covered how to make Lemon Garlic Butter Chicken Bites. We looked at key and optional ingredients, as well as the tools you need. I provided step-by-step cooking instructions and tips for perfect chicken. We explored variations, storage methods, and answered common questions. Now, you have all the tools to whip up this dish with ease. Enjoy cooking and share your tasty results!](https://fastmealmate.com/wp-content/uploads/2025/05/97cbb791-292c-4238-a79b-781f43956dc5-768x768.webp)