
Texas Sheet Cake Easy Recipe and Tips for Success
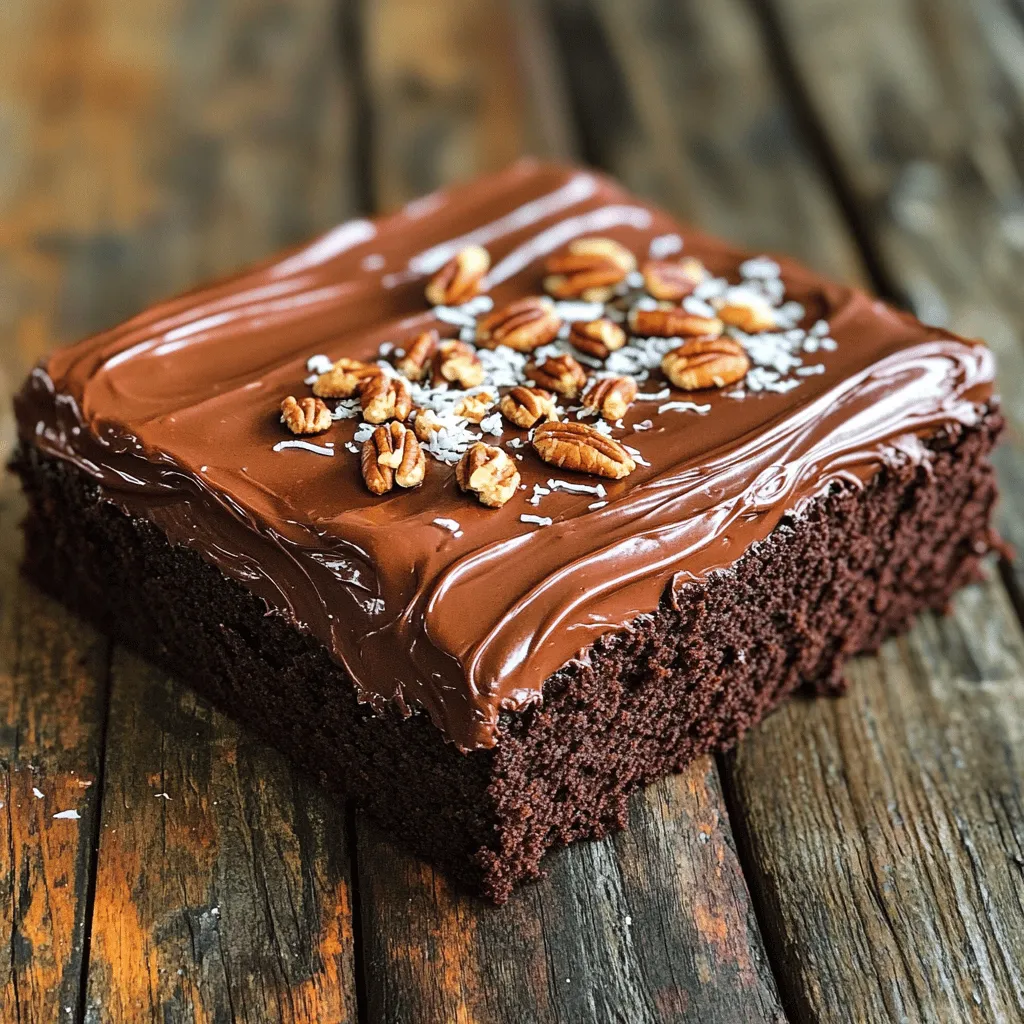
Craving a delicious dessert that’s easy and fun to make? Texas Sheet Cake is the answer! With its rich chocolate flavor and moist texture, this cake will surely impress your family and friends. In this post, I’ll share my easy recipe and tips for success, so you can whip up this sweet treat with confidence. Let’s dive into the world of Texas Sheet Cake and make your baking dreams come true!
Ingredients
Dry Ingredients
– 2 cups all-purpose flour
– 2 cups granulated sugar
– 1 teaspoon baking soda
– 1/2 teaspoon salt
Wet Ingredients
– 1 cup unsalted butter, divided
– 1 cup water
– 1/2 cup unsweetened cocoa powder
– 2 large eggs, at room temperature
– 1/2 cup buttermilk, at room temperature
– 1 teaspoon pure vanilla extract
Optional Add-ins
– 1/2 cup chopped pecans
– 1/2 cup shredded coconut
To make Texas sheet cake, gather these ingredients. Start with the dry ones. All-purpose flour forms the base. Granulated sugar gives it sweetness. Baking soda helps it rise. Salt balances the flavor.
Next, you need the wet ingredients. Unsalted butter adds richness. Water and cocoa powder create the chocolate base. Eggs bind the cake. Buttermilk keeps it moist. Vanilla adds a lovely aroma.
For added crunch, consider the optional add-ins. Chopped pecans add a nutty flavor. Shredded coconut gives extra texture. Feel free to mix and match to suit your taste.
This easy recipe uses common ingredients, making it simple and fun.
Step-by-Step Instructions
Preparation
Preheating the oven
First, I set my oven to 350°F (175°C). This temperature is key for a moist, fluffy cake.
Preparing the sheet pan
I use a large sheet pan, about 13×18 inches. I generously grease it with butter or cooking spray. Then, I dust it with flour. This step helps the cake come out easily.
Mixing the Batter
Combining dry ingredients
In a big mixing bowl, I sift together the all-purpose flour, granulated sugar, baking soda, and salt. I whisk these well to blend them. This mix is the base of our cake.
Preparing the chocolate mixture
In a medium saucepan, I melt 1 cup of unsalted butter over medium heat. Once it melts, I add 1 cup of water and 1/2 cup of unsweetened cocoa powder. I stir this until it’s smooth. Then, I bring it to a gentle boil. This mixture adds rich flavor.
Mixing wet and dry ingredients
I carefully pour the hot chocolate mix into the bowl of dry ingredients. I stir gently until it’s just combined. Next, I whisk together 2 large eggs, 1/2 cup of buttermilk, and 1 teaspoon of pure vanilla extract in a separate bowl. Once frothy, I pour it into the batter and mix until smooth. I can add chopped pecans or shredded coconut here if I want extra crunch.
Baking and Frosting
Baking the cake
I pour the batter into the prepared sheet pan. I spread it evenly with a spatula. I bake it for 20-25 minutes. To check if it’s done, I insert a toothpick into the center; it should come out clean with a few moist crumbs.
Making the frosting
While the cake is baking, I make the frosting. In a saucepan, I melt 1/2 cup of unsalted butter over medium heat. I whisk in 1/4 cup of milk and 1/4 cup of unsweetened cocoa powder until smooth. I remove it from heat and add 3 1/2 cups of sifted powdered sugar and 1 teaspoon of pure vanilla extract. I whisk until it’s creamy.
Frosting the cake
After 20-25 minutes, I take the cake out of the oven. I let it cool for about 10 minutes in the pan. Then, I pour the warm frosting over the cake, covering it evenly. This adds a sweet finish to the rich chocolate flavor.
Enjoy the delicious Texas Sheet Cake!
Tips & Tricks
Baking Tips
How to know when the cake is done
Check the cake by inserting a toothpick in the center. If it comes out clean or with a few moist crumbs, the cake is ready. Timing is key, so start checking at 20 minutes.
Avoiding common baking mistakes
Make sure to measure your ingredients correctly. Too much flour can make the cake dry. Use room temperature eggs and buttermilk for better mixing. Remember to preheat your oven to 350°F (175°C) before baking.
Frosting Tips
Achieving the perfect frosting consistency
Your frosting should be smooth and spreadable. If it is too thick, add a bit more milk. If too thin, add more powdered sugar until it reaches the right texture.
Decorating suggestions for serving
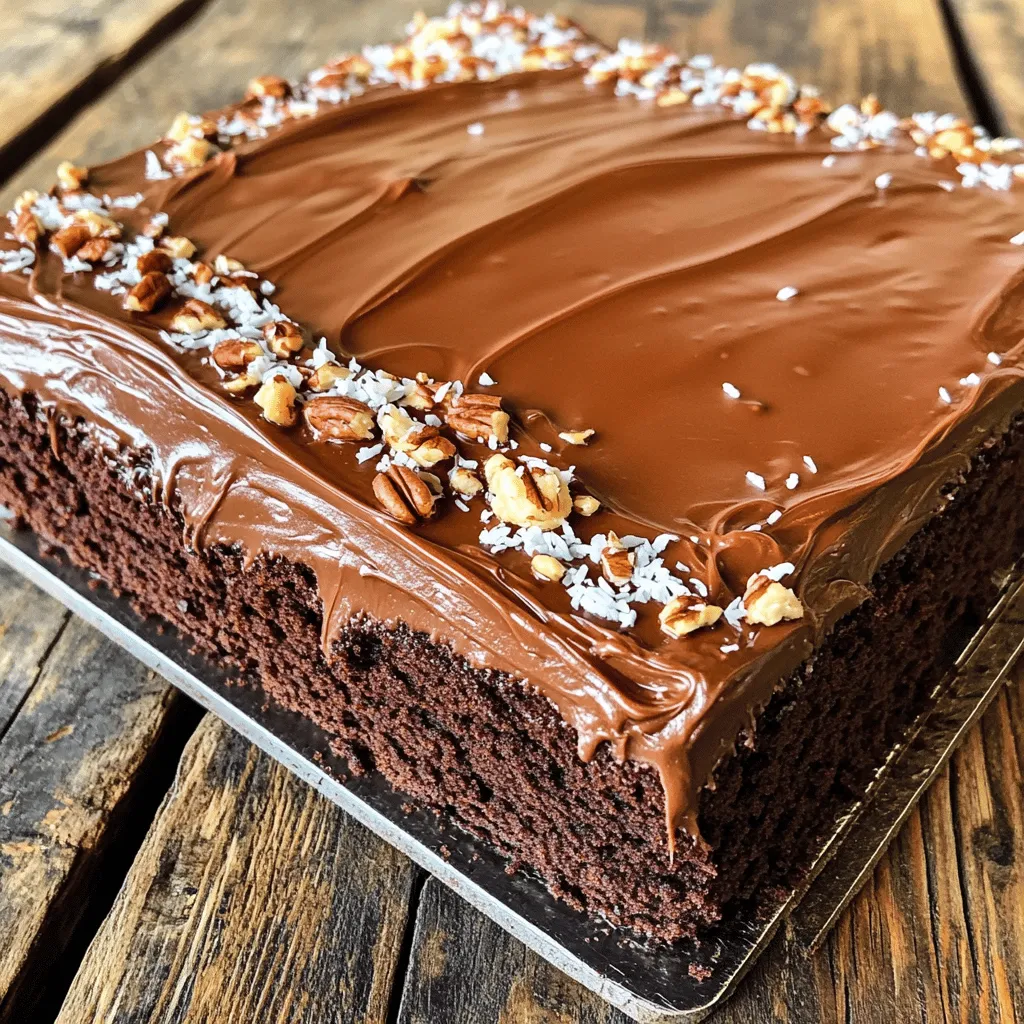
Sprinkle chopped pecans or coconut on top for a nice touch. You can also drizzle chocolate syrup over each slice for added flair. Presentation matters, so use a nice serving plate!
Serving Suggestions
Best ways to serve Texas Sheet Cake
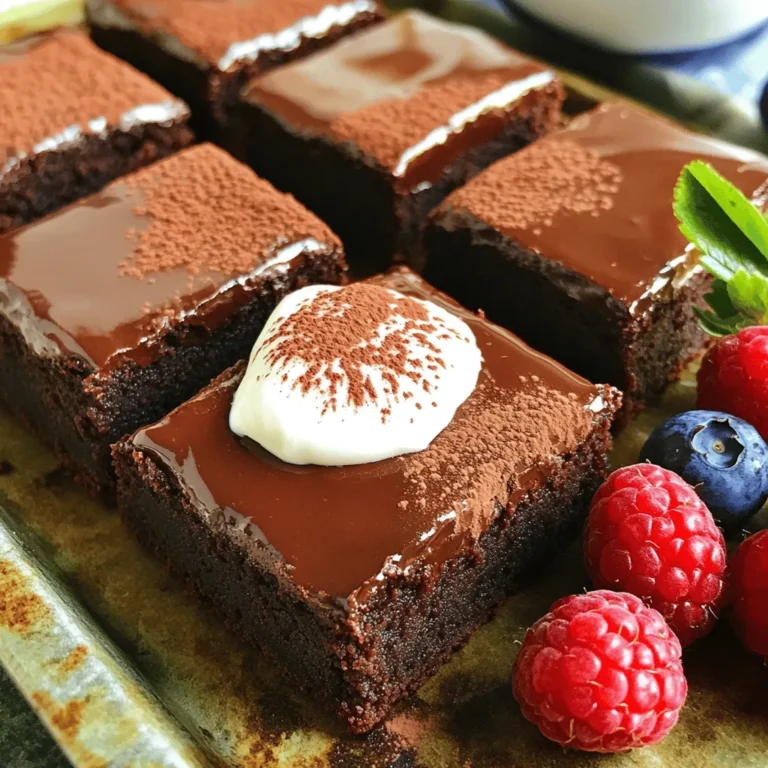
Cut the cake into squares for easy serving. This cake is great at room temperature. Serve it plain, or add a scoop of vanilla ice cream on the side for extra sweetness.
Pairings with beverages or sides
Pair this cake with a glass of cold milk or a hot cup of coffee. It also goes well with a light dessert wine. Consider serving it with fresh berries for a burst of flavor.
Variations
Flavor Variations
You can change up Texas Sheet Cake by adding different extracts. Almond or coffee extracts add unique flavors. Just a teaspoon can make a big difference. You can also try adding spices, like cinnamon. A teaspoon of cinnamon gives warmth and depth to the cake. Experiment with these flavors to find your favorite!
Dietary Variations
If you need a gluten-free option, use gluten-free flour. Many brands work well in this recipe. For a dairy-free cake, swap the buttermilk for a non-dairy milk, like almond or oat milk. You can also use dairy-free butter for the frosting. These swaps help everyone enjoy this delicious cake.
Decorating Variations
Get creative with frosting! Instead of the classic chocolate, try cream cheese frosting or a rich caramel glaze. You can also add toppings beyond pecans and coconut. Fresh berries, sprinkles, or even crushed cookies add fun textures. These variations make your cake stand out and impress your guests!
Storage Info
Proper Storage Techniques
To keep your Texas Sheet Cake fresh, follow these steps:
– Let it cool completely before storing.
– Cover the cake with plastic wrap or foil.
– You can also use an airtight container.
These methods will keep your cake moist and tasty. I prefer using a large container, as it helps avoid any drying out.
Freezing Tips
You can freeze Texas Sheet Cake for later. Here’s how:
– Slice the cake into squares.
– Wrap each square in plastic wrap.
– Place the wrapped slices in a freezer bag or container.
To thaw, just take a slice out and let it sit at room temperature for about an hour. You can also microwave it for a few seconds if you’re in a hurry.
Shelf Life
Texas Sheet Cake stays fresh for about 3 to 4 days at room temperature. If you store it in the fridge, it can last up to a week. Freezing can extend its life to about 3 months. Just remember, the sooner you eat it, the better it tastes!
FAQs
What is Texas Sheet Cake?
Texas Sheet Cake is a rich, chocolatey dessert baked in a large pan. It has roots in Texas and is loved for its simplicity and taste. The cake is moist, thanks to the cocoa and butter, and topped with a creamy frosting. This cake is often served at gatherings and celebrations. Its charm lies in its easy preparation and big flavor. You can enjoy this cake warm or at room temperature, making it a perfect treat for any occasion.
Can I make Texas Sheet Cake ahead of time?
Yes, you can make Texas Sheet Cake in advance. Here are some tips for prepping:
– Bake the cake: You can bake it a day before serving.
– Cool completely: Let it cool in the pan before frosting.
– Frost later: Frost it just before serving to keep it fresh.
– Store properly: Cover the cake tightly with plastic wrap or foil.
This way, your cake stays moist and delicious.
What are the best serving suggestions?
To enhance your dessert experience, consider these ideas:
– Add toppings: Sprinkle with chopped pecans or shredded coconut for texture.
– Serve with ice cream: A scoop of vanilla ice cream pairs well with chocolate cake.
– Drizzle chocolate syrup: This adds an extra layer of sweetness.
– Use a decorative platter: Presenting on a nice plate makes it more appealing.
These small touches can elevate your cake’s presentation and flavor.
How do you know if the cake is done?
You can tell if the cake is done by checking for a few signs:
– Toothpick test: Insert a toothpick in the center. It should come out clean or with a few moist crumbs.
– Look for a springy texture: Gently press the top; it should bounce back.
– Even color: The edges should pull away slightly from the pan.
These signs help ensure your Texas Sheet Cake is perfectly baked.
Texas Sheet Cake is a delicious treat made with simple ingredients. We covered the dry and wet components, tips for baking and frosting, and how to store it effectively. Remember, you can add extras for fun flavors or dietary needs. Making this cake is easy and rewarding. Enjoy the joy it brings, whether you serve it at a party or enjoy it at home. Trust these simple steps, and you’ll bake to impress!


![To make my fluffy eggless pancakes, gather these key ingredients: - 1 cup all-purpose flour - 1 tablespoon granulated sugar - 1 tablespoon baking powder - 1/8 teaspoon fine sea salt - 1 cup milk (you can use plant-based milk) - 2 tablespoons vegetable oil (or melted coconut oil) - 1 teaspoon pure vanilla extract - Optional toppings: fresh seasonal fruits, maple syrup, whipped cream, or chocolate chips These ingredients work together to create a fluffy and tasty pancake that everyone will love. If you lack any of the ingredients, don't worry! Here are some easy swaps: - All-purpose flour: Use whole wheat flour for added fiber. - Granulated sugar: Try maple syrup or honey for a natural sweetener. - Milk: Almond, soy, or oat milk work just as well. - Vegetable oil: Applesauce can replace oil for a lower-fat option. These substitutes keep your pancakes delicious while catering to various diets. Toppings can take your pancakes to the next level. Here are some ideas you might enjoy: - Fresh seasonal fruits like berries or bananas - A drizzle of maple syrup for natural sweetness - A dollop of whipped cream for richness - A sprinkle of chocolate chips for a sweet twist Feel free to mix and match these toppings. They add flavor and fun to your eggless pancakes. Enjoy your creation with your favorite additions! 1. First, sift together: - 1 cup all-purpose flour - 1 tablespoon granulated sugar - 1 tablespoon baking powder - 1/8 teaspoon fine sea salt This helps mix the dry ingredients well. Sifting also adds air, making your pancakes lighter. 2. In another bowl, whisk together: - 1 cup milk (you can use plant-based milk) - 2 tablespoons vegetable oil (or melted coconut oil) - 1 teaspoon pure vanilla extract Mix until smooth. This step adds flavor and moisture to your batter. 3. Pour the wet mixture into the dry ingredients. Gently fold the batter using a spatula or whisk. 4. It’s okay if there are lumps. This keeps your pancakes fluffy! - Preheat your non-stick skillet or griddle over medium heat. - Lightly grease with a small amount of oil or cooking spray to prevent sticking. - For each pancake, pour about 1/4 cup of the batter onto the hot skillet. - Watch for bubbles on the surface. This shows they are ready to flip. It takes about 2-3 minutes. - Carefully flip each pancake using a spatula. Cook for 1-2 more minutes until golden brown. - If they cook too fast, lower the heat. You want them cooked through but fluffy! - Look for a light golden color on both sides. - The pancakes should feel soft and spring back when touched. - If they are thick and fluffy, that means you nailed it! Serve warm with your favorite toppings. Enjoy your fluffy eggless pancakes and check out the Full Recipe for more tips! To make eggless pancakes fluffy, you need the right mix. The key is using baking powder. It acts as a leavening agent, helping your pancakes rise. Mixing dry and wet ingredients separately is crucial. Always combine them gently. This keeps air bubbles intact, which makes for fluffy pancakes. Avoid over-mixing the batter; a few lumps are okay. They add to the texture. You can make your pancakes taste even better. Add vanilla extract for a sweet aroma. For a twist, try almond or coconut extract. You can also mix in spices like cinnamon or nutmeg. This gives depth to the flavor. If you want something fruity, mash in some ripe bananas or mix in blueberries. These additions elevate your pancakes from simple to special. Many people make errors when cooking pancakes. One mistake is cooking on too high heat. This can burn the outside while leaving the inside raw. Keep the heat on medium for even cooking. Another error is using old baking powder. Check the expiration date before you start. Lastly, don’t skip the resting time after mixing. Letting the batter sit for a few minutes helps improve the texture. For more details, check out the Full Recipe. {{image_4}} You can easily make your pancakes vegan. Just use plant-based milk instead of cow's milk. Almond, soy, or oat milk all work well. You can also swap vegetable oil for melted coconut oil. This adds a nice flavor. The rest of the steps stay the same. You will still get fluffy and tasty pancakes. If you need gluten-free pancakes, choose a gluten-free flour mix. Many stores sell these blends. You can also use almond flour or coconut flour. Just remember, these flours may need more liquid. Start with the same recipe, but adjust the milk as needed. Your pancakes will still be fluffy and delicious. Get creative with your pancakes! You can add different flavors to the batter. Try mixing in mashed bananas or applesauce for sweetness. You could also fold in chocolate chips or nuts for crunch. Fresh berries add a lovely pop of color and flavor. Experiment with spices like cinnamon or nutmeg for a warm twist. Each new flavor makes breakfast exciting! If you want more ideas, check the Full Recipe for inspiration. To store leftover pancakes, let them cool first. Then, stack them with parchment paper in between. This prevents sticking. Place the stack in an airtight container. They stay fresh for up to three days in the fridge. If you plan to eat them later, freezing is a great option. When reheating pancakes, use the microwave or a skillet. For the microwave, place one pancake on a plate. Heat for about 20-30 seconds. For the skillet, warm it on medium heat and add a little oil. Cook the pancake for about a minute on each side. This keeps them soft and warm. To freeze pancakes, allow them to cool completely. Then, place them in a single layer on a baking sheet. Freeze for about an hour. Once frozen, transfer them to a freezer bag. Remove as much air as possible. They can last for up to two months. When you want to eat them, just follow the reheating tips! Yes, you can use other types of flour. Whole wheat flour gives a nutty taste. Oat flour is a great gluten-free option. Just remember, different flours may change the texture. If you use whole wheat, add a bit more liquid to the batter. This helps keep your pancakes light and fluffy. To make your pancakes fluffier, you can try a few tricks. First, sift your dry ingredients before mixing. This adds air and makes them lighter. Second, don’t overmix the batter; a few lumps are okay. Lastly, let the batter rest for about 5-10 minutes. This allows the baking powder to work better, giving you fluffier pancakes. Eggless pancakes can be healthy, depending on your ingredients. Using whole grain flour adds fiber. Adding fruits like bananas or blueberries boosts vitamins. You can also reduce sugar for a healthier option. Remember, the toppings you choose can affect health too. Fresh fruit or yogurt are great choices over syrup or cream. For the full recipe, check out the [Full Recipe]. This blog post covered how to make delicious eggless pancakes. We explored the key ingredients and tasty toppings. I shared simple steps and cooking tips for fluffy results. I highlighted ways to enhance flavor and avoid common mistakes. We also discussed variations like vegan and gluten-free pancakes. Finally, I provided storage and reheating tips to enjoy leftovers. Now you can make perfect eggless pancakes that everyone will love!](https://fastmealmate.com/wp-content/uploads/2025/06/4882ee2e-6759-45a7-b0fa-121a335c7fa8-768x768.webp)
![To make Easy Roasted Tomato Soup, gather these key ingredients: - 2 pounds of ripe, juicy tomatoes, halved - 1 medium onion, cut into quarters - 4 cloves of garlic, left unpeeled - 2 tablespoons of extra virgin olive oil - Sea salt and freshly cracked black pepper, to taste - 1 teaspoon of dried basil - 1 teaspoon of sugar (optional, to counterbalance acidity) - 4 cups of rich vegetable broth - 1/2 cup of heavy cream (optional, for a luscious finish) - Fresh basil leaves, for a lovely garnish These ingredients create a base that bursts with flavor. The tomatoes give the soup its rich taste. The onion adds sweetness, while garlic brings depth. You can add optional ingredients to boost the flavor: - A splash of balsamic vinegar for acidity - A pinch of red pepper flakes for heat - A teaspoon of smoked paprika for a smoky taste These extras can transform the soup into something special. Feel free to experiment and find your favorite combination. To prepare this soup, you’ll need a few handy tools: - A large baking sheet for roasting - A pot for cooking the soup - An immersion blender or a standard countertop blender - A cutting board and sharp knife for prep Having the right tools makes cooking easier. With these, you’ll create a smooth, tasty soup that warms the soul. For the complete recipe, check out the [Full Recipe]. To start, gather all your ingredients. You need: - 2 pounds of ripe, juicy tomatoes, halved - 1 medium onion, cut into quarters - 4 cloves of garlic, left unpeeled - 2 tablespoons of extra virgin olive oil - Sea salt and freshly cracked black pepper, to taste - 1 teaspoon of dried basil - 1 teaspoon of sugar (optional) - 4 cups of rich vegetable broth - 1/2 cup of heavy cream (optional) - Fresh basil leaves for garnish First, wash the tomatoes well. Cut them in half and place them on a baking sheet. Next, quarter the onion and add it to the sheet. Toss in the unpeeled garlic cloves. Now, drizzle the olive oil over the veggies. Sprinkle sea salt, black pepper, and dried basil on top. If you want to balance the soup's acidity, add sugar now. Preheat your oven to 400°F (200°C). Once the oven is ready, slide in your baking sheet. Roast the vegetables for 25-30 minutes. The tomatoes should soften and caramelize. After roasting, take the sheet out and let the veggies cool. Once cool enough to handle, peel off the garlic skins. In a large pot, combine the roasted tomatoes, onion, and garlic. Add the vegetable broth and place the pot over medium heat. Bring the mixture to a gentle simmer. Use an immersion blender to puree the soup until smooth. If you don’t have one, carefully transfer the soup to a blender. Make sure to leave space for steam to escape. If you want a rich finish, stir in the heavy cream now. Taste the soup and adjust the seasoning. Heat until hot throughout. Finally, serve the soup in bowls. Garnish with fresh basil leaves for color and flavor. Enjoy your delicious, comforting bowl of roasted tomato soup! To get a smooth soup, use an immersion blender. It makes blending easy. If you prefer, you can blend in batches with a regular blender. Just leave space for steam. For a thicker texture, add less broth. If you like it thinner, add more broth. You can also stir in heavy cream for extra richness. It adds a nice velvety feel. One mistake is not roasting the tomatoes long enough. They need time to caramelize and develop flavor. Don’t skip the sugar if your tomatoes are very acidic. It balances the taste. Also, remember to peel the garlic after roasting. Skins can affect the smoothness of your soup. Finally, taste your soup before serving. Adjust salt and pepper to match your flavor. Serve your soup hot, garnished with fresh basil leaves. They add color and flavor. Pair it with a grilled cheese sandwich for a classic combo. You can also serve it with crusty bread for dipping. For a twist, add a drizzle of balsamic glaze on top. This adds a sweet tang that enhances the soup. For the full recipe, check the details above. {{image_4}} You can easily make this soup vegan. Just skip the heavy cream. Use more vegetable broth instead. This keeps the soup rich and tasty. The roasted tomatoes give it a great flavor. You won’t miss the cream at all. Add a splash of coconut milk for creaminess if you like. It adds a nice twist! Want to spice things up? Add a pinch of red pepper flakes for heat. A dash of smoked paprika gives a warm flavor. Fresh herbs like thyme or oregano enhance the soup, too. You can also stir in a tablespoon of balsamic vinegar. It adds depth and a little sweetness. Don't forget to taste as you go! This soup is naturally gluten-free. You don’t need any flour or wheat. Just use certified gluten-free vegetable broth. This way, everyone can enjoy it. If you want to thicken the soup, use blended potatoes or a cornstarch slurry. It keeps the soup smooth without gluten. Enjoy this comforting bowl without worries! To store leftover soup, let it cool first. Pour it into an airtight container. Make sure to seal it well. Place it in the fridge. It will stay fresh for about three days. If you want to keep it longer, freezing is better. Freezing is a great way to prepare meals ahead. Use freezer-safe containers or bags. Fill them with soup, leaving some space at the top. This allows for expansion. Label the containers with the date. It can last up to three months in the freezer. When you’re ready to use it, just thaw it in the fridge overnight. To reheat your soup, use a pot on the stove. Heat it gently over medium-low. Stir often to avoid burning. If the soup is too thick, add a splash of broth or water. You can also use a microwave. Heat it in short bursts, stirring in between. Always taste before serving to check the flavor. Adjust seasoning if needed for that perfect bowl of comfort. The best tomatoes for this soup are ripe, juicy varieties. I love using Roma or vine-ripened tomatoes. They have great flavor and are less watery. You can also mix in some heirloom tomatoes for extra depth. Their sweetness adds a lovely touch to the soup. Yes, you can make this soup ahead of time. It keeps well in the fridge for up to four days. Just make sure to cool it completely before storage. You can also freeze it for up to three months. For the best taste, reheat the soup gently on the stove. To make roasted tomato soup without cream, simply skip the heavy cream. Instead, you can add a splash of vegetable broth for richness. For added creaminess, blend in some cooked white beans or cashews. They blend smoothly and give a nice texture without dairy. You’ll still enjoy a flavorful bowl of comfort. For the full recipe, check out the detailed instructions above. In this post, we explored how to make easy roasted tomato soup. We discussed key ingredients, optional flavors, and tools you need. Following the step-by-step instructions ensures success every time. I shared tips for the perfect consistency and common mistakes to avoid. You can even try vegan and gluten-free options. Lastly, I covered storage and reheating for later enjoyment. Enjoy making this warm soup and share it with others.](https://fastmealmate.com/wp-content/uploads/2025/07/8c50acbe-b26b-4fce-9348-24a1062b636d-768x768.webp)