Cherry Crumb Cheesecake Delightful and Worthy Treat
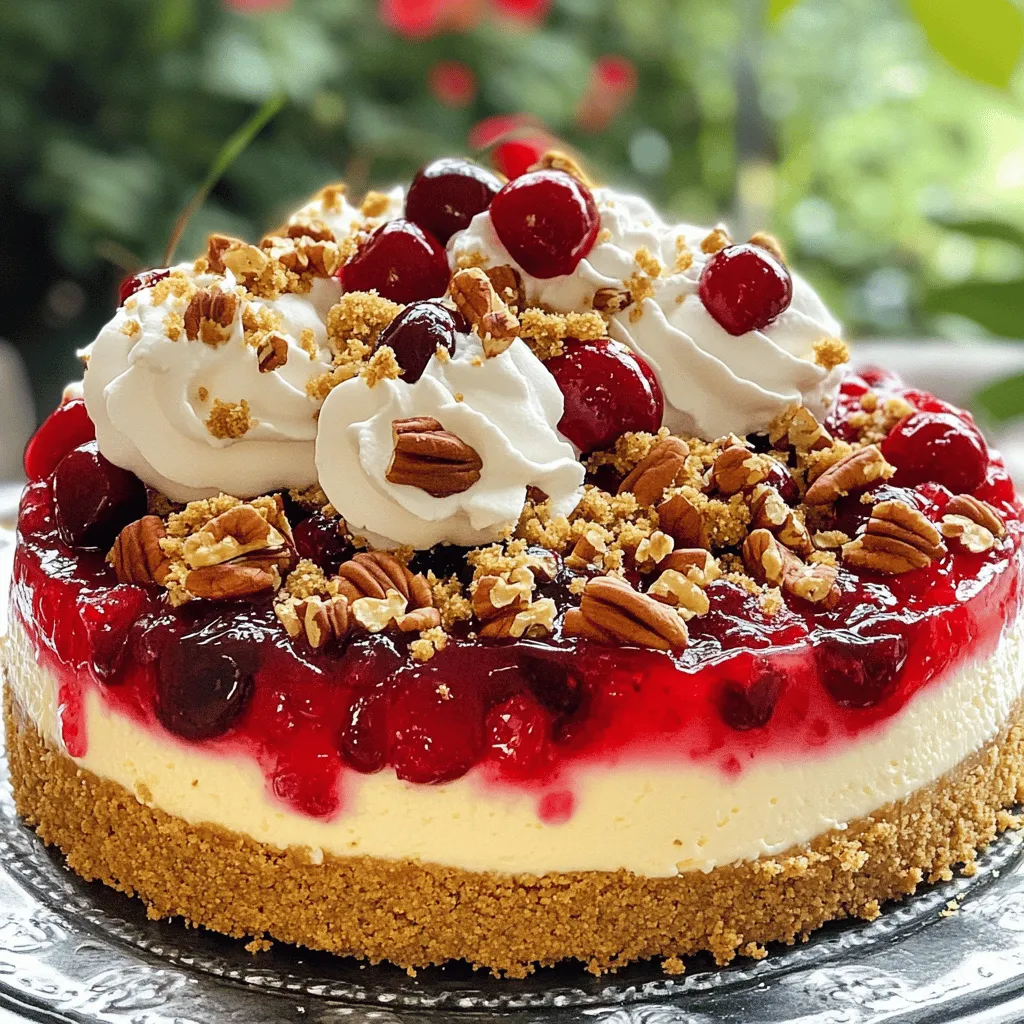
If you love dessert, you’re in for a treat! Cherry Crumb Cheesecake is a fun twist on a classic. Imagine a rich, creamy filling topped with sweet cherries and a crunchy crumb layer. In this post, I’ll guide you through easy steps and tips to make your own. Whether you stick with cherries or customize it, this cheesecake will impress everyone. Let’s dive in and create something delightful!
Ingredients
Key Ingredients for Cherry Crumb Cheesecake
To make a Cherry Crumb Cheesecake, you need specific key ingredients:
– 1 ½ cups graham cracker crumbs
– ½ cup unsalted butter, melted
– 1 cup granulated sugar, divided
– 1 ½ teaspoons ground cinnamon
– 3 packages (8 oz each) cream cheese, softened
– 1 teaspoon pure vanilla extract
– 3 large eggs, at room temperature
– 1 cup cherry pie filling
These ingredients create a rich and creamy cheesecake with a delightful cherry flavor.
Optional Ingredients for Customization
You can customize your cheesecake with these optional ingredients:
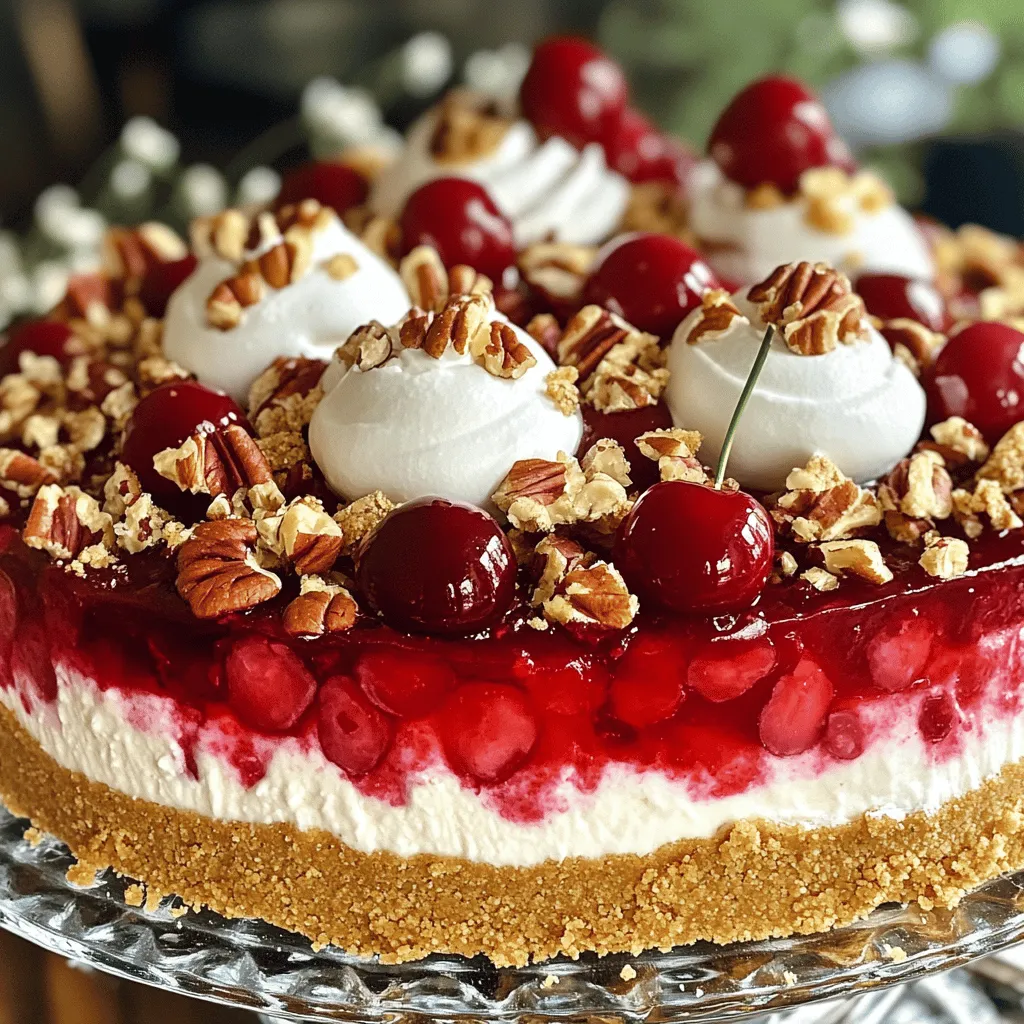
– ½ cup chopped pecans or walnuts
– Additional cherry filling for topping
Adding nuts gives a nice crunch. More cherry filling can boost the flavor and look.
Tools You’ll Need for Preparation
To prepare your Cherry Crumb Cheesecake, gather these tools:
– 9-inch springform pan
– Mixing bowls
– Electric mixer
– Spatula
– Measuring cups and spoons
Having the right tools makes the process smooth and fun. Each tool helps you create a perfect cheesecake with ease.
Step-by-Step Instructions
Preparing the Crust
Start by preheating your oven to 325°F (160°C). In a medium bowl, mix together the graham cracker crumbs, melted butter, ½ cup of granulated sugar, and ground cinnamon. You want it to feel like wet sand. Next, press this mixture firmly into the bottom of a 9-inch springform pan. This forms a solid crust for your cheesecake. Now, bake the crust in the oven for about 10 minutes. It should look light and golden brown. Once done, take it out and let it cool.
Making the Cheesecake Filling
In a large bowl, beat the softened cream cheese using an electric mixer. Mix until it’s creamy and smooth. Slowly add in the remaining ½ cup of granulated sugar and the vanilla extract. Keep mixing until everything is well combined. Next, add the eggs, one at a time. Mix on low speed after each addition. This helps avoid overmixing, which can make the cheesecake dense. After the eggs are mixed in, gently fold the cherry pie filling into the cream cheese mixture. Be careful not to crush the cherries.
Assembling and Baking the Cherry Crumb Cheesecake
Now it’s time to pour the cheesecake filling into the cooled crust. Smooth the top with a spatula to ensure an even surface. Place the cheesecake in the oven and bake for about 50 to 60 minutes. The center should be set but still slightly jiggly. Once baked, turn off the oven and crack the door to let the cheesecake cool slowly. Let it cool for about an hour before moving it to the fridge. Chill it for at least 4 hours, but overnight is best. For a crunchy topping, mix leftover graham cracker crumbs with a tablespoon of melted butter and optional chopped nuts. Sprinkle this over the cheesecake before serving.
Tips & Tricks
How to Avoid Common Mistakes
When making a cheesecake, avoid overmixing. Mix the cream cheese just until smooth. Adding eggs? Do it one at a time. This keeps your cheesecake light and fluffy. Another tip: let your cream cheese soften fully. Cold cream cheese can lead to lumps. Also, be careful when folding in the cherry filling. You want to keep the cherries intact for a lovely look.
Best Practices for Chilling the Cheesecake
Chilling is key for a great cheesecake. After baking, turn off the oven and crack the door. This helps your cake cool slowly. Let it sit for about an hour. Then, move it to the fridge. Chill for at least four hours. For best results, chill overnight. This ensures your cheesecake sets perfectly and is easier to slice.
Enhancing Flavor and Texture
To boost flavor, add a splash of lemon juice to the cream cheese mix. It adds a nice zing. You can also swap out some sugar for brown sugar. This gives a deeper flavor. For texture, mix in chopped nuts in the filling or topping. They add a nice crunch. If you want more cherry flavor, drizzle some extra cherry filling on top before serving.
Variations
Different Fruit Options Besides Cherry
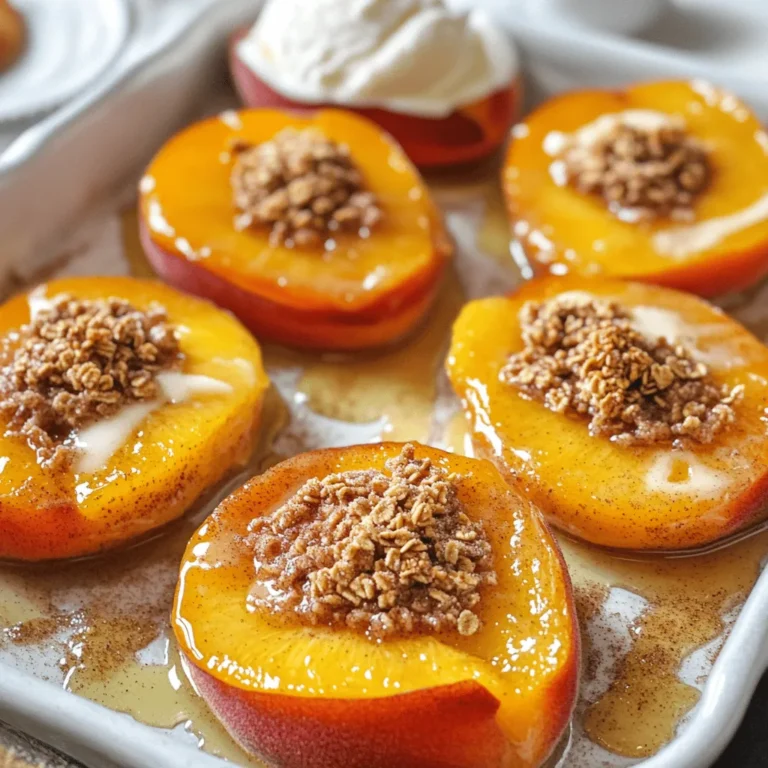
You can change the fruit in this recipe. Try blueberries, strawberries, or peaches. Each fruit adds its unique flavor and color. For blueberries, use a blueberry pie filling. Strawberries work well too. Just mash them gently before folding them in. Peaches can give a sweet, summer vibe.
Gluten-Free Version of the Recipe
You can make this cheesecake gluten-free. Simply swap the graham cracker crumbs for gluten-free crumbs. Look for options made from almonds or oats. Check the labels to ensure they are gluten-free. The rest of the ingredients stay the same, so you keep all that flavor.
Alternative Crust Ideas
You can get creative with the crust. Instead of graham crackers, use chocolate cookies for a rich taste. Oreos make a great choice too. For a nutty crust, blend nuts like almonds or pecans. Just mix them with butter and press into the pan. Each crust adds a new twist to the cheesecake.
Storage Info
How to Properly Store Leftover Cheesecake
After enjoying your Cherry Crumb Cheesecake, you may have some left. To store it, cover the cheesecake tightly with plastic wrap or foil. This helps keep it fresh. Place it in the fridge. It will stay good for up to five days. If you cut slices, use a clean knife to avoid mess.
Freezing Tips for Long-Term Storage
Want to save your cheesecake for later? Freezing is a great option. First, let the cheesecake cool completely. Then, wrap it tightly in plastic wrap. After that, wrap it in aluminum foil. This extra layer protects it from freezer burn. You can freeze the cheesecake for up to three months. When you’re ready to enjoy it again, move it to the fridge to thaw overnight.
Reheating Instructions for Best Results
When you’re ready to eat your cheesecake, no need to heat it. Cheesecake is best served cold. However, if you want a warm slice, you can gently warm it. Preheat your oven to 250°F (120°C). Place the cheesecake slice on a baking sheet. Heat it for about 10 minutes. Check to see if it’s warmed through. Enjoy it with a fresh cherry topping for the best taste!
FAQs
Can I use fresh cherries instead of cherry pie filling?
Yes, you can use fresh cherries. Just pit and slice them. Mix the fresh cherries with a little sugar and cornstarch. This helps them thicken and sweeten. Fresh cherries bring a bright flavor. They also add a nice pop of color to your dessert.
How long does Cherry Crumb Cheesecake last in the fridge?
Cherry Crumb Cheesecake lasts about five days in the fridge. Store it in an airtight container. This keeps it fresh and tasty. After a few days, the crust may get softer. But the flavor stays great.
What can I substitute for cream cheese in this recipe?
You can use Greek yogurt as a substitute. It gives a creamy texture. Silken tofu is another option for a vegan version. Both substitutes can work well in this recipe. They will change the flavor slightly, but it will still be delicious.
This blog post covered how to make Cherry Crumb Cheesecake. We explored key ingredients, and tools needed, and shared step-by-step instructions. I provided tips to avoid mistakes and enhance flavor. We discussed variations like gluten-free options and how to store leftovers.
In the end, baking cheesecake can be fun and rewarding. With these tips, you can enjoy a delicious treat any time!


![To create a delightful 20-minute couscous, you need a few simple ingredients. Here’s what you will need: - 1 cup couscous - 1 ¼ cups vegetable broth (or water) - 1 cup cherry tomatoes, halved - 1 small cucumber, diced into small cubes - ½ red onion, finely chopped - ½ cup Kalamata olives, pitted and sliced into rings - 1 cup fresh spinach, roughly chopped - ¼ cup feta cheese, crumbled - 2 tablespoons extra virgin olive oil - 1 tablespoon fresh lemon juice - 1 teaspoon dried oregano - Salt and freshly ground black pepper to taste These ingredients bring a burst of flavor and color to your meal. Couscous cooks fast and absorbs the broth well, making it fluffy. The cherry tomatoes and cucumber add crunch, while olives give a salty kick. Fresh spinach provides nutrients, and feta cheese adds creaminess. Use good olive oil and fresh lemon juice for a bright taste. This mix of flavors makes your dish fresh and inviting. For the detailed recipe, check out the Full Recipe section. To start, bring 1 ¼ cups of vegetable broth or water to a rolling boil in a saucepan. This step is crucial for cooking the couscous properly. Once the liquid bubbles up, remove the pan from the heat. Stir in 1 cup of couscous and cover the pan with a lid. Let it sit for 5 minutes. This allows the couscous to absorb all the liquid, making it fluffy and light. While the couscous cooks, grab a large mixing bowl. Combine 1 cup of halved cherry tomatoes, 1 small diced cucumber, ½ finely chopped red onion, and ½ cup of sliced Kalamata olives. Toss in 1 cup of roughly chopped fresh spinach. Mixing these colorful veggies adds crunch and freshness to your meal. In a small bowl, whisk together 2 tablespoons of extra virgin olive oil, 1 tablespoon of fresh lemon juice, and 1 teaspoon of dried oregano. Add a pinch of salt and pepper to taste. This dressing brings all the flavors together and enhances the dish's brightness. Pour the dressing over the vegetable mix and toss gently. This helps each piece get coated well. Next, fluff the couscous with a fork, breaking apart any clumps. Add the fluffed couscous to the veggie mixture and stir until everything is mixed evenly. To finish, sprinkle ¼ cup of crumbled feta cheese on top. This adds a nice salty bite and creamy texture to the dish. Check the [Full Recipe] for all details. To make your couscous extra tasty, add fresh herbs like parsley or cilantro. You can also try spices like cumin or paprika for more depth. Feel free to swap feta cheese with goat cheese or even mozzarella if you prefer. Each cheese brings its own flavor and texture to the dish. For the best fluff, always use a fork to fluff your couscous. This helps break up any clumps. When cutting vegetables, try to make them uniform in size. This way, they cook evenly and look nice in your dish. Serve your couscous in colorful bowls to make it pop. You can also spread it on a large platter for a family-style meal. For a finishing touch, sprinkle extra crumbled feta and fresh herbs on top. This adds color and makes the dish more inviting. {{image_4}} You can change up the recipe in many ways. Use seasonal vegetables for a fresh twist. Think about adding bell peppers, zucchini, or even asparagus. These veggies add color and flavor to your dish. Protein is another way to mix things up. Chickpeas are great for a plant-based option. They add a nice texture and protein boost. Grilled chicken is another good choice if you want meat. It pairs well with the other flavors in couscous. The flavor can shift based on your ingredients. A Mediterranean style is bright and fresh. Use herbs like basil, parsley, or mint for a burst of taste. On the other hand, a Middle Eastern twist adds warmth. Spices like cumin or coriander can really change the game. Dressings also play a big role. You can use a tangy vinaigrette or a creamy yogurt dressing. Each option gives the dish a new taste profile. Experiment with what you like best. If you're looking for gluten-free options, consider quinoa or rice. Both work well in place of couscous. They provide a similar texture and are easy to cook. For vegan meals, swap out the cheese and broth. Use a plant-based broth and nuts or seeds instead of cheese. Nutritional yeast can give a cheesy flavor without dairy. These changes keep the dish tasty and suitable for all diets. To keep your leftover couscous fresh, use airtight containers. Glass containers work great, as they do not absorb smells. Plastic containers are also fine if they are good quality. Make sure to cool the couscous completely before sealing the container. This reduces moisture inside and keeps it from getting soggy. When refrigerating, store couscous within two hours of cooking. This helps prevent bacteria growth. Place it in the fridge right away. If you plan to eat it later, consider separating it from any dressing or veggies. This keeps the couscous from becoming mushy. Reheating couscous is easy. The best method is to use the microwave. Start by placing your couscous in a microwave-safe bowl. Add a few drops of water to keep it moist. Cover it with a damp paper towel and heat for 1-2 minutes. Stir halfway through for even heat. You can also reheat couscous on the stove. Add a splash of water to a pan over low heat. Stir often until warm. This method helps keep the couscous fluffy. Avoid high heat, as it may dry out the grains. When stored properly, couscous lasts about 3 to 5 days in the fridge. Check for any signs of spoilage before eating. If you see mold or a sour smell, it's best to throw it away. Fresh couscous should have a light, fluffy texture. If it feels hard or clumpy, it may have gone bad. Always trust your senses when deciding whether to eat leftovers. You can tell when couscous is done by its texture. Perfectly cooked couscous is light and fluffy. It should not be sticky or mushy. After letting it sit, fluff it with a fork. This helps break up clumps and adds air. Yes, you can meal prep couscous. Cook it in advance and store it in the fridge. It keeps well for three to five days. Just make sure to let it cool before storing. You can add your veggies and dressing just before eating. This keeps the flavors fresh. Couscous pairs well with many dishes. You can serve it with grilled chicken or fish. A fresh salad is a great side too. Roasted vegetables add nice flavor. You can also enjoy it with hummus or tzatziki for a dip. Check out the " Speedy Mediterranean Couscous Delight" for the detailed recipe and enjoy this quick meal! This blog post guides you to make a tasty Mediterranean couscous dish. We covered the key ingredients, step-by-step cooking instructions, and helpful tips to enhance flavor. Remember, you can mix in different veggies or proteins to make it your own. Storing and reheating couscous is easy, too, so enjoy your leftovers! This simple recipe is perfect for meal prep or a quick dinner. You’re now set to impress your family and friends with this delightful dish. Dive in, create, and enjoy every bite!](https://fastmealmate.com/wp-content/uploads/2025/06/3a323c96-3f14-4a25-b011-50d8f6184ffe-768x768.webp)