Creamy Parmesan Chicken with Penne Delightful Dish
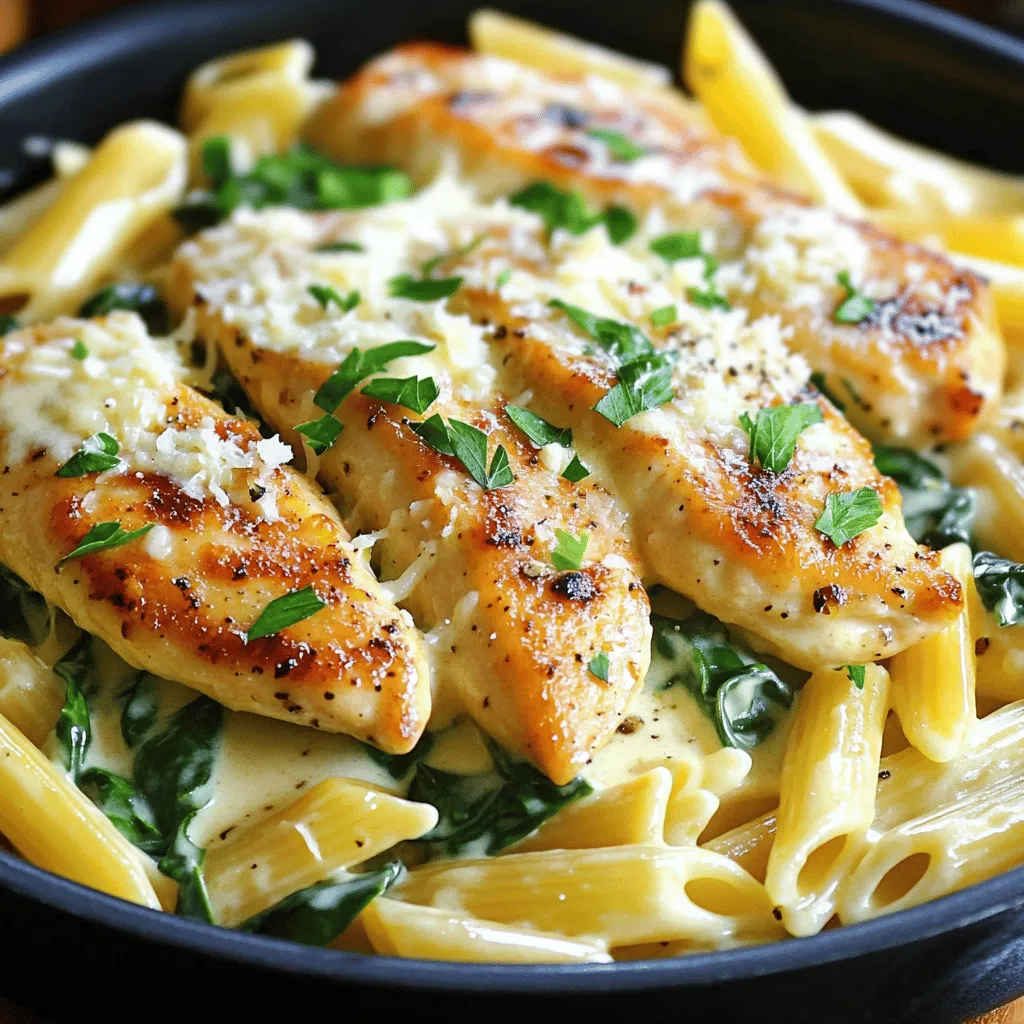
If you’re craving a comforting meal that impresses, look no further! My Creamy Parmesan Chicken with Penne is both simple and delicious. With juicy chicken, tender pasta, and a rich, creamy sauce, this dish has it all. Perfect for a weeknight dinner or special occasion, it’s easy to customize. Join me as we explore how to make this delightful dish effortlessly! Get ready to tantalize your taste buds!
Ingredients
Main Ingredients
– 2 boneless, skinless chicken breasts
– 8 oz penne pasta
– 1 cup heavy cream
– 1 cup freshly grated Parmesan cheese
Seasonings and Additions
– Olive oil
– 3 cloves garlic, finely minced
– 1 teaspoon Italian seasoning blend
– 1 cup baby spinach leaves
– Salt to taste
– Freshly ground black pepper to taste
– Fresh parsley, chopped (for garnish)
Gathering these ingredients is the first step. I always buy fresh chicken and high-quality cheese. It makes a big difference in flavor. I love using freshly grated Parmesan. It melts better and tastes richer than pre-packaged cheese.
The seasonings add depth to the dish. Garlic gives a nice aroma, while Italian seasoning brings warmth. Baby spinach adds color and nutrition. Always taste for salt and pepper. Adjust them to your liking.
For the best results, use good olive oil. It helps sear the chicken perfectly. The parsley not only looks nice but adds freshness.
These ingredients create a creamy, savory dish. Each bite of Creamy Parmesan Chicken with Penne will delight your taste buds.
Step-by-Step Instructions
Preparing the Penne Pasta
1. Bring a large pot of salted water to a boil.
2. Add the penne pasta and cook as the package directs, usually 10-11 minutes.
3. Drain the pasta and set it aside. Reserve a splash of pasta water to use later.
Cooking the Chicken
1. While the pasta cooks, heat olive oil in a large skillet over medium heat.
2. Season both sides of the chicken breasts with salt, pepper, and Italian seasoning.
3. Place the chicken in the hot skillet. Cook for about 6-7 minutes on each side until golden brown.
4. Check that the chicken reaches an internal temperature of 165°F (75°C). Remove it from the skillet and let it rest.
Making the Creamy Sauce
1. Lower the heat and add minced garlic to the same skillet. Sauté for about 1 minute until fragrant.
2. Pour in the heavy cream and bring to a gentle simmer while stirring.
3. Gradually add the grated Parmesan cheese. Stir continuously until the cheese melts and the sauce is smooth.
Combining Ingredients
1. Add the baby spinach to the creamy sauce. Stir until it wilts down, about 1-2 minutes.
2. Add the cooked penne pasta to the sauce. Toss gently to combine everything.
3. If the sauce is too thick, adjust the consistency with reserved pasta water.
Plating the Dish
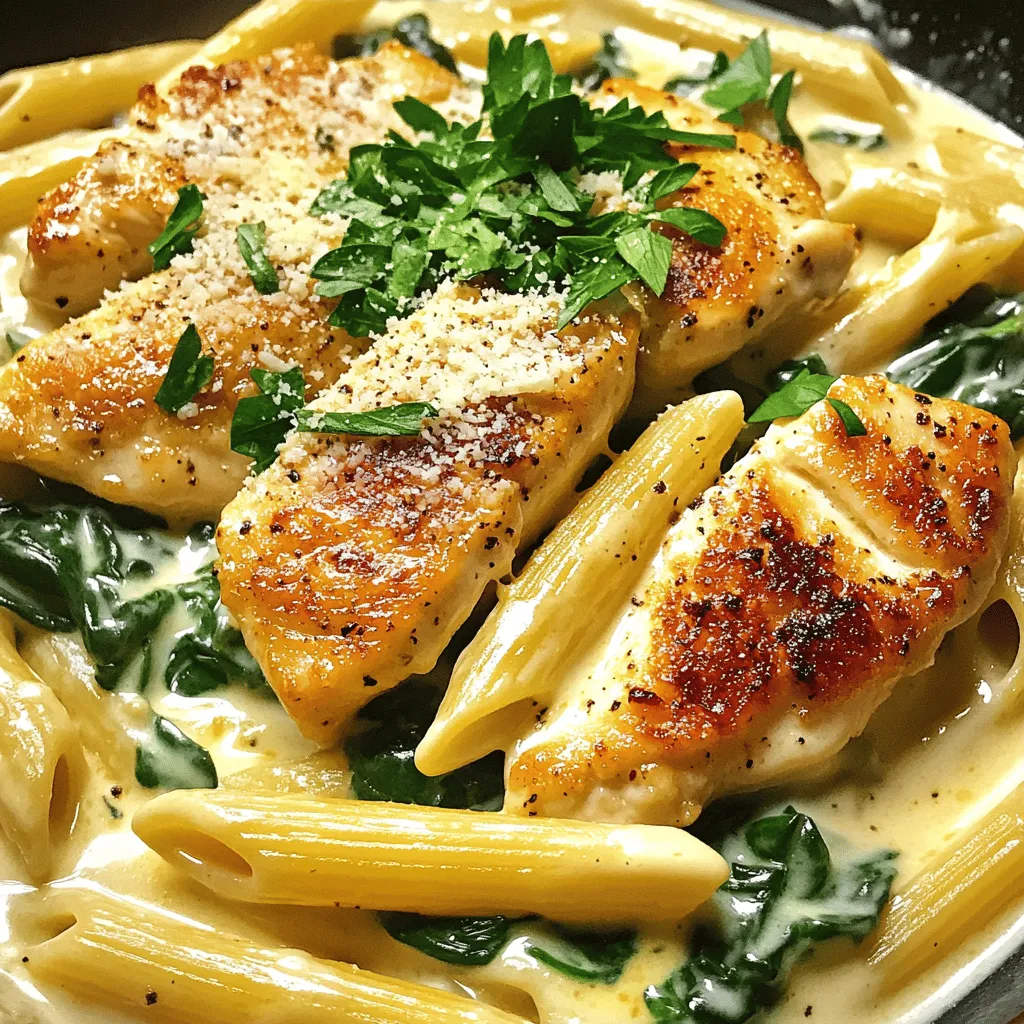
1. Slice the rested chicken into strips. Arrange it on top of the creamy penne pasta.
2. Garnish with freshly chopped parsley and serve immediately.
Tips & Tricks
Perfecting the Creamy Sauce
To keep your sauce from separating, focus on the temperature. Always cook over low to medium heat. If it gets too hot, the cream can break. Stir often for a nice, smooth blend. To get the best texture, add the cheese slowly. This way, it melts evenly and creates that creamy goodness you love.
Chicken Cooking Tips
To ensure your chicken stays juicy, don’t skip the resting step. After cooking, let it sit for a few minutes. This helps the juices stay inside. You can marinate the chicken before cooking for more flavor. Try a mix of olive oil, lemon juice, and garlic for a tasty marinade.
Pasta Cooking Tips
For perfect al dente pasta, follow the package instructions closely. Test the pasta a minute before the time ends. It should be firm but not hard. When draining, save a cup of pasta water. This water is starchy and can help thicken your sauce.
Variations
Ingredient Substitutions
You can switch up the protein in this dish. Shrimp works well and adds a nice touch. Tofu is a great choice for a vegetarian option. Both will soak up the creamy sauce beautifully.
If you prefer a lighter sauce, try half-and-half instead of heavy cream. It still gives a rich flavor without the extra calories. You can also use Greek yogurt for a tangy twist, but be sure to add it at the end to prevent curdling.
Flavor Variations
To kick up the flavor, add sun-dried tomatoes or artichokes. These ingredients bring a burst of taste and color. You can also try herbs like fresh basil or oregano for a fragrant boost. Just sprinkle them in as you stir the sauce.
Dietary Modifications
If you need a gluten-free option, choose gluten-free penne pasta. Many brands offer delicious alternatives made from rice or lentils. You can also make this dish vegetarian by omitting the chicken and adding more veggies. Zucchini, bell peppers, or mushrooms work well.
Experimenting with these variations can make your creamy Parmesan chicken with penne even more delightful!
Storage Info
How to Store Leftovers
To keep your creamy pasta fresh, store it in a sealed container. Make sure it cools to room temperature first. Refrigerate it within two hours after cooking. This helps stop bacteria. For freezing, use airtight containers. Portion it out for easy meals later. It can last in the freezer for up to three months. When you reheat, add a splash of water or cream if it looks dry.
Shelf Life
In the fridge, Creamy Parmesan Chicken with Penne lasts about three to four days. Always check for signs of spoilage. If it smells sour or has mold, throw it away. If the color changes or it looks slimy, do not eat it.
Reheating Tips
To reheat, gently warm it on the stove over low heat. Stir it often to avoid sticking. You can also use the microwave. Heat in short bursts, stirring in between. This way, you keep the creamy texture. Avoid high heat, as it can make the sauce separate. Enjoy your meal just as much the next day!
FAQs
How can I make Creamy Parmesan Chicken with Penne ahead of time?
You can prep this dish ahead of time. First, cook the penne and chicken. Store them in separate containers in the fridge. Prepare the creamy sauce the day you plan to eat it. This way, the pasta and chicken stay fresh. Reheat everything together before serving. You can also cut the chicken into strips for quick heating. This saves time on busy nights.
Can I substitute the heavy cream with a lighter option?
Yes, you can use half-and-half or whole milk as a lighter choice. Both options reduce the fat a bit. However, the sauce will be less rich and creamy. If you want a similar texture, try adding a little cornstarch. Mix it with the milk before adding it to the sauce. This will help thicken it up.
What can I serve with Creamy Parmesan Chicken with Penne?
Great sides include fresh salads or steamed veggies. A simple green salad with lemon dressing works well. Roasted broccoli or asparagus are tasty choices, too. Garlic bread is another nice touch. It helps soak up the creamy sauce.
Is this recipe suitable for meal prep?
Yes, this recipe is perfect for meal prep! Start by portioning the creamy penne and chicken into containers. Store them in the fridge for up to four days. To reheat, warm them in the microwave or on the stove. Be sure to add a splash of water if the sauce thickens too much.
In this post, we explored how to make Creamy Parmesan Chicken with Penne. We started with the key ingredients, including chicken, pasta, and cream. I shared step-by-step instructions to guide you through cooking each part of the dish. Tips helped to elevate your cooking, while variations showed how to tailor the recipe to your taste. Finally, we discussed storage and reheating for leftovers. With this recipe, you can create a creamy, delicious meal that’s easy to customize and enjoy repeatedly. Happy cooking!


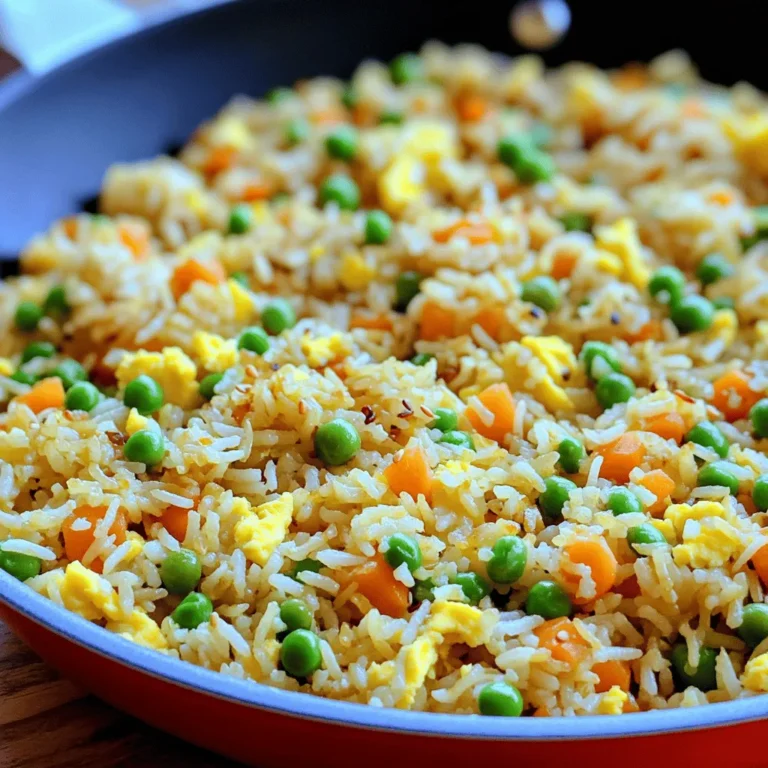
![- 1 pound boneless, skinless chicken thighs, cut into 1-inch cubes - 1/4 cup soy sauce - 1/4 cup honey - 2 tablespoons rice vinegar - 1 tablespoon sesame oil - 2 cloves garlic, finely minced - 1 teaspoon fresh ginger, grated - 1 red bell pepper, cut into 1-inch squares - 1 yellow bell pepper, cut into 1-inch squares - 1 zucchini, sliced into thick rounds The main ingredients are key to a great teriyaki dish. Chicken thighs are juicy and flavorful. The soy sauce and honey create a sweet and salty marinade. Rice vinegar adds a slight tang. Garlic and ginger bring warmth and depth to the flavor. The colorful veggies add crunch and a fresh touch. - 1 teaspoon cornstarch mixed with 1 tablespoon cold water (optional, for thickening the sauce) - Sesame seeds, for garnish - Fresh cilantro, for garnish Cornstarch helps thicken the teriyaki sauce. This makes it stick better to the chicken. Sesame seeds and cilantro are perfect for garnishing. They add a nice look and extra flavor. - Bamboo skewers (soaked in water for at least 30 minutes) - Grill or grill pan You need skewers to hold the chicken and veggies. Soaking them in water prevents burning. A grill or grill pan cooks the skewers evenly. It gives the chicken those beautiful grill marks. For the full recipe and more tips, check out the Full Recipe section. To start, we need to mix the marinade. In a medium bowl, combine the soy sauce, honey, rice vinegar, sesame oil, minced garlic, and grated ginger. Whisk these ingredients together until they blend well. This mixture is key to our teriyaki chicken skewers. Marinating is very important. It lets the chicken soak up all the nice flavors. Aim for at least 30 minutes. For the best taste, try to marinate for 1 to 2 hours. This makes a big difference in flavor. Now, it’s time to thread the chicken and veggies onto the skewers. First, take your soaked bamboo skewers and start with a piece of chicken. Then, add a square of red bell pepper, followed by a piece of yellow pepper. Next, add a thick slice of zucchini. Repeat this pattern. This colorful arrangement is not just tasty; it looks great too! Make sure the pieces fit snugly but not so tightly that they can't cook well. A nice visual appeal will impress everyone at the table. When it’s time to cook, we can grill the skewers. Preheat your grill or grill pan to medium-high heat. Place the skewers on the grill and cook them for about 10 to 12 minutes. Turn them occasionally for even cooking. If you prefer, you can also bake or broil the skewers. Just adjust the cooking time. Cook until the chicken is fully done and has lovely grill marks. For added flavor, brush the skewers with the thickened teriyaki sauce while they cook. Check the Full Recipe for more details on each step! To make a great teriyaki marinade, you need balance. Start with soy sauce for saltiness. Add honey for sweetness. Rice vinegar brings in acidity, which brightens the flavors. Garlic and ginger give depth. Ensure you mix these well. A good marinade coats the chicken evenly. For extra flavor, let the chicken sit in the marinade for longer. Aim for 1 to 2 hours for the best taste. If you want more richness, try adding a splash of orange juice. This will enhance the flavor profile. Grilling your skewers right is key. First, preheat your grill to medium-high heat. This helps get those beautiful grill marks. Place the skewers on the grill and leave them alone for a few minutes. Avoid moving them too much; let them sear. Flip them only once or twice. If you brush them with the thickened sauce, it adds a nice glaze. Keep an eye on the time; cook them for about 10-12 minutes. Common mistakes include overcrowding the grill. Give each skewer space so they cook evenly. Also, don’t skip the resting time after grilling; it helps the juices redistribute. When serving, presentation matters. Lay the skewers on a big platter. Drizzle with any leftover teriyaki sauce for extra flavor. Sprinkle sesame seeds and chopped cilantro on top. It adds color and looks inviting. For side dishes, think simple. Steamed rice or a fresh salad pairs well. You could also serve grilled veggies for a complete meal. These combinations elevate your dish and make for a delicious feast. Remember, the Full Recipe will guide you through the process! {{image_4}} You can swap chicken for other proteins like beef or tofu. Beef gives a rich, hearty taste. Tofu offers a plant-based option that absorbs flavors well. Adjust cooking times depending on what you use. Beef may need longer than chicken, while tofu cooks quicker. Always check for doneness to keep your meal safe. Feel free to include seasonal vegetables. Bell peppers, zucchini, and onions add color and crunch. Try mushrooms or cherry tomatoes for even more variety. These colorful additions not only taste great but also make your dish visually appealing. Mixing different veggies can create a vibrant plate that excites the eyes. You can use store-bought teriyaki sauce for speed. Homemade sauce allows you to control flavors better. If you want a kick, try adding chili flakes for spice. For a sweeter twist, mix in some pineapple juice. These variations help you customize the sauce to fit your taste. Check the [Full Recipe] for details on how to make your own sauce! After enjoying your teriyaki chicken skewers, you may have some leftovers. It’s best to store them right away. Place the skewers in an airtight container. This keeps them fresh and prevents odors. You can refrigerate them for up to four days. For longer storage, wrap them tightly in plastic wrap and place them in a freezer bag. You can freeze them for up to three months. Just remember to label the bag with the date. When it’s time to enjoy leftovers, reheating correctly matters. You want to keep the chicken moist. The oven works best for this. Preheat it to 350°F (175°C). Place the skewers on a baking sheet and cover them with foil. Heat for about 10-15 minutes until warm. The microwave is quicker but can dry out the chicken. If you use it, heat in short bursts of 30 seconds. Check often to avoid overcooking. Leftover teriyaki chicken skewers can last up to four days in the fridge. If frozen, they remain safe for three months. Always check for signs of spoilage before eating. If the chicken smells bad or looks off, don’t eat it. Look for a change in color or texture too. When in doubt, throw it out. Enjoying your teriyaki chicken skewers fresh is the best way to experience their flavor. For the full recipe, refer to the earlier sections. The best chicken for skewers is thighs. They stay juicy and tender when cooked. Breasts can dry out quickly. They have less fat, which makes them less forgiving. Thighs are more flavorful and can handle marinating well. Yes, you can make teriyaki chicken skewers in advance. Marinate the chicken for at least 30 minutes. For the best taste, marinate for 1 to 2 hours. You can even marinate them overnight. Cook them right before serving for the best results. You can serve teriyaki chicken skewers with many tasty sides. Rice, like jasmine or brown rice, pairs well. You can also offer stir-fried veggies for crunch. A fresh salad with sesame dressing adds a nice touch. Consider serving with grilled pineapple for a sweet twist. Explore these options to find what you love! This article covered making delicious teriyaki chicken skewers. We explored key ingredients like chicken, marinade, and vegetables. You learned how to prepare the marinade, assemble skewers, and cook on the grill. We also shared tips for flavor, grilling techniques, and serving ideas. You can mix in different proteins or vegetables and make it your own. Remember to store any leftovers properly to enjoy later. Now, get ready to impress with your new skewering skills!](https://fastmealmate.com/wp-content/uploads/2025/06/9b1dc869-68dc-4727-be9c-b0e6615ca1ac-768x768.webp)
![- Smooth natural peanut butter - Pure maple syrup or honey - Coconut oil (melted) - Rolled oats - Dark or semi-sweet chocolate chips - Unsweetened cocoa powder - Pure vanilla extract - Fine sea salt To make delicious chocolate peanut butter bars, you need these key ingredients. First, smooth natural peanut butter gives a creamy base. I love using peanut butter that has no added sugar or oils. It keeps the bars rich and healthy. Next, pure maple syrup or honey sweetens the bars. Both options work well, but maple syrup has a unique flavor. Coconut oil adds a silky texture. Make sure it’s melted for easy mixing. Rolled oats provide fiber and a chewy texture. They help hold everything together. Choose certified gluten-free oats if needed. Dark or semi-sweet chocolate chips add a sweet touch. They melt beautifully into the mixture. Unsweetened cocoa powder brings a rich chocolate flavor. I recommend high-quality cocoa for the best taste. Pure vanilla extract enhances the overall flavor, while fine sea salt balances the sweetness. When making these bars, accurate measurements are key. If you measure wrong, the texture may change. I suggest using a kitchen scale for best results. A scale gives exact amounts, which is very helpful. Use measuring cups for dry ingredients and liquid measuring cups for liquids. Make sure to level off dry ingredients for accuracy. This helps achieve the perfect consistency in your bars. You can customize these bars easily. For sweeteners, try agave syrup or brown rice syrup. Both options work well if you want to change things up. If you prefer a different nut butter, almond or cashew butter are great choices. Just remember that these may alter the taste a bit. For gluten-free options, use certified gluten-free oats. This way, everyone can enjoy these tasty treats without worry. You can find many useful substitutions to fit your needs. Check out the Full Recipe for detailed steps to create your own chocolate peanut butter bars! Start by lining an 8x8 inch baking dish with parchment paper. This helps with easy removal later. Leave some paper overhang on two sides. It makes lifting the bars out simple. Next, grab a large mixing bowl. Combine 1 cup of smooth peanut butter, 1/2 cup of pure maple syrup, and 1/4 cup of melted coconut oil. Use a whisk or spatula to mix until you see a smooth blend. Now it's time to add the dry ingredients. Toss in 1 cup of rolled oats, 1/2 cup of unsweetened cocoa powder, 1 teaspoon of pure vanilla extract, and 1/4 teaspoon of fine sea salt. Mix everything well until you get a thick batter. Now, gently fold in 1/2 cup of dark or semi-sweet chocolate chips. Make sure they spread evenly through the mix. Transfer this mixture into your lined baking dish. Use a spatula or your hands to press it down firmly. You want a compact, even layer. Once done, place the dish in the fridge. Chill it for at least 1 to 2 hours until the mixture feels firm. For the complete recipe, check the Full Recipe section. To make the best chocolate peanut butter bars, focus on texture. You want a smooth, firm bar that holds together well. Use natural peanut butter for creaminess. If your bars turn out dry or crumbly, it often means too many dry ingredients. Stick to the recipe and measure carefully. Mixing well helps combine all the ingredients and avoids clumps. You can boost flavor with simple add-ins. A splash of pure vanilla extract adds depth. A sprinkle of fine sea salt can enhance sweetness too. Consider adding a bit of cinnamon for warmth or even a few tablespoons of crushed nuts for crunch. Each small change can make your bars even better. Presentation matters when serving these bars. Cut them into neat squares or rectangles. Arrange them on a colorful plate for a pop. Drizzling melted chocolate over the top makes them look fancy. You can also sprinkle some crushed peanuts or a pinch of sea salt on top for a rustic touch. These small efforts make your treat feel special. For the full recipe, check out the [Full Recipe]. {{image_4}} If you want to make these bars healthier, you have options. You can use less sweetener. Try using only 1/4 cup of pure maple syrup. You can also replace coconut oil with unsweetened applesauce. This swap cuts calories and adds moisture. Another great idea is to use a sugar substitute. Look for options like stevia or monk fruit. These can help you cut sugar without losing sweetness. Want to switch up the flavor? Add fruits like mashed bananas or shredded coconut. Bananas give a creamy texture, while coconut adds a tropical twist. You can even mix in some almond extract for a nutty flavor boost. Experiment with different nut butters too! Almond butter or cashew butter can change the taste. Each nut butter brings a unique flavor. It’s fun to find your favorite blend. Toppings can make your bars even better. Try sprinkling crushed nuts on top. Walnuts or pecans add a nice crunch. You can also use coconut flakes for a chewy texture. For a sweet finish, drizzle melted chocolate over the top. You can use dark, milk, or even white chocolate. This extra layer makes the bars look fancy and taste amazing. For the full recipe, check out the detailed instructions above. To keep your chocolate peanut butter bars fresh, use an airtight container. This helps prevent moisture and keeps them from drying out. You can store them in the refrigerator or freezer, depending on how long you want to keep them. If you plan to eat them within a week, the fridge is perfect. For longer storage, the freezer is your best option. In the fridge, these bars can last about one week. If you notice any changes in color or smell, it's best to throw them away. Signs of spoilage include a dry texture or a strange odor. Always inspect your bars before enjoying them. You can freeze the bars either one by one or as a whole batch. If you freeze them individually, wrap each bar in plastic wrap or foil. This way, you can grab one whenever you want a treat. If you prefer to freeze the whole batch, just place the container in the freezer. When you're ready to eat, let them thaw in the fridge for a few hours. For the full recipe, check the earlier section. Yes, you can use crunchy peanut butter! It adds a fun texture. The bars will have a nice bite from the peanut pieces. Keep in mind, the flavor may be more intense with crunchy peanut butter. If you enjoy that nutty crunch, go for it! To check if the bars are set, gently press the top with your finger. If it feels firm and springs back, they are ready. You can also look for a slight sheen on the surface. If it’s still soft, give it more time in the fridge. Patience makes perfect bars! For clean cuts, use a sharp knife. Run the knife under hot water, then dry it off. This helps the knife glide through the bars easily. Cut them into squares or rectangles, depending on your preference. If they crumble, try chilling them longer before cutting. Absolutely! To make these bars vegan, use maple syrup instead of honey. Ensure your chocolate chips are dairy-free. Check that your peanut butter has no added ingredients. With these swaps, you can enjoy a tasty vegan treat! In summary, this guide covered how to make delicious no-bake bars. You learned about the key ingredients, measurement tips, and how to mix everything smoothly. We shared storage techniques to keep your bars fresh and variations to suit your taste. Remember, small changes can lead to big flavor. Experiment with different add-ins and toppings to make these bars your own. By following these tips, you’ll enjoy tasty treats that fit your needs. Enjoy making your no-bake bars!](https://fastmealmate.com/wp-content/uploads/2025/06/11f9b23d-ca49-49dd-b442-fa08a6216cde-768x768.webp)